


Of of my most frequently asked questions in blog land (and in real life!) is “How Do I Paint Furniture So That It Doesn’t Look Like Crap?” Literally. People have asked me that exact question, many many many times. Figured it was time for a lesson of sorts.
One of the most popular items I get asked about is my kitchen table (which now has the leaf in it and no longer houses just a corn on the cob in the bowl):

Over the years, I have painted many items of furniture and there is definitely a learning curve. A huge learning curve. Annoyingly long learning curves. Nothing worse than spending 2 weeks painting a tiny little desk, only to realize that you forgot primer and the whole project was a waste! (not that I have been there or anything, hmmm).
So, I will now attempt to explain to everyone how I like to paint my furniture. Sure, some people may do it differently, but I have found my method to be extremely successful and it always results in professional looking results.
HOW TO SUCCESSFULLY PAINT FURNITURE
* To begin with, you need to determine what type of furniture you are painting. Solid wood is obviously the best choice and will result in the nicest, most long-lasting finish. If you wish to paint laminate or other manufactured surfaces, you will follow the same procedure, but don’t expect it to become a family heirloom. It will eventually chip and wear down, but painting it is still a great money saver in the meantime (until you can afford family heirloom pieces!)
Step 1: Thoroughly clean all surfaces using a damp rag and a vacuum (if needed). Don’t want any random spider webs in your paint! Finish it off, by wiping it down with a dry rag.
Step 2: If your furniture piece is bare wood, skip this step. However, most furniture that needs to be painted will either have a varnish, stain or a previous paint of coat on it. This is when you need to sand it down to “rough it up”. Most furniture will only need a really light sanding, you don’t even need to sand every inch of it, just enough to get the furniture ready for new paint. You don’t need to remove all the varnish or previous paint, but you need to scratch up the surface. Make sense? Don’t kill yourself with the sanding, trust me!
I personally prefer to use my electric palm sander: (see the cup of coffee next to it? That is how I roll)

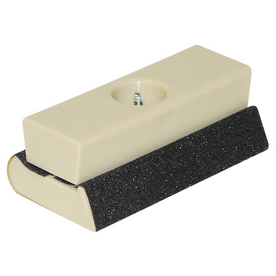
but obviously, not everyone has an electric sander just hanging around! So, another good alternative is a sanding block:
ANOTHER option, if you really really really hate to sand, is a Paint Deglosser:
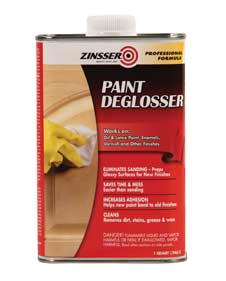
A paint deglosser is great, but really toxic (smelly!) and isn’t necessary for most projects. However, it is definitely a great alternative, especially for pieces of furniture that have little grooves you can’t get into (intricate details!)
After sanding, rub down the entire piece of furniture with a dry cloth (I prefer microfiber, but a dish towel or paper towels would work, as well). This is simply to remove any of the dust from sanding.
Step 3: Let’s start painting! I absolutely SWEAR by using an OIL BASED PRIMER. Make sure it is a primer and not a regular oil based interior paint. This is what has allowed my furniture to stand the test of time. DO NOT SKIP THIS STEP! If you skip this step, you are wasting your time (in my little opinion, of course!) In general, I use KILZ Original Oil Based Primer, however, I heard they recently came out with a low odor version… I need to check that out because oil based paints stink. Make sure you do this project outdoors or in a well ventilated area, like a garage with the door open!
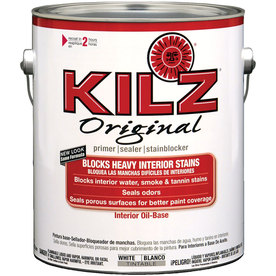
MAJOR TIP ALERT! IF YOU ARE PLANNING TO PAINT YOUR FURNITURE A DARK COLOR, LIKE BLACK OR RED, GET YOUR PRIMER TINTED! TRUST ME, IT WILL SAVE YOU A TON OF TIME IN THE END!
Use a really nice brush for this step, preferably one intended for oil based paints. It will make all the difference in the end result.
For the primer, I like to do 2 REALLY light coats of paint (waiting a few hours between coats). When I mean light, I mean light! Don’t glob it on and don’t keep going over the area again and again. Primer never looks nice, so don’t expect a nice finish. Don’t get discouraged.
Step 4: Wait a day. Let your furniture fully dry and cure. If you area has high humidity, I would even wait 48 hours, but I am always too impatient for that! Now, time to lightly sand your primed surface. “SAND off what I JUST did? Are you crazy?” Yes, this is when you need to LIGHTLY sand (using a fine grit sandpaper, either electric sander or regular sandpaper…NO deglosser!) the entire surface that you primed. Reason? If you skip this step, you can end up with unsightly lines from your paint strokes and it will look awkward. Trust me, it is a very easy step and will help with your finished project. Just do it and don’t ask questions, lol!
Finish off this step with another rub down from a dry cloth (the furniture, not you. Don’t get all dirty on me now)
Step 5: Time for the fun! Time to PAINT! Here is where I like to use either a satin or a semi gloss Interior LATEX paint (tinted to whatever color you desire!)
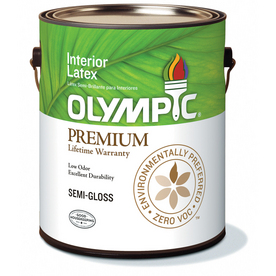
(in no way am I endorsing this brand of paint, but they were the last brand I used and I actually really liked it. I generally go for Sherwin Williams or Benjamin Moore, though. However, Olympic is much cheaper and it did a great job!)
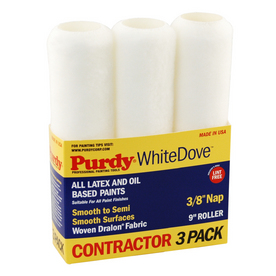
Buy a nice paint brush meant for latex paint and a few foam rollers (depending on your job). If I have a really large piece, like my kitchen table, I do like to have a few rollers on hand to speed things up a little! Generally, you want to avoid rollers because they tend to leave bubbles and marks. A paint brush is always best, but if you do use a roller, quickly go over the wet paint with a dry brush to avoid the bubbles:
Do 2-3 LIGHT LIGHT LIGHT coats of the latex paint. Again, I am not joking when I say light. I know that you might want to just get the project finished and be done with it, but several light coats are MUCH better than 1 or 2 globby, icky coats of paint. Let the paint dry at least 4 hours in between coats, but it is always better to let it sit overnight.
ANOTHER TIP ALERT! I FIND THAT IT DOES WONDERS WHEN I DO A QUICK, LIGHT SANDING IN BETWEEN COATS, JUST TO GET RID OF ANY IMPERFECTIONS AND PAINT STROKES. WAIT FOR THE PAINT TO DRY AND GIVE A VERY LIGHT SANDING WITH SANDPAPER (NO ELECTRIC SANDERS AT THIS POINT!)
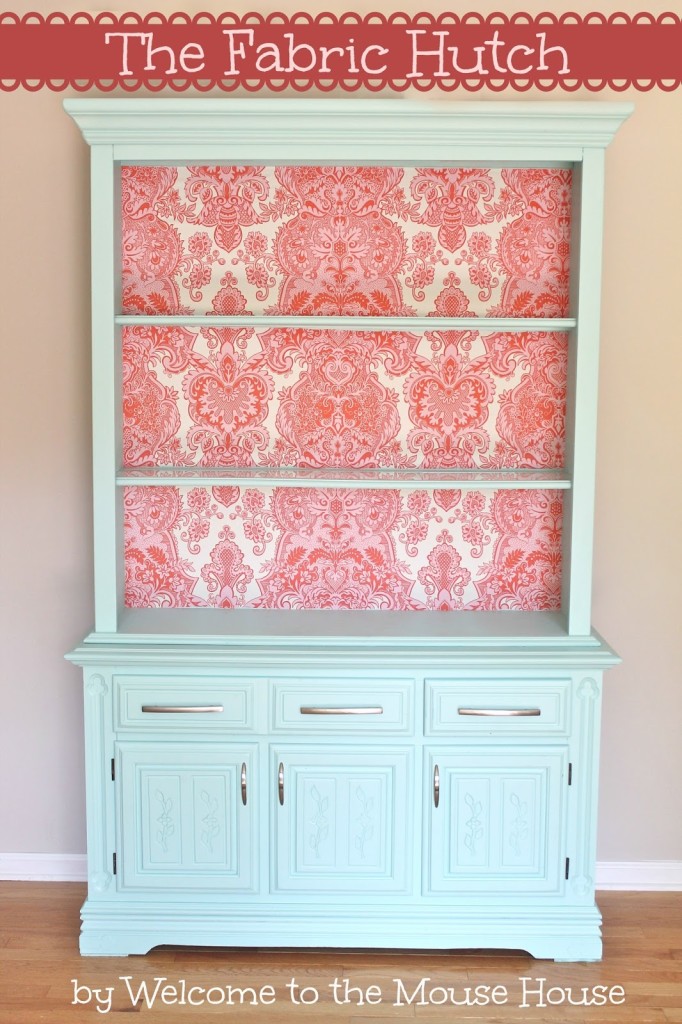
Step 6: Are you still with me? I hope so! You are almost there!!! I promise! So, after 2-3 light coats of paint (the darker the color, the more coats it will take…this is why you need a tinted primer!) now it is time for the polyurethane! Okay, here is where I must confess. I don’t always do this step. For instance, I recently painted this corner hutch and I totally skipped this step!
Why didn’t I poly this piece? Well, because my kids aren’t allowed to touch it, it barely gets used, it won’t have wear and tear, etc. However, places like kitchen tables or kitchen chairs or kitchen cupboards or an entertainment unit, mostly everything? POLYURETHANE IT PLEASE! After all your hard work, you don’t want it to chip or get damaged! It is the last and final step, just do it. Peer pressure.
Polyurethane comes in many forms, but most importantly, you want to find one that doesn’t yellow. Here is my recommendation:
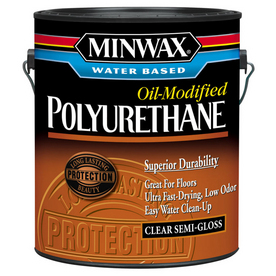
Polyurethanes come in a wide assortment… semi gloss, satin, high gloss, wipe on, sprays, etc. I prefer this exact brand and type, but I have heard great things about the wipe ons. However, I don’t know if I would trust that for a kitchen table. I used the above for our kitchen table and even after all the forks and plates, and smashes we have had, there have been no problems!
Either way, choose a water based/latex based poly and get to work! Same drill as before. 1-3 light light coats. No need to sand in between, unless you see streaks. If that is the case, wait for it to dry and give it a quick sanding before doing the next coat.
Use semi gloss or high gloss poly if you want a really shiny finish (like my kitchen table). Otherwise, a satin finish might be best for things like an entertainment unit or a coffee table. There are certain items you don’t want glossy, so keep that in mind!
Step 7: Stand back and be proud! You did it!
All of this information probably seems long-winded and like too much to handle, but trust me, it really isn’t bad at all! I do most of my furniture pieces after the kids are in bed, for maybe an hour at a time. I place it in the garage or basement (or whatever room) and I work on it when I can. This is not going to be a one day project, but it will be something that you can look back on and say “HEY, I did that!” You will be so happy you did it and you can save so much money in the process.
If you end up using my method, I would LOVE to see pictures! Contact me at www.facebook.com/mousehousecreations

Hayley
Hayley Crouse is a wife, mother and multifaceted designer. Her love of sewing, crafting, cooking and interior design infuses her daily life and naturally spills over into her online presence. She pushes the envelope of her creativity and hopes that others will be inspired to do the same. She currently authors the Welcome to the Mouse House Blog, is the pattern designer behind Mouse House Creations and is a collaborative designer with Willow & Co. Patterns.
Latest posts by Hayley (see all)
- Music Room: Home Tour - January 11, 2019
- The Ace Cardigan - July 30, 2018
- Susie Halter Top and Shorts: Project Run and Play - July 18, 2018
This is a perfect tutorial with step-by-step directions for someone like me with NO experience painting furniture. I love the examples of what you use for us beginners. Thanks Hayley! ~Elise
Awesome! These tips will come in handy when I finally get around to finishing my craft room! Tahnks for sharing! i also wanted to let you know we tried your sugar cookies and loved them. i blogged about them today and linked back to your post. Thanks Again!
This looks great. I, unfortunately, have two pieces of furniture that are covered in that yucky wood veneer. I think that’s what you call it. At this point, I am determined to paint them or throw them out of the window. Unfortunately, this would probably hurt a lot of people because one piece is a large armoire. LOL! What technique works best for painting wood veneer, that gross wood product covered essentially in a sticker that looks like wood? Can you do all of the same painting and sanding techniques?
Wonderfully helpful. Thank you for sharing this!
Sara
Wonderfully helpful. Thank you for sharing this!
Sara
What about if you want your painted piece to have a shiny or lacquer-y look to it? Do you use gloss or semi-gloss? Oil or water based paint? Thanks for the very helpful tips!
What about if you want your painted piece to have a shiny or lacquer-y look to it? Do you use gloss or semi-gloss? Oil or water based paint? Thanks for the very helpful tips!
Instead of sanding have you ever used the bonding primers? I had a friend that used them and loved it, but I am going to be painting a desk for my office and don’t want to do something that will mess it ip.
Thanks!!
SGP, I didn’t see an email to respond to you directly, so hopefully you check back here!
YES! I have recently discovered bonding primers and I LOVE them! Last time, I used Bin 1-2-3 bonder and it worked wonderfully! I don’t think I will ever do it a different way again!
The method I have here works amazingly wonderfully, just more time consuming. Good luck!
What color paint did you use for your table? I am going to paint a diningroom set from 1965 that is an awful yellowish color, but I want it to look like wood still. I think the color that you used for your table would be great for it.
Jeanine, I will get that paint info to you tomorrow!!!
What about if you want your painted piece to have a shiny or lacquer-y look to it? Do you use gloss or semi-gloss? Oil or water based paint? Thanks for the very helpful tips!
This tutorial is perfect.It help the people those have no experience like me.Thank you very much. Hospitality furniture
I like your decorated rooms. Keep it up
This post is really awesome and helpful for all kind of furniture lover .I think every people will get help who finding furniture info through online by this kind of blog.I have found also same source at decorise.com who offering high quality wall art , tosh furniture , home accents , accent pieces, and one of a kind items at affordable prices.But you posted really good post so please keep it up .
This blog post is really great; the standard stuff of the post is genuinely amazing.
york furniture store
Wonderful, just what a blog it is! This blog has provided the helpful data to us continue the good work.
bubblegum casting
I know this is quality based blogs along with other
stuff.
bubblegum
casting reviews
Superb way of explaining, and great blog to get wonderful information. The Funky Chair
Can I apply the POLYURATHANE with a sponge roller? That is how I painted my table. I am very pleased with how it turned out. I do not want to have drag marks from the brush.
Yes, Nancy, you sure can! 🙂
I have never done this before…and redoing a hutch. We got the bottom painted and have applied the poly…then sanded….then we applied another coat. But you can see the sanding marks from the sanding…looks yukking. What to do???
Hi Karen, sorry you’re having a difficult time. Without being there to see it, my best guess would be to try light sanding paper to smooth it out. Hope you’re pleased with the final outcome! 🙂
Use a 220 grit sandpaper. Rub lightly. Then reapply poly with a cloth. Light coats. Maybe two or three.
I am wanting to paint our dining room table. There are chips in the varnish and sanding isn’t smoothing it out. Will a primer help smooth this out, or will I have to strip the entire top to get all the old varnish and stain off so it’s smooth?
Sounds like you will have to sand down, at least the spots that have paint chips missing. Once smooth, you should be good to go!
I am refinishing a laminated library table. Unfortunately I sanded through the top veneer layer now I must paint part of the top. My local paint store told me I should wait 2-3 months before I poly over the paint so it can cure out. Do you think that is really necessary? Should I ask for a specific type of paint?
No, it is not necessary to wait months. You should be fine to do it the very next day as long as everything is dry!
Hello Hayley, I want to paint my bathroom vanity. Do you think this kind of paint will be good for the bathroom? let me know! you have inspired me to paint the trim in my whole house! I am not nearly done, but at least the kitchen and two bedrooms are done! Thank you!
Yes, that would totally work! 🙂
I am going to be painting a stained rattan tv armoire. I can’t use regular sanding methods because the piece is very texture-y. Do you have any tips for painting that kind of piece?
I would rent or buy a spray gun!
How long do you wait between the last coat of paint and applying the poly?
Thanks,
P.
I recommend 48 hours.
I just covered an entire coffee table with 3 coats of black chalk paint and wax (first furniture painting project EVER) and I cannot deal with the results 😉 my little ones have covered in in fingerprints and it’s just too matte of a finish. Any other recommendations for me if I want to try your method or should I just follow your steps?
Thank you in advance!!!!
Hi I have wood furniture that was a light blue – I sanded down and than painted a brown which did not come out right. I am now painting it red. I have re-sanded (not all the way – there is brown and blue paint left.
Do i need to sand all the way or can I go ahead and paint the red on?
Do I absolutely need to prime first?
I have painted a vintage dresser for my teen granddaughter. I used two coats of a bonding primer . I did sand first and between coats. Then I applied two coats of sherwin Williams water based enamel paint. It loooks good. My question is do I really need to apply polyurethane on top of all those coats??? If so how and when to apply.??
I would still do it just in case…. I also think it depends on how much use the top will get? I have certainly gone without the poly, but wished I would have!
What do you mean awaiting moderation
Hi Deborah. Comments are reviewed first before posting.
I have primed and painted over bare wood for the interior of a china cabinet, but am now ready to apply polyurethane, but your outstanding article didn’t mention how long you should wait between painting and poly-ing …
Thanks, Ron
Hi Ron. I’d recommend 48 Hours.
I didn’t see a response to the Great White Whale post regarding painting a a veneered surface. I am planning on painting my dining room table a charcoal grey. It has a veneer top. Any tips would be welcome.
yes you can use this method on veneer!
Also, do you tint the oil based primer if gold is your underlying color?
I would think that would make it much easier!
Thanks for sharing your experiences. I’m doing some research on painting. I have an old coffee table and I want to paint it. Now I know how to do that.
Hi,
Great info, thanks so much. My question is I have painted a dresser in pearl paint. Do I sand before I apply the Polyurethane?
Thank you in advance.
I thought your site users might appreciate an example of a small deviation from your method. Your painting process is definitely a good one. It reflects a lot of what I do with one major difference. Whether I’m priming or painting I don’t do 1-3 light coats. On narrower pieces of bare wood I do one coat latex primer, brushing on carefully or on larger spaces I roll on with a foam roller. Then I hand sand with 220 grit followed by 400 grit to achieve a nice smooth buttery feel. Then I brush on (or roll on on larger spaces) my latex finish coat, e.g. semi-gloss, and load up the brush well when I do so. I spread the paint with a very light touch–avoiding brush marks as much as possible–and wait overnight for it to dry. With this first coat you I’m usually able to achieve an extremely smooth finish that covers well. If I’m not satisfied I’ll hand sand coat #1 with 400 grit and re-coat. The key is good sanding, light-touch brushing or rolling, and using a top-grade high quality paint, like Benjamin Moore, that settles well as it dries.
Thanks for the blog!! How long to let a kitchen table cure before using it, once the last coat of poly is applied? (I read somewhere 3-4 weeks?)
Thanks for this detailed guide! One question: I’m about to paint our kitchen table, and asked the guy in Sherwin Williams what kind of paint to use. He suggested their all surface enamel, and told me that if I use that, there is no need to use a finishing or sealing product as well because the enamel paint is so tough. In your experience, is this advice accurate?
i’m painting a cabinet and my sanding is showing through the paint, will a self-leveling poly “ease” them out, or do i need to sand the paint off?
thanks for your tips!