


Here is a super easy and fun way to dress up any room with some wooden art work!
Last month, I created the wooden artwork for my son’s bedroom makeover. He wanted a “number themed” bedroom, but I also wanted to make sure it was sophisticated. At the last minute, I came up with an idea to display a variety of numbers above his bed!

I love that you can see it right when you walk in.


Supplies:
*lots of furring strips (can be found at any hardware store)
*sheet of plywood cut to the size you want
*liquid nails
*wood stain
*rag
*saw
*sandpaper
*nails
*heavy duty screws
*various sizes of numbers
(I purchased some of them at the hardware store and some of them at the craft store)
*spray paint for numbers
Cut your plywood to the size you desire.
This will be the back of your artwork.
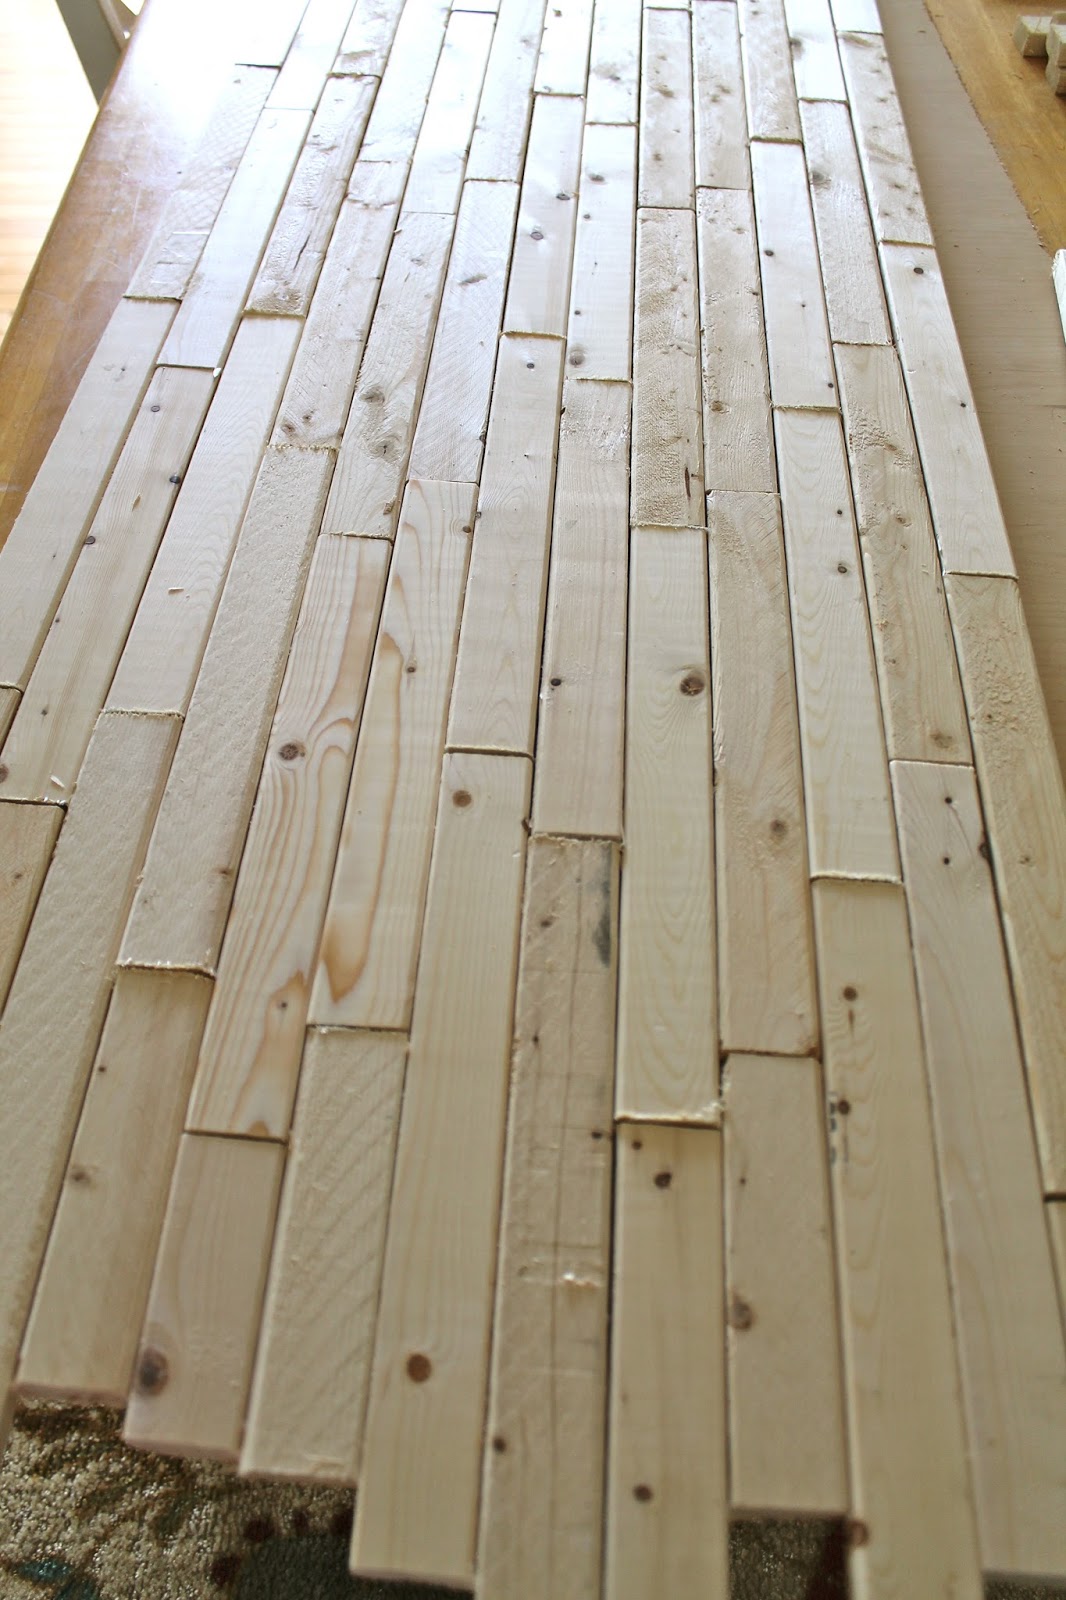
Cut your furring strips into various lengths. I cut them into various lengths for interest. Some were about 12 inches, some 6 inches, and a few were odd sizes like 4 inches, 8 inches, etc.

Working in sections, apply a good amount of Liquid Nails to your plywood.

Stick down your furring strips. As you can see in my photo below, I staggered them… simply for visual interest. I liked the look of the random placement. I also staggered and had the ends overlap the plywood.
This is kind of a boring process, so I watched some trashy reality tv to keep me perky.

Once you have them all laid out, nail or staple gun your pieces to the plywood back. Make sure your nails/staples are long enough to secure them, but not too long or it will poke through the back.

Give your surface a good sanding to get rid of any majorly rough areas. Wipe clean with a rag.
Now, grab your stain and cover the entire piece, including the sides.

Once your entire piece is covered in stain, go back and wipe with a rag to remove some of the stain.

Now, lay out the numbers in whatever fashion you want and attach them with screws.
For some further visual interest, I placed a reflective “8” onto a small canvas. You can do whatever you want!

Screw to the wall, making sure you either anchor it or drill right into the studs. This thing is heavy and we don’t need any accidents! We used deck screws and anchors.

Hayley
Hayley Crouse is a wife, mother and multifaceted designer. Her love of sewing, crafting, cooking and interior design infuses her daily life and naturally spills over into her online presence. She pushes the envelope of her creativity and hopes that others will be inspired to do the same. She currently authors the Welcome to the Mouse House Blog, is the pattern designer behind Mouse House Creations and is a collaborative designer with Willow & Co. Patterns.
Latest posts by Hayley (see all)
- Music Room: Home Tour - January 11, 2019
- The Ace Cardigan - July 30, 2018
- Susie Halter Top and Shorts: Project Run and Play - July 18, 2018
This is so fun Hayley& I cannot imagine what one would have to pay for such an awesome piece!
Mae
This is just so unique and I LOVE the different numbers! Pinned!
Love this… I have been looking for a way to add more depth to these picture frames I have above my couch and I think this is the perfect solution. Thanks for the tutorial!
Thanks for the inspiration! Here’s my version: http://seeshellspace.blogspot.com/2014/10/a-little-custom-numerology.html
Hugs!!