


This was already posted on Frugal Girls, but I have gotten several requests from my readers to repost it here so that you can easily access the templates, no problem!
Welcome back to my Felt Board Tutorial Series! Previously, we have discussed How to Make the Felt Board and I have also given you a downloadable template for Making Felt People and Clothing .
Now, let’s move on to some more shapes dealing with the Weather. These would not only be great just for home use, but also for teachers to use at school or even for parents to use in their homeschooling classrooms!

Let’s begin!
Download and Print your Weather Templates HERE AND HERE ( there are two pages to download and print for the weather templates)
Same as with the Felt People, gather your supplies:


At this point, you can either use your markers to trace onto the felt or you can just cut, while holding the pattern piece:

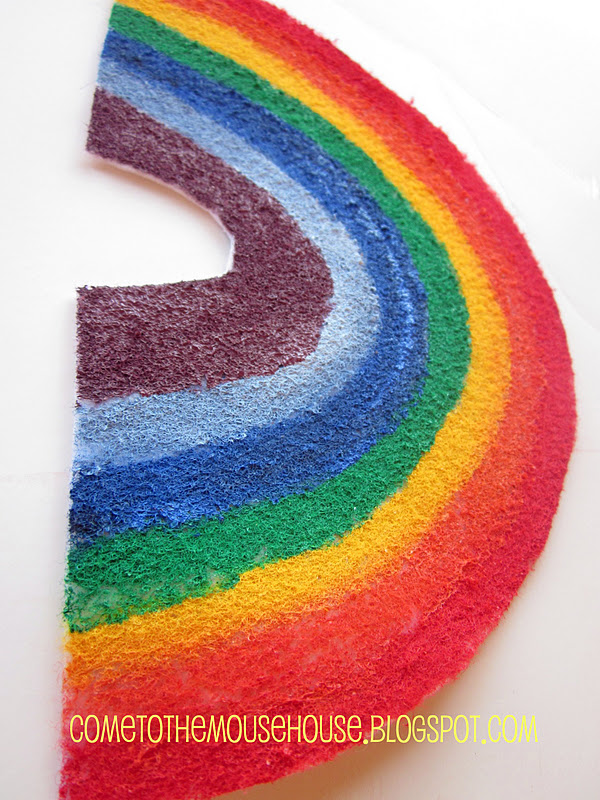
Here is what the rainbow will look like after being cut out:

Now for the fun part… Painting! You do NOT need to be an artist for this, trust me! Have fun with it and remember that it is a toy for children and they won’t care if there are imperfections…. just enjoy the process!
Oh, and think back to grade school when we learned the colors of the rainbow: ROYGBIV (red, orange, yellow, green, blue, indigo, violet)

Let the fabric paint dry for at least 4 hours:
Continue on with the same method for all of your shapes. Trace, cut, embellish! You can either embellish with paint like I did with the cloud….


OR you can embellish with a colored Sharpie marker like I did with the sun!


Hayley
Latest posts by Hayley (see all)
- Music Room: Home Tour - January 11, 2019
- The Ace Cardigan - July 30, 2018
- Susie Halter Top and Shorts: Project Run and Play - July 18, 2018
What a great idea! Pinning this for the future. 😉 Here from Skip to My Lou linky party!
This is great! I love using felt boards!
I’d love for you to link up and share: http://tutusandteaparties.blogspot.com/2011/12/pinteresting-link-party-week-twenty.html
THank you!
Love the idea! What do you ‘stick’ the pieces to the board with?
Love this idea… Going to use it for my 2 year olds weather wall (Pinned it for this weekends project)
Love ur tutorial but thing I wanna ask is that how do u stop it from falling off as in if the kid is playin with felt toys on the felt board which is standing upwards wont the toys fall off how do u stop it from falling