Hi there! It looks like this if your first time visiting. I would LURVE for you to sign up for my newsletter to get exclusive discounts and updates. And while you're at it, why not follow me on Bloglovin'?
As previously promised, I will be showing you how to make a felt board and offering lots of fun shapes for you to make and play around with!
However, we need to make the felt board first, right?
Now, this is something you can make as large or as small as you want/need. While deciding on my own, I thought of several cute ideas ranging from small to large: small paint canvas wrapped in felt propped up on a plate stand or even an entire wall covered with felt! This totally depends on the space you are working with and the portability you want! Let your imagination run wild 🙂
Because I wanted this to be a “free or at minimal cost” project, I decided to hunt through my collection of old frames in the basement, where I stumbled upon this giant thing. Even though I wasn’t loving the picture inside, it had a great frame in a color I wanted and I knew it would be the perfect size for the playroom (which we are still working on, by the way! Pictures to come soon, I promise!)
I used the end of a spoon to lift up al the little metal bits. Don’t want to ruin my “manicure”. (haha, haven’t had a manicure in about 7 years…. I think it is about time!)
Lift out the wood backing (which you will keep and use for this project!!!)
and get rid of the glass (or plexi in my case!) *I always hang onto the glass or plexi for future projects! Recycle, yo!*
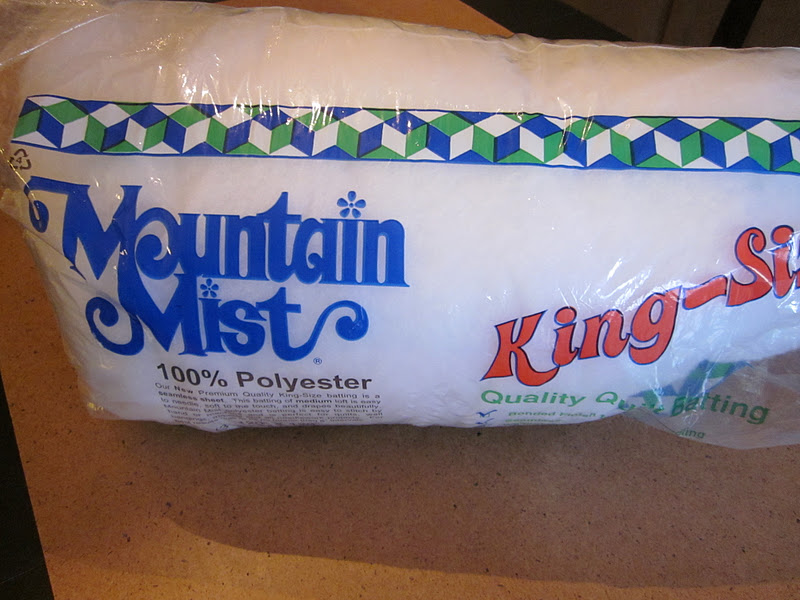
Grab some quilt batting. I am not a quilter, but I always have quilt batting lying around. Not exactly sure why I do, but I do! However, it does come in handy. I used it for my ottoman tutorial recently.
Either way, this step is not a necessity. If you don’t have quilt batting, just skip this step! Your felt board will just be less, puffy. Maybe you want it that way? I like mine a tad puffy 🙂
Oh, and grab your glue gun. And for the LOVE OF GOD…. will someone please just send me a new glue gun already? This thing is pathetic. With all the glue gun projects I do, you would think I would have splurged by now. Good lord this is embarassing.
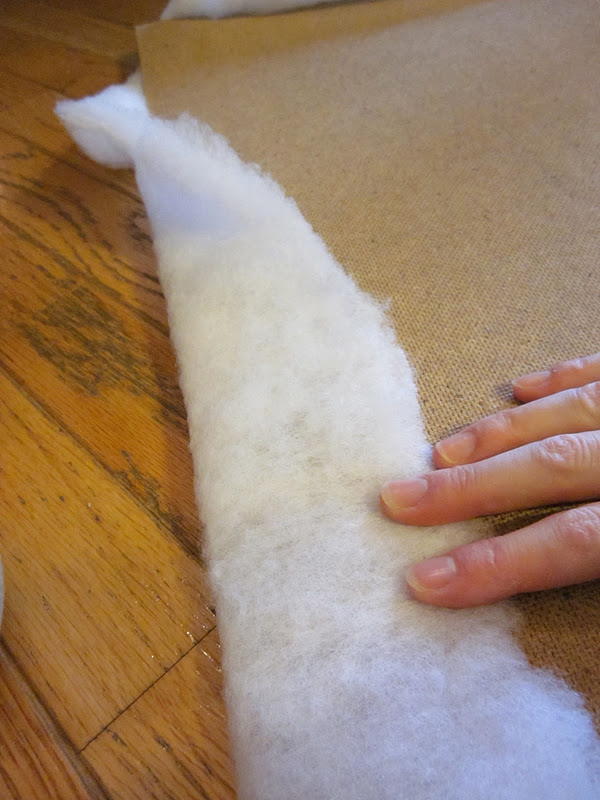
Moving on, lay the batting on top of the cardboard backing that you removed from the frame. Cut it to size, leaving about 1-2 inches on the sides.
Now, start the fun part! Get that glue gun hot and ready! Glue in 5-7 inch increments and attach the batting as you go. Make sure to pull a little so that the batting becomes taut.
You can DO IT! 🙂
Now, you are left with this. A batting-covered board.
Don’t stop to admire your work! You aren’t done yet, you lazy thing!
Now, grab the felt you wish to cover the board with. I hemmed and hawed at this. Like literally. I hemmed and I hawed. No lie! I have multiple yards of felt in my studio. I couldn’t decide. Do I go with white? Do I go with a sky blue? Do I do a mix of of green and purple? I brought some of it upstairs to get a better look.
You know how I made my final decision?
Yes, this dog. She was laying on a bunch of my felt and I couldn’t get her up. So gross.
(isn’t that picture disgustingly wonderful? It was taken YEARS ago and we still get a kick out of it. And NO, she has never been allowed to sit like that on any of our chairs, EVER AGAIN, lol!)
Keep in mind that she is NEVER allowed near my fabrics or my supplies so to have her near my “stuff” was like Heaven to her. Anyway, long-winded response was I basically decided on this blue-green felt. Hey, you can choose whatever you want!
Start cutting and gluing your felt just like you did with the batting, making sure you pull it taut the entire time.
Keep going around until you end up with a back like this:
Flip it around and make sure there are no creases. Admire your work.
Pop it carefully back into the frame. If you used batting, it will be a tight squeeze, but it should fit in. Since there is no glass, you can easily bend a stretch the frame to get your newly matted felt board in!
Stay tuned for some fun cut outs and shapes that I have for you to download!
Hayley Crouse is a wife, mother and multifaceted designer. Her love of sewing, crafting, cooking and interior design infuses her daily life and naturally spills over into her online presence. She pushes the envelope of her creativity and hopes that others will be inspired to do the same. She currently authors the Welcome to the Mouse House Blog, is the pattern designer behind Mouse House Creations and is a collaborative designer with Willow & Co. Patterns.
We have owned Four pugs since we have been married, and they just make us giggle all the time!
Love the felt frame! I am sick because my MIL put together felt board books for the boys YEARS ago and I was tired of moving them. Now I could use one for Baby Button!
I love this! I’m looking for something to hang in a big ol’ white space in Lamb’s nursery, and this would be perfect! I want to be able to take it off the wall and put it on the floor for play… will this be sturdy enough for that? Or will I need to finish the back a different way?
I love the picture of your pug. I had a pug for 15 years and he did some amazingly funny things. But I love that picture. LOL. Harley would go outside, sit in the middle of the yard, and turn his head and look at the clouds and bark at them. We said his American Indian name was “Laugh at Clouds.” He loved tv, but would always growl at the bad guys. Couldn’t watch a dog show, he’d go crazy. Thanks for sharing.
Hayley, I just want to say how much I enjoyed your tutorial. I found it through a Google search for “how to make felt board,” and I wasn’t expecting to be so entertained as I read about that topic! Your sense of humor is so cute!
I waited a very l–o–n–g time to be a grandmother, and I’m loving time my two-year old grandson even more than I imagined. Thanks for the great tutorial. I’ll have this made by the time I get to keep him again on Monday!


OMGawsh that dog is hilarious! I would hang that picture in some obscure location to catch people by surprise. Hahahaha
Nice tutorial too! I’ll have to look out for a big ol’ frame to do the same.
We swear that our girl pug is a cat.
We have owned Four pugs since we have been married, and they just make us giggle all the time!
Love the felt frame! I am sick because my MIL put together felt board books for the boys YEARS ago and I was tired of moving them. Now I could use one for Baby Button!
Rebecca and Heidi, the dog kills me too! She is so ugly…only a mother can love her, haha.
Heidi, I didn’t realize you had a pug too!
I love this! I’m looking for something to hang in a big ol’ white space in Lamb’s nursery, and this would be perfect! I want to be able to take it off the wall and put it on the floor for play… will this be sturdy enough for that? Or will I need to finish the back a different way?
I love the picture of your pug. I had a pug for 15 years and he did some amazingly funny things. But I love that picture. LOL. Harley would go outside, sit in the middle of the yard, and turn his head and look at the clouds and bark at them. We said his American Indian name was “Laugh at Clouds.” He loved tv, but would always growl at the bad guys. Couldn’t watch a dog show, he’d go crazy. Thanks for sharing.
Hayley, I just want to say how much I enjoyed your tutorial. I found it through a Google search for “how to make felt board,” and I wasn’t expecting to be so entertained as I read about that topic! Your sense of humor is so cute!
I waited a very l–o–n–g time to be a grandmother, and I’m loving time my two-year old grandson even more than I imagined. Thanks for the great tutorial. I’ll have this made by the time I get to keep him again on Monday!
Take care.
Karen
oh this made me SOOO happy to read Karen!