


Time for another remodel reveal! Check out the Home Tour page for other rooms in our house.
Back in April, I had posted our plans for the Master Bathroom remodel HERE. Be sure to check it out to see before pictures. The previous bathroom was in desperate need of a gut job, and after saving for years, we FINALLY could afford to do it. However, with all projects around here, nothing was as easy as planned 😉 So, here we are, almost a year later and I can actually say the room is complete. We also redid the master bedroom, but I will save that post for another day.
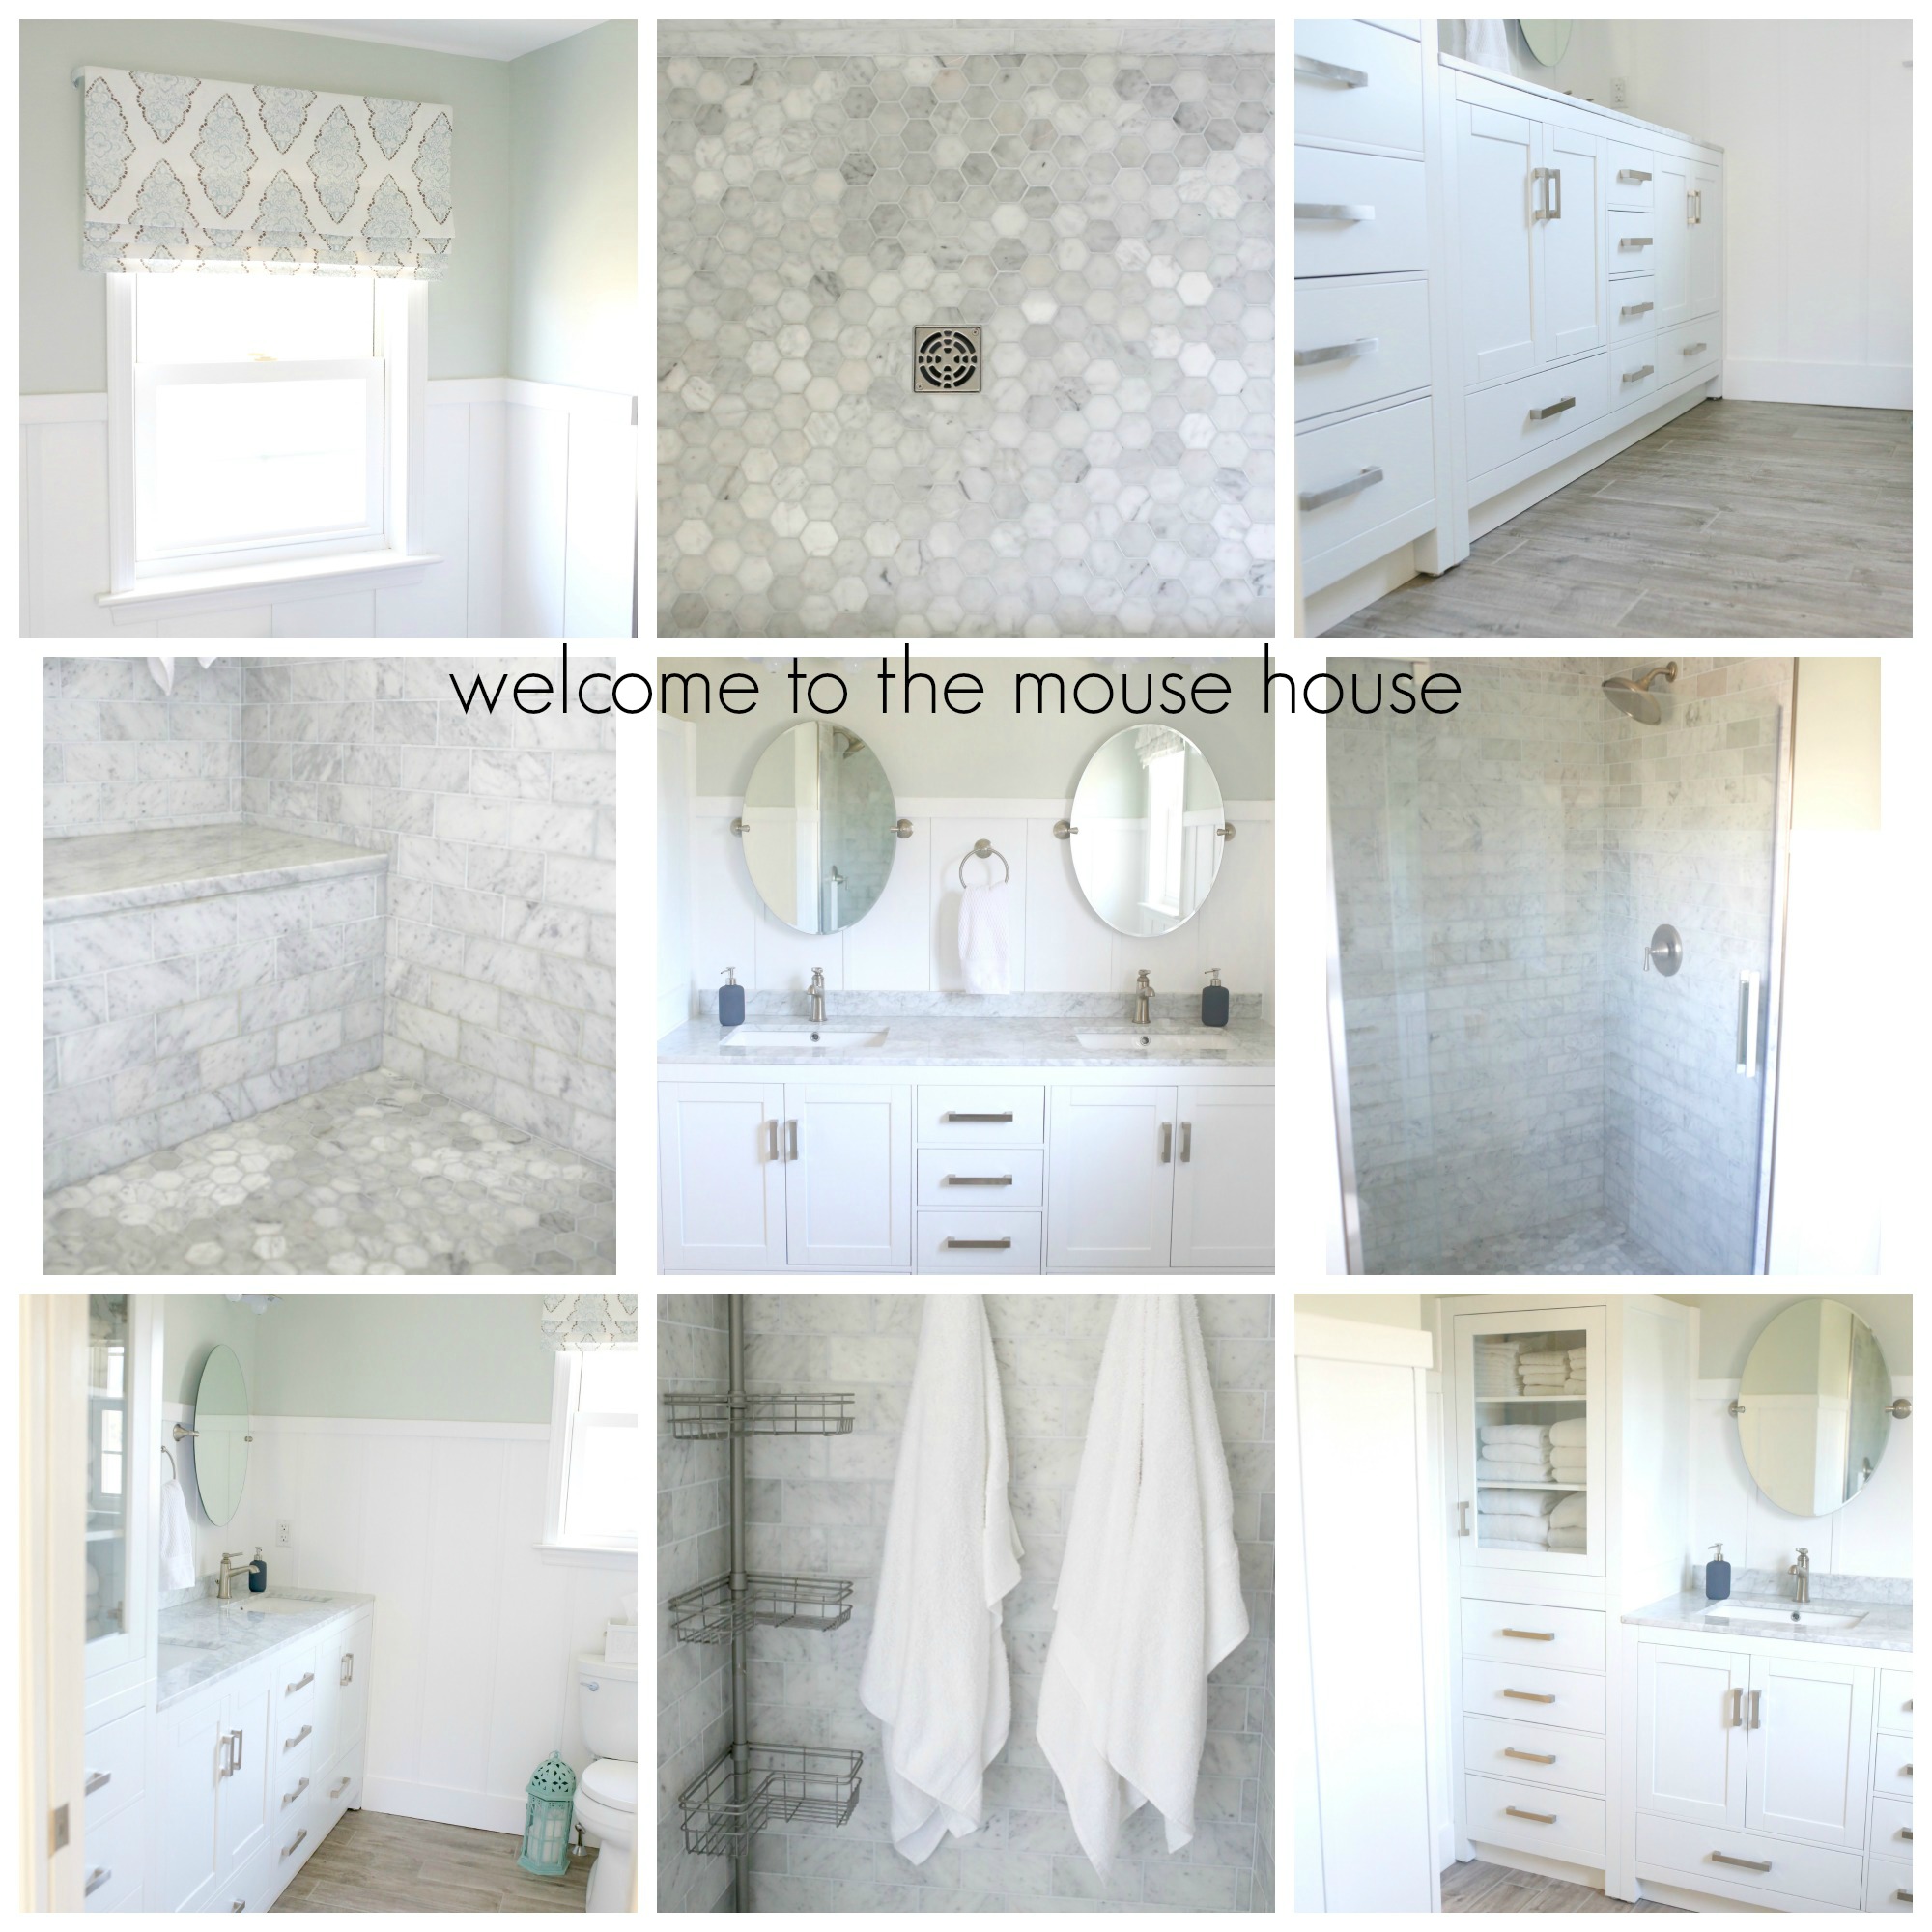
We absolutely LOVE our new master bathroom. Here is a sneak peek of the finishes in the new room.
Like I mentioned above, this was a gut job. And when I say gut job, I mean it. We had the contractor rip out all of the walls of the bathroom and the closet and we reconfigured it all. Not only did the bathroom need upgrading, the master closet was in desperate need of widening.
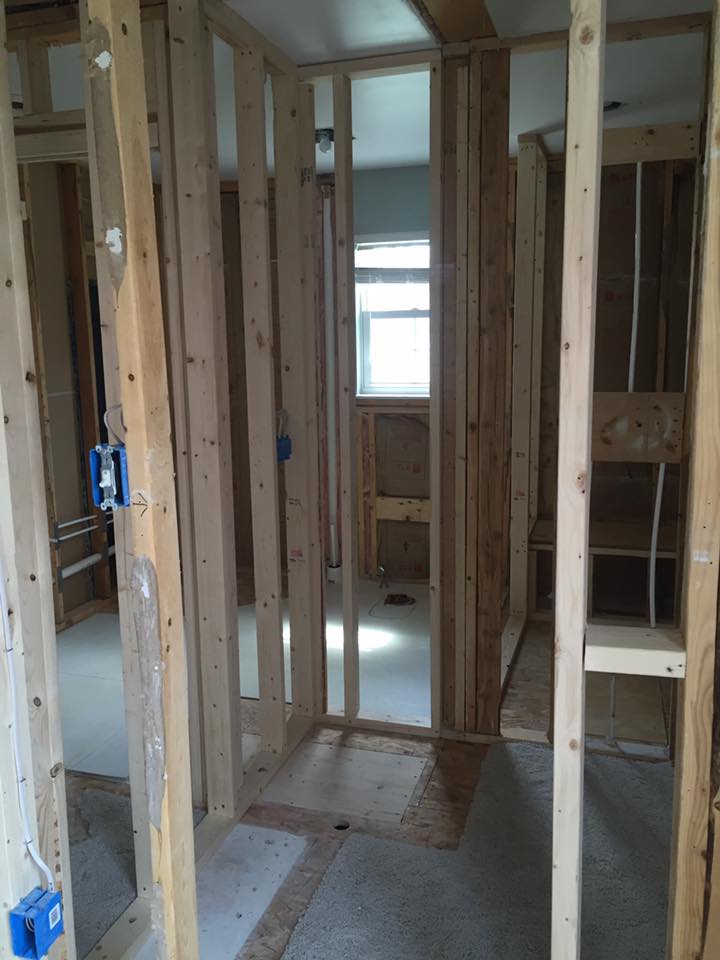
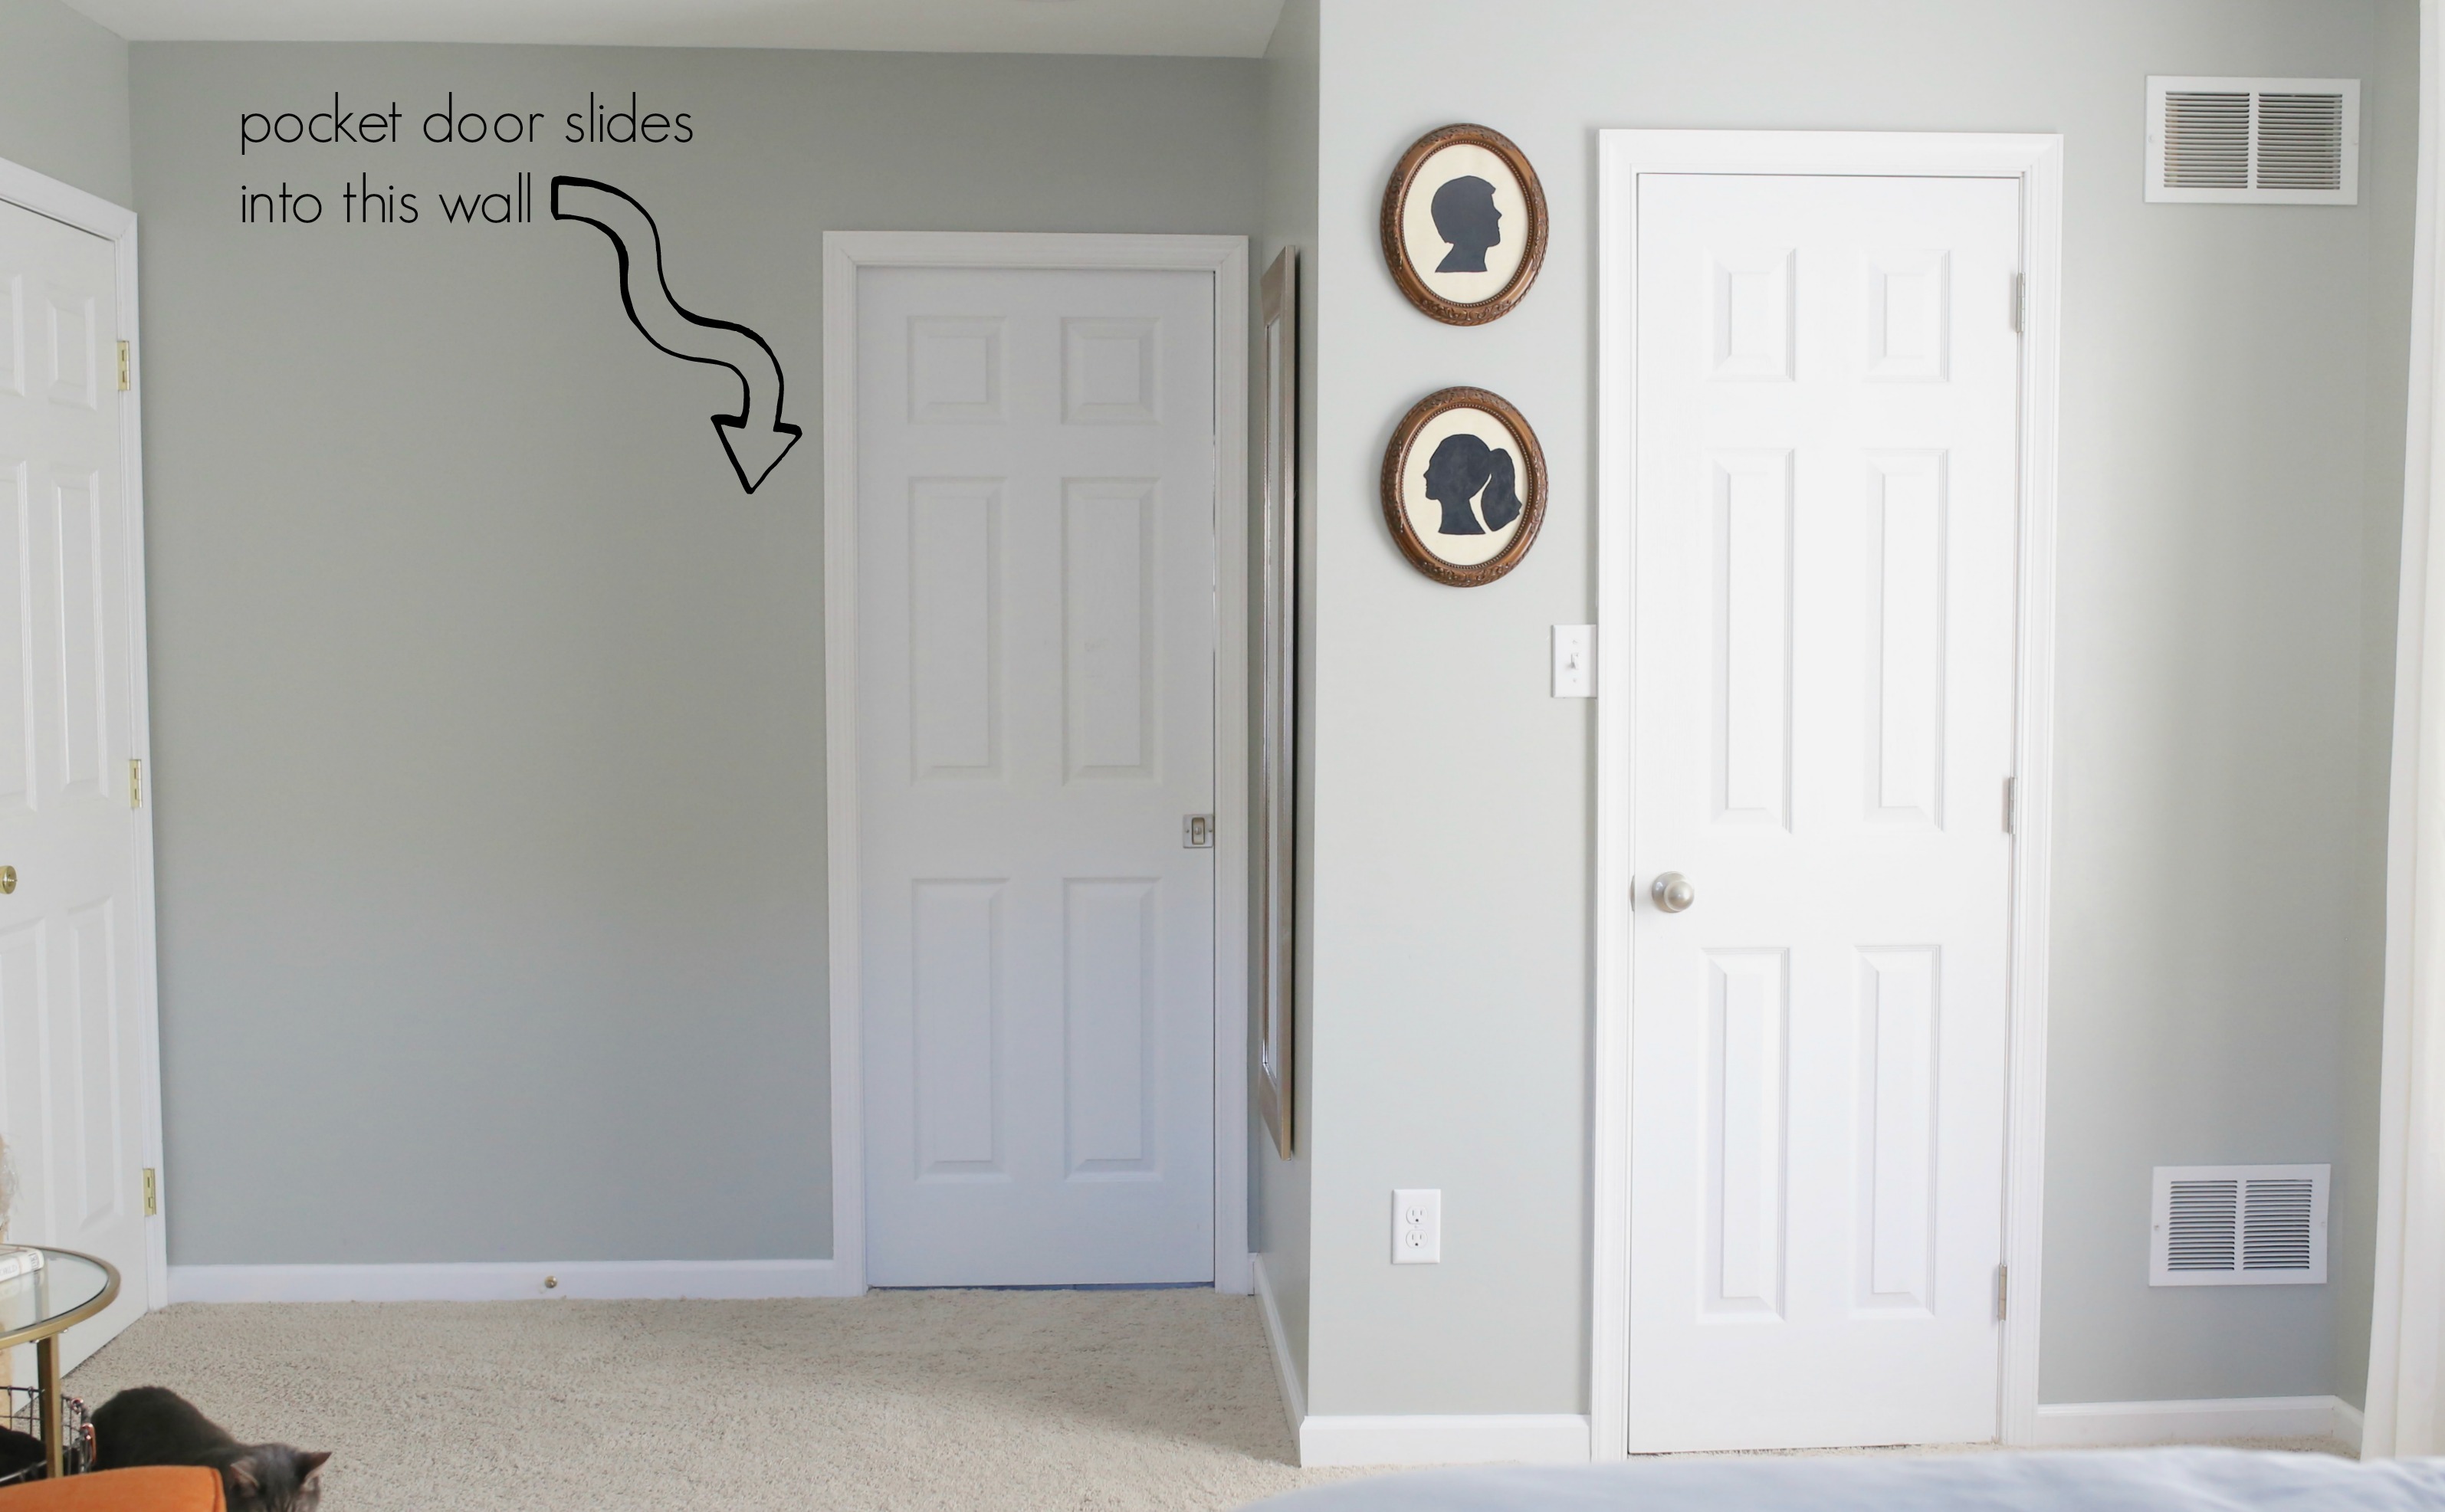
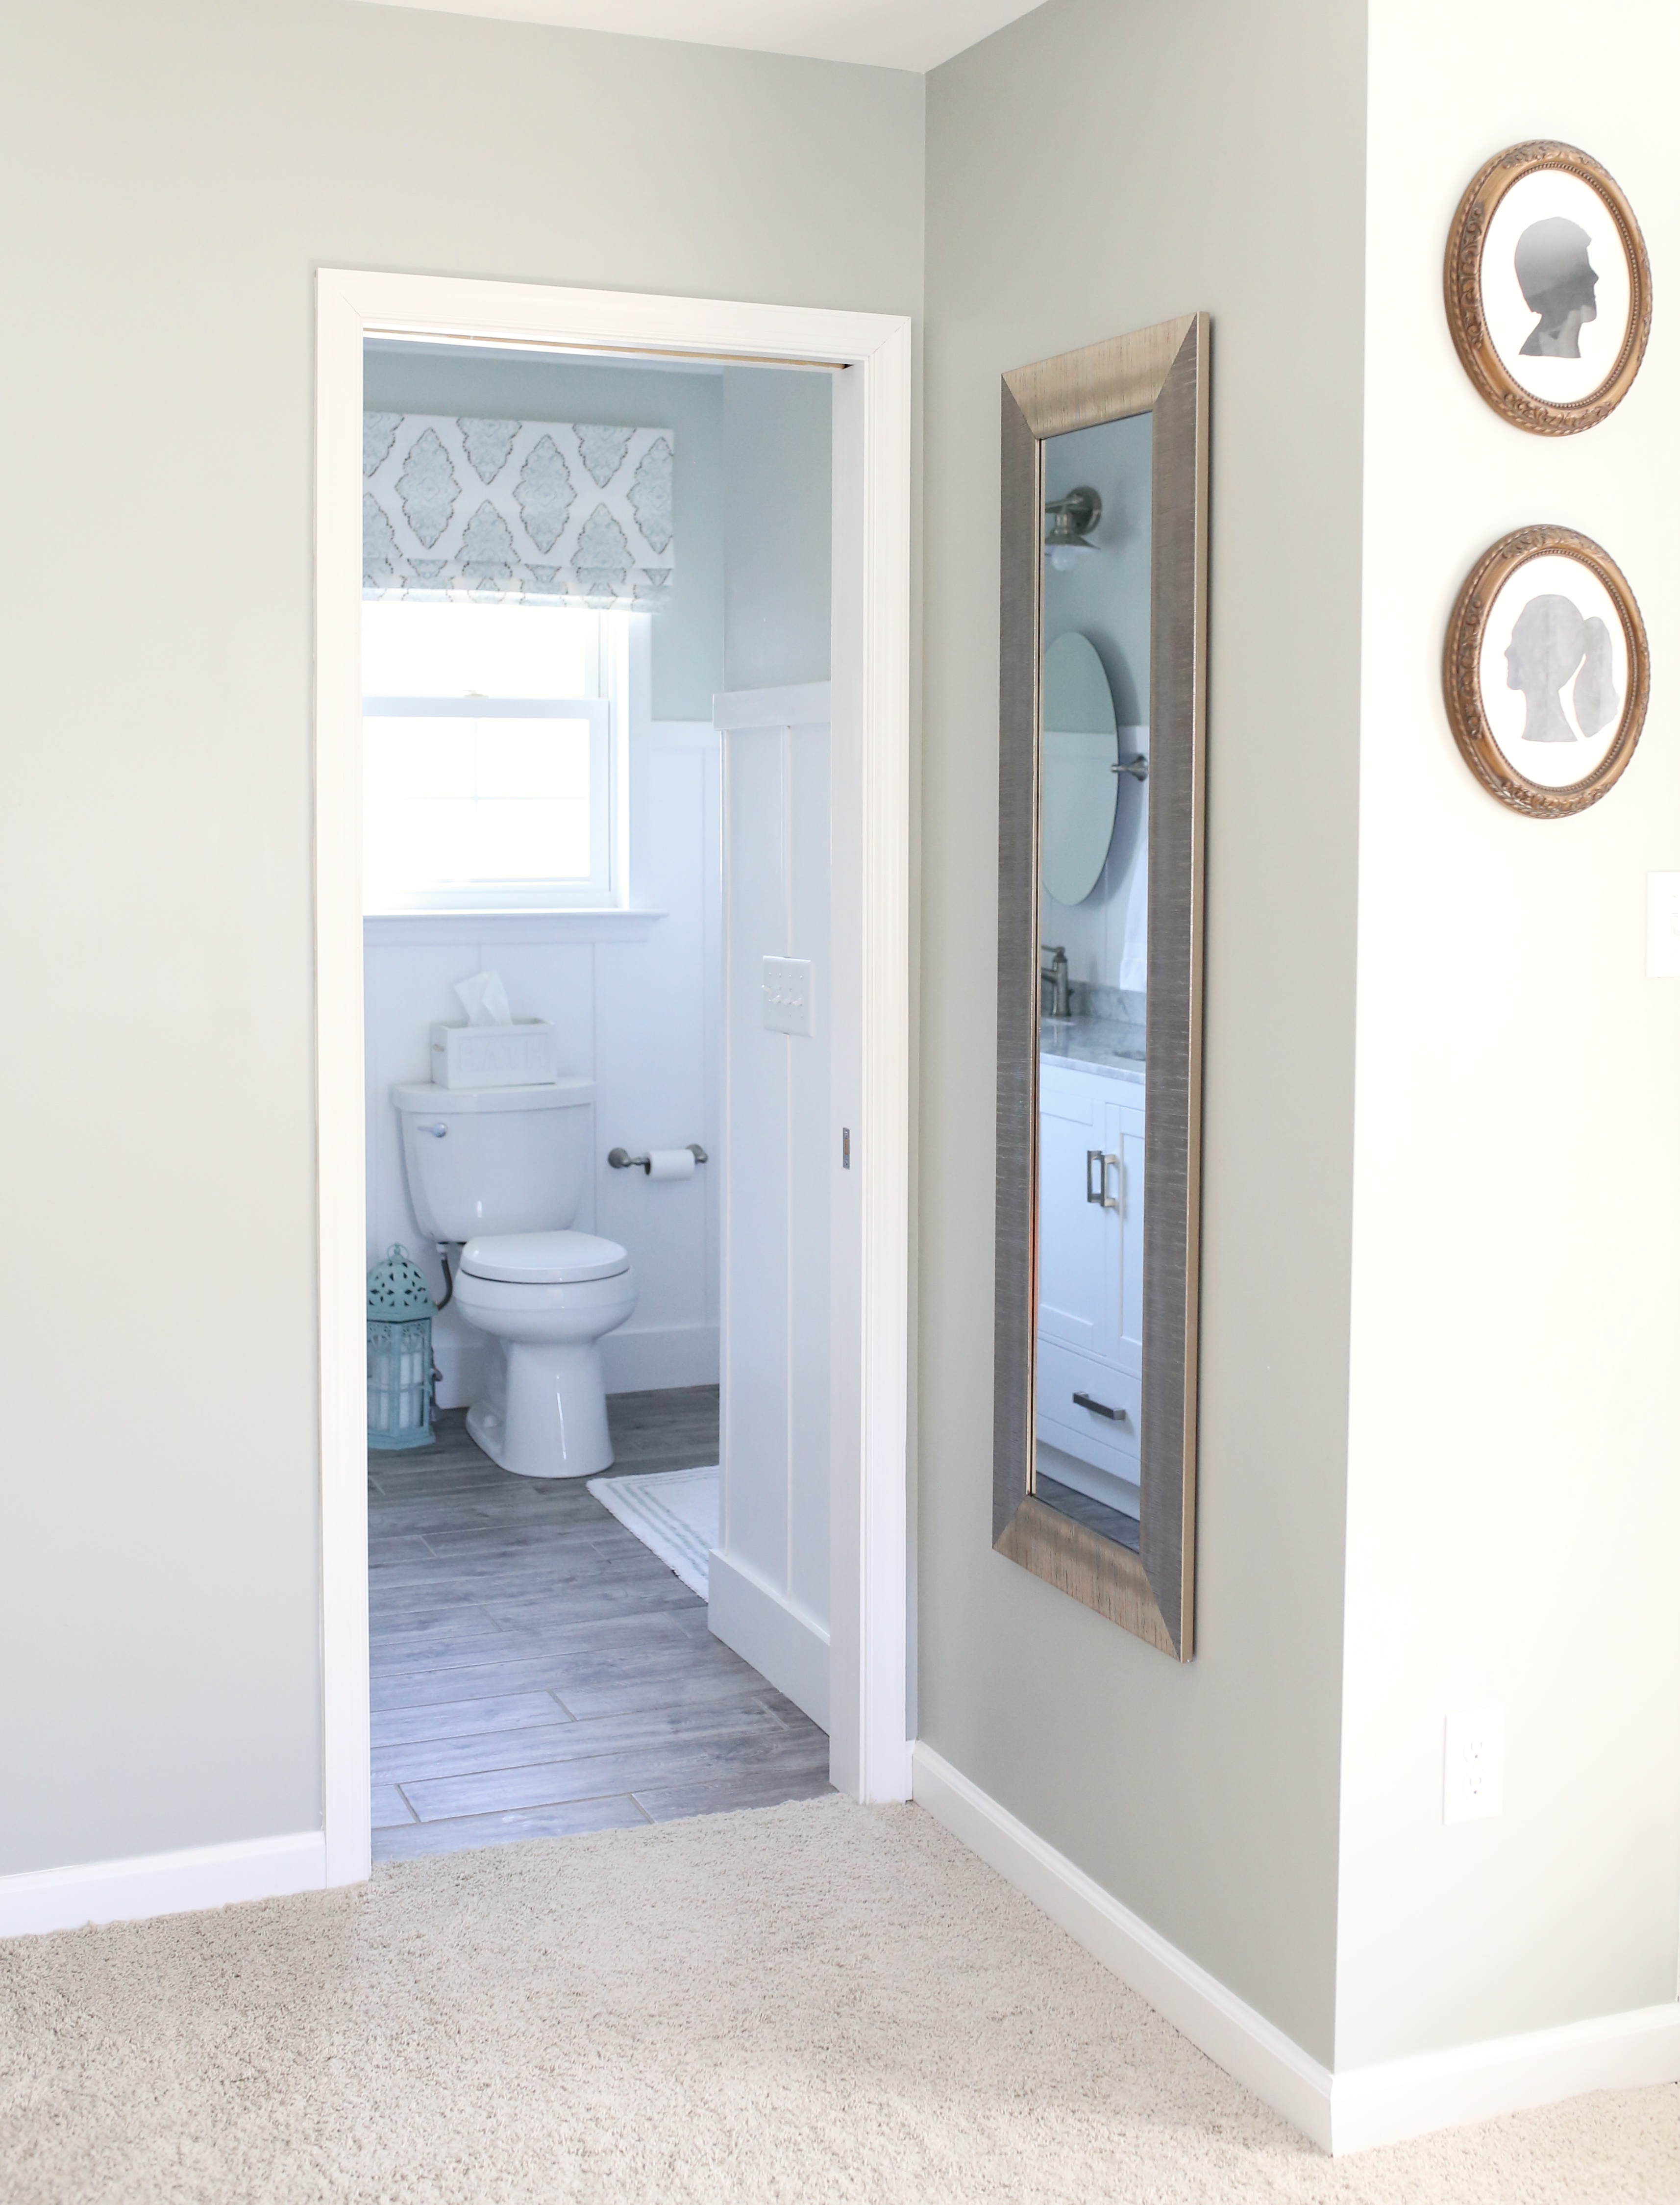
This picture below shows the changes well. The top photo is the “before” and the bottom photo is the “after”. You can see how many random doors we started out with. The door all the way to the right was the closet and that middle door was a weird pantry. We widened the closet by eliminating that pantry and squaring the whole area off. It literally doubled our closet space, which was much needed. We did lose a slight bit of space inside the bathroom, but we made up for it by moving the bathroom entry to the right a few feet and installing a pocket door. The whole aesthetic is much cleaner and simpler now.

Moving the doorway to the bathroom not only allowed for the sink to be moved to that wall, but it also allowed for a pocket door. A pocket door was an absolute must have for me in this project. It frees up all of that square footage a door would normally swing, allowing us more floor space to work with.
Now for a tour of the beautiful master bathroom.
When you walk into our bedroom, we now have a squared off wall instead of a million random doors, so I wanted to accent it with something simple like this full length mirror from Overstock.com
I feel like the biggest transformation is when you enter the bathroom because it feels like a completely different space. The “before” bathroom had the stand up shower on the wall where we can now fit a double vanity sink because we moved the entry way over several feet. The before bathroom only had one small vanity, so this was an absolute must-have for us.
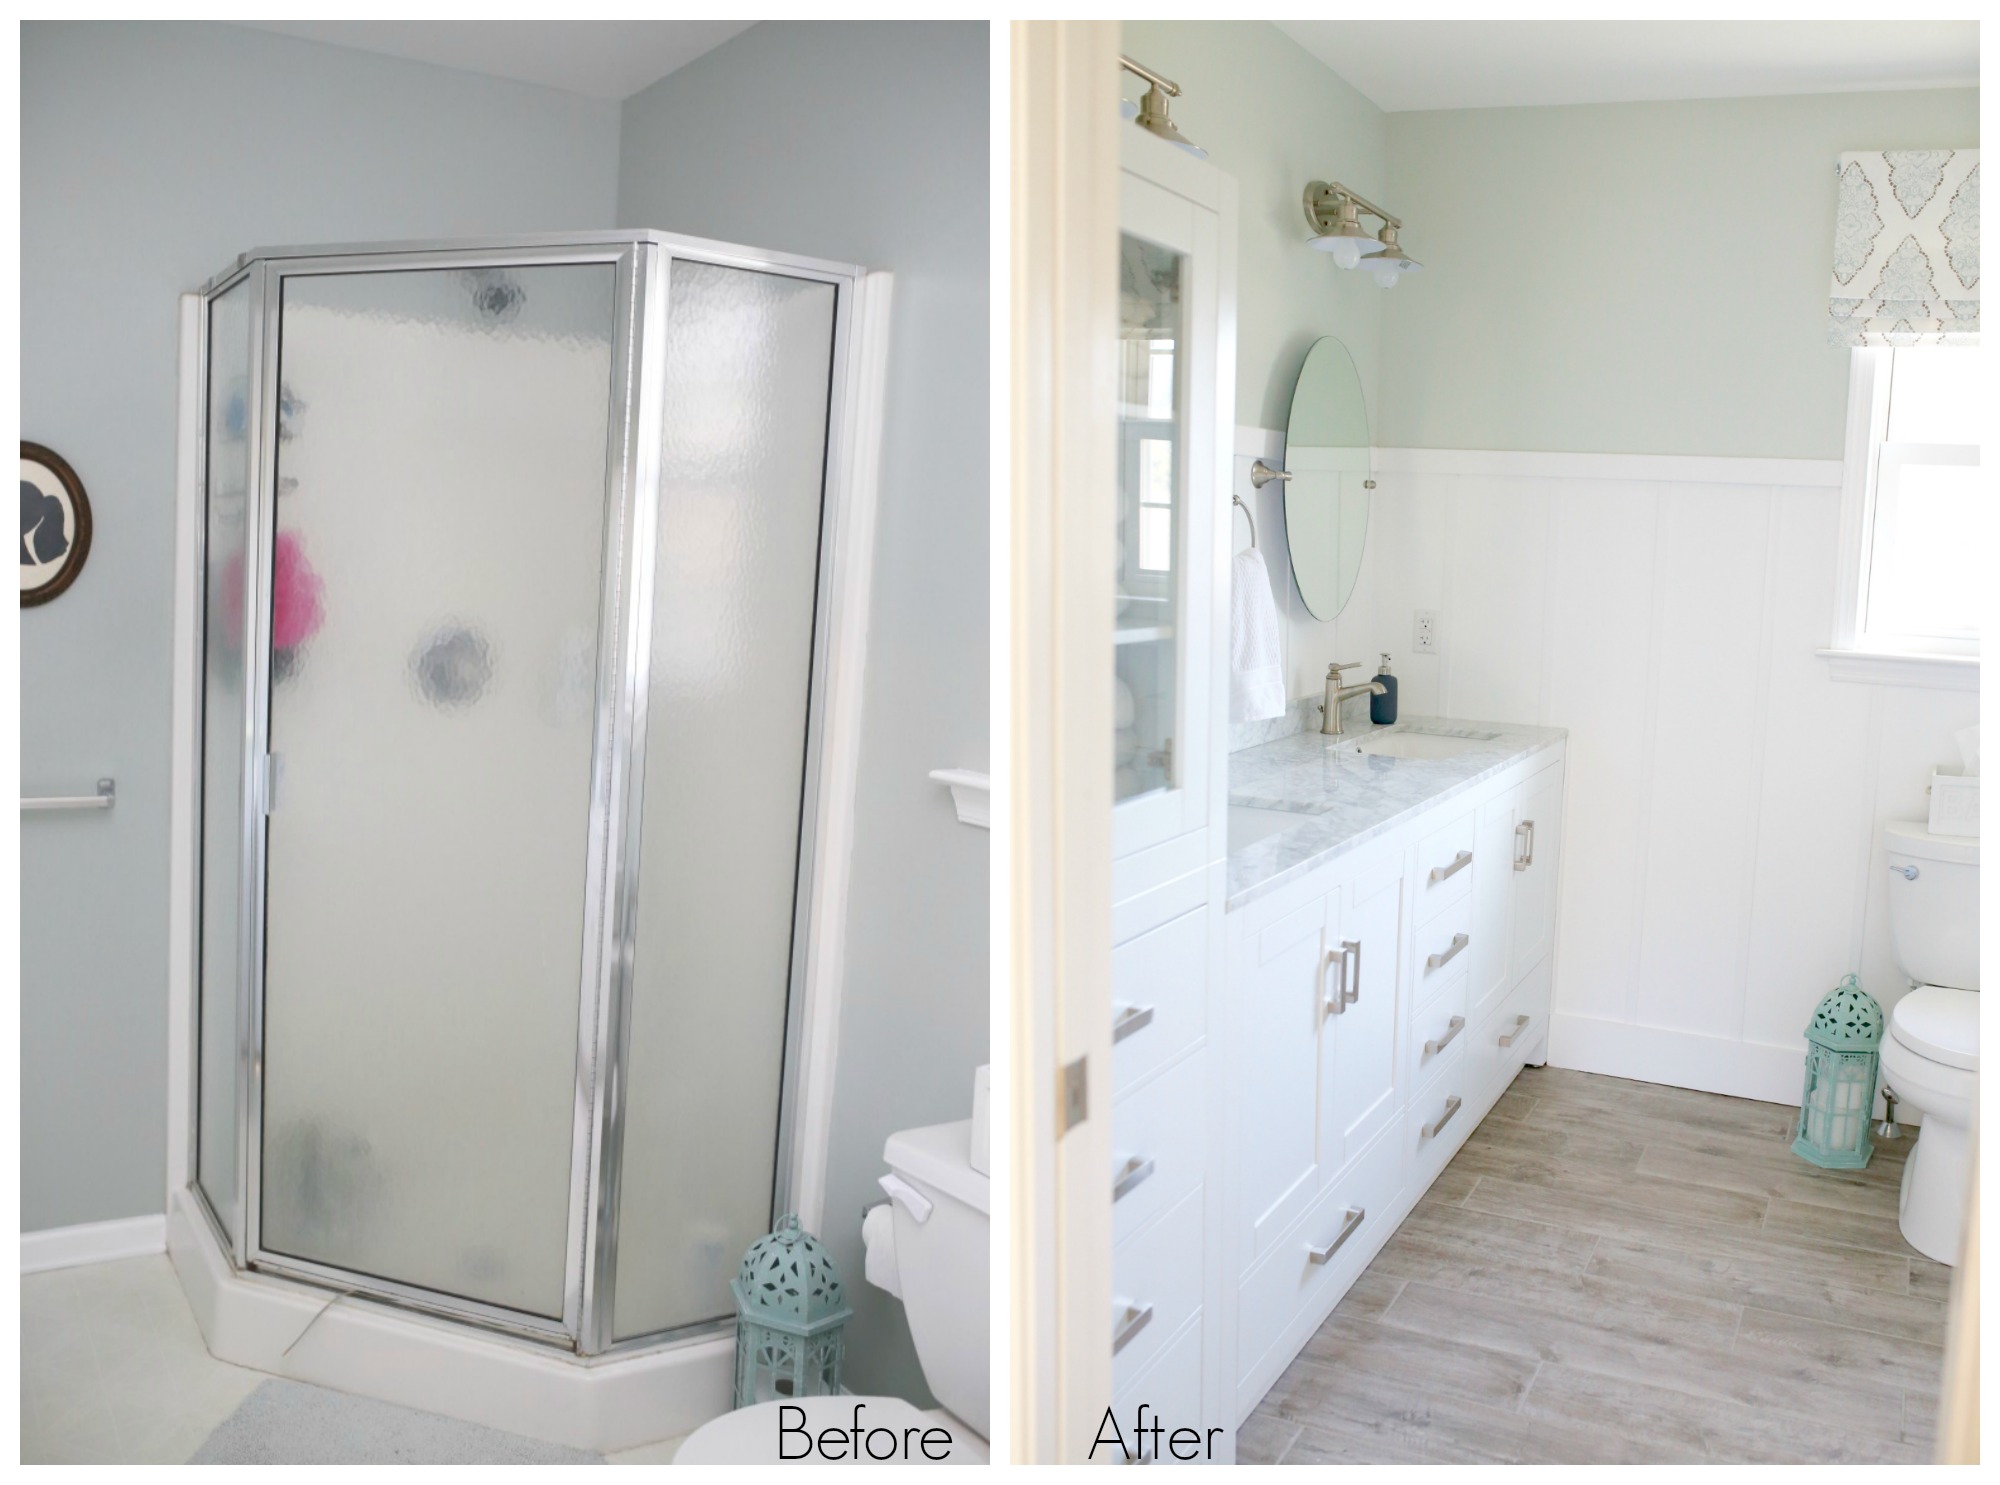
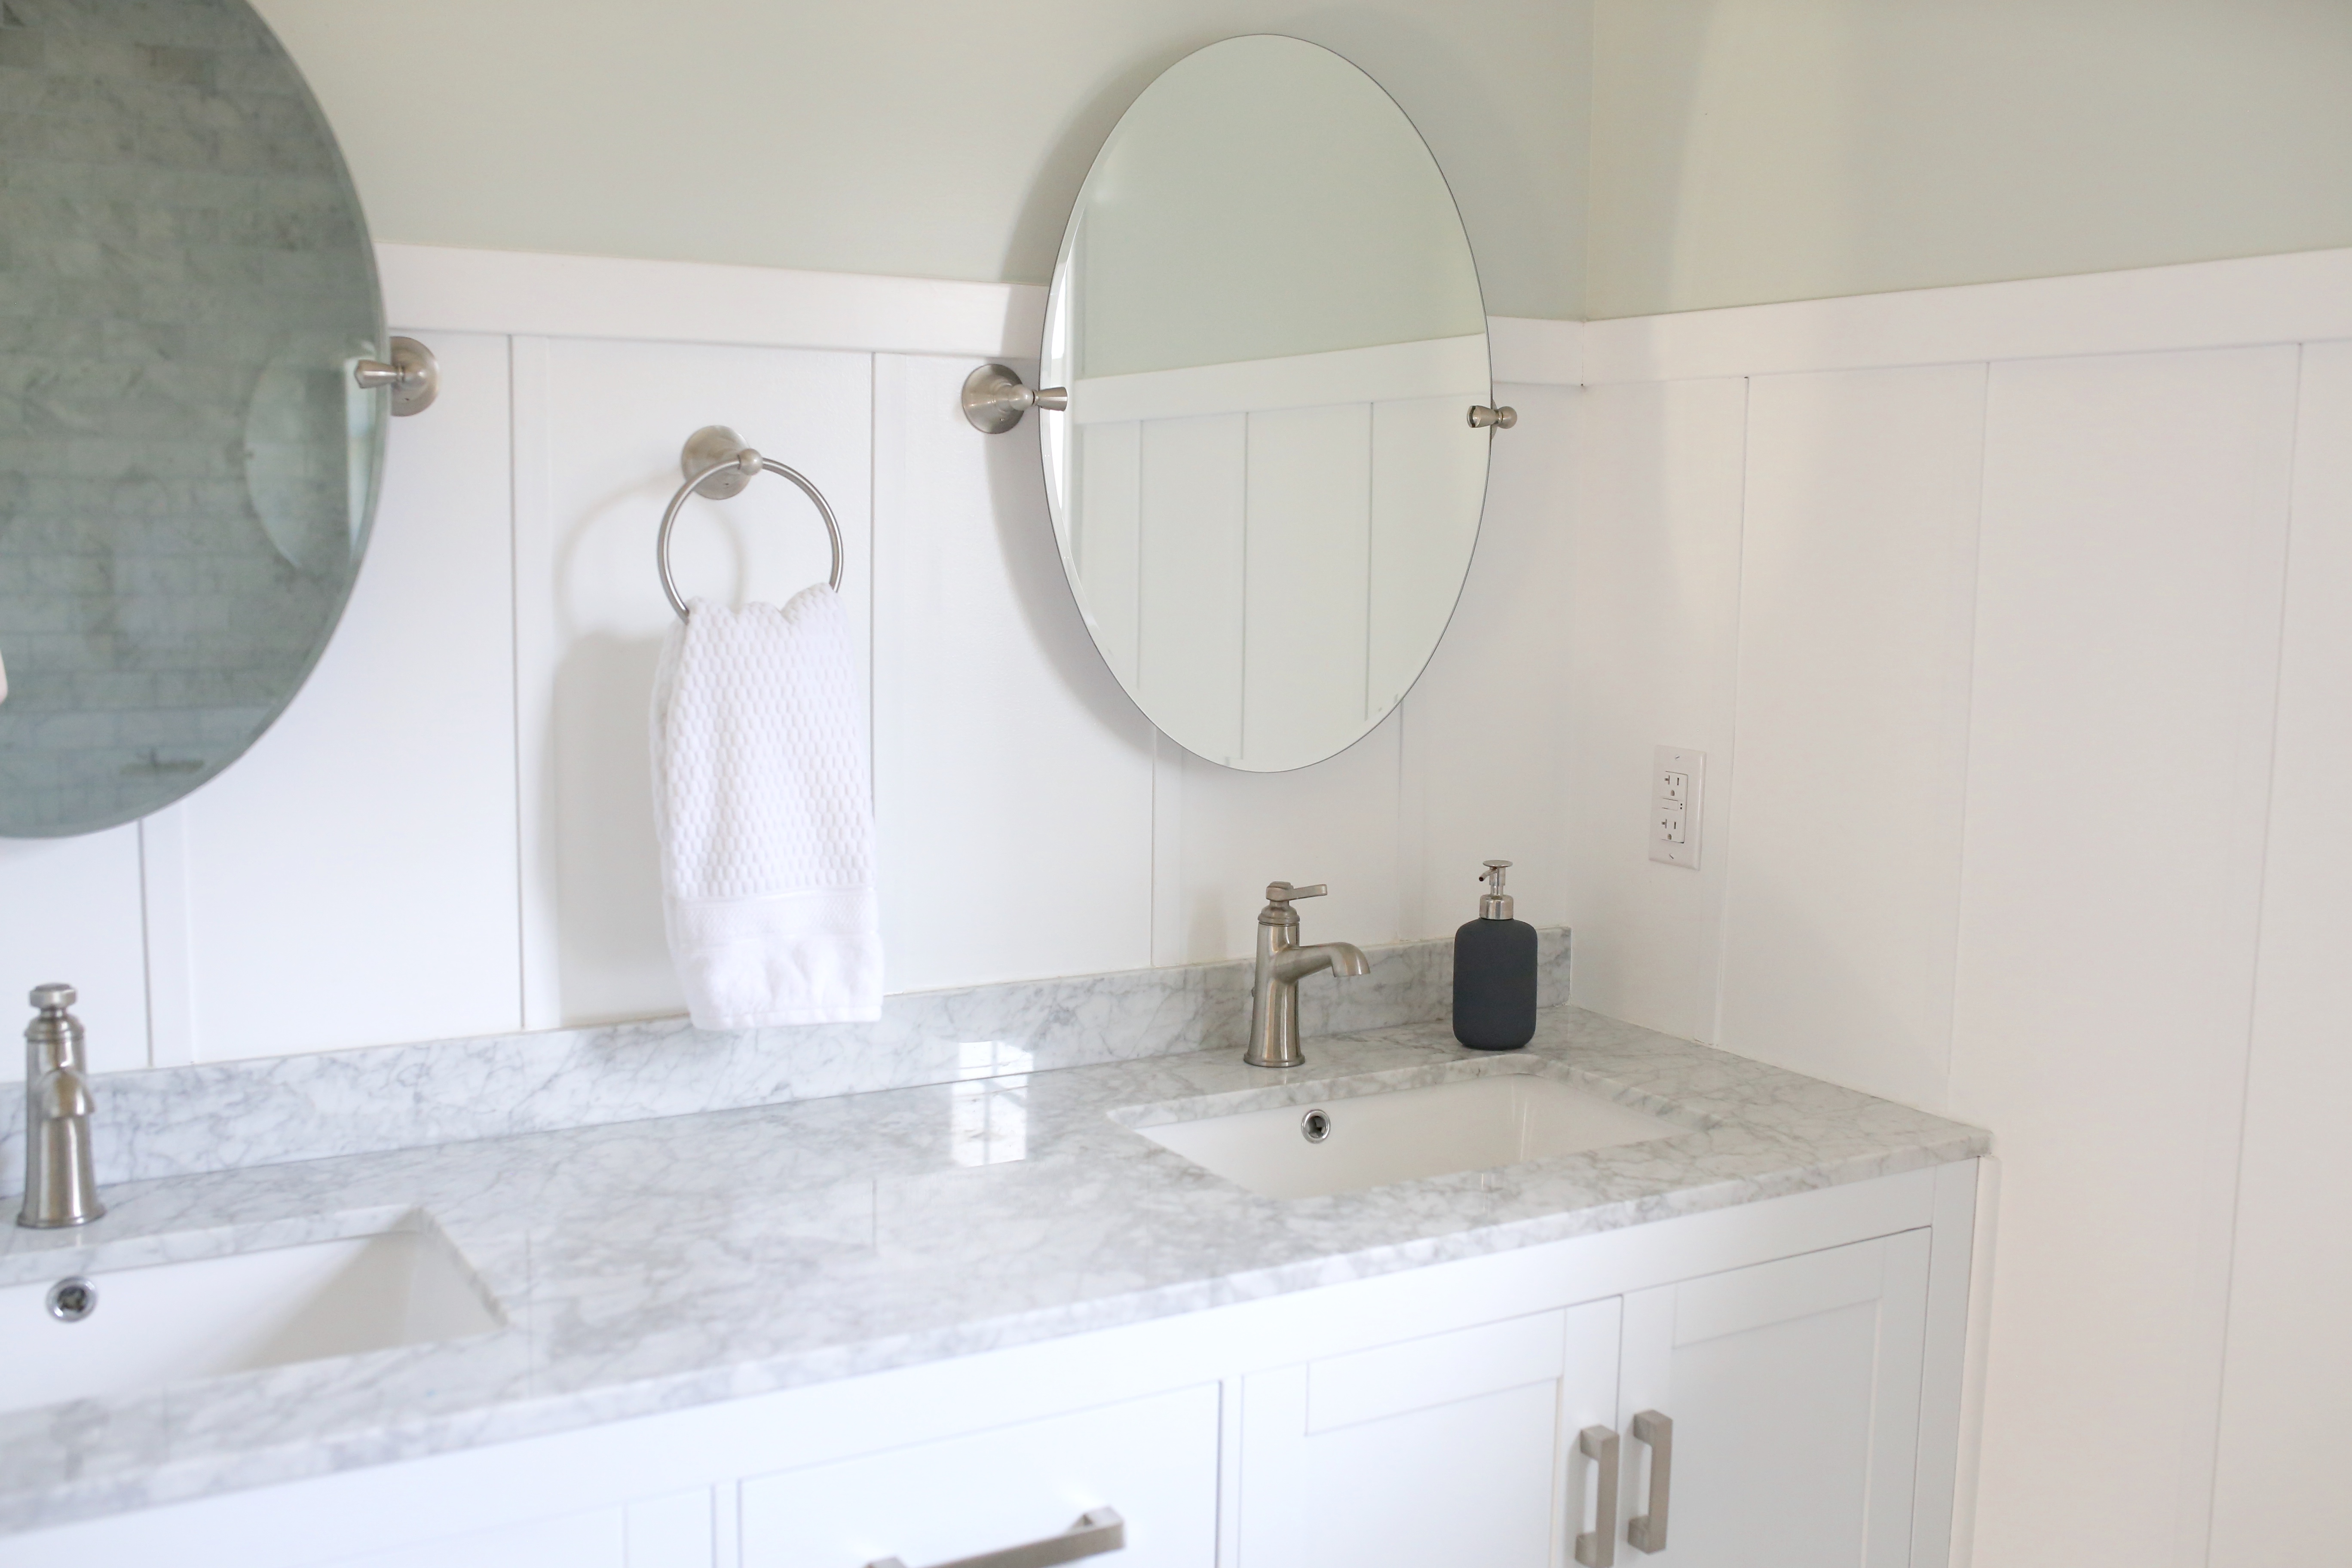
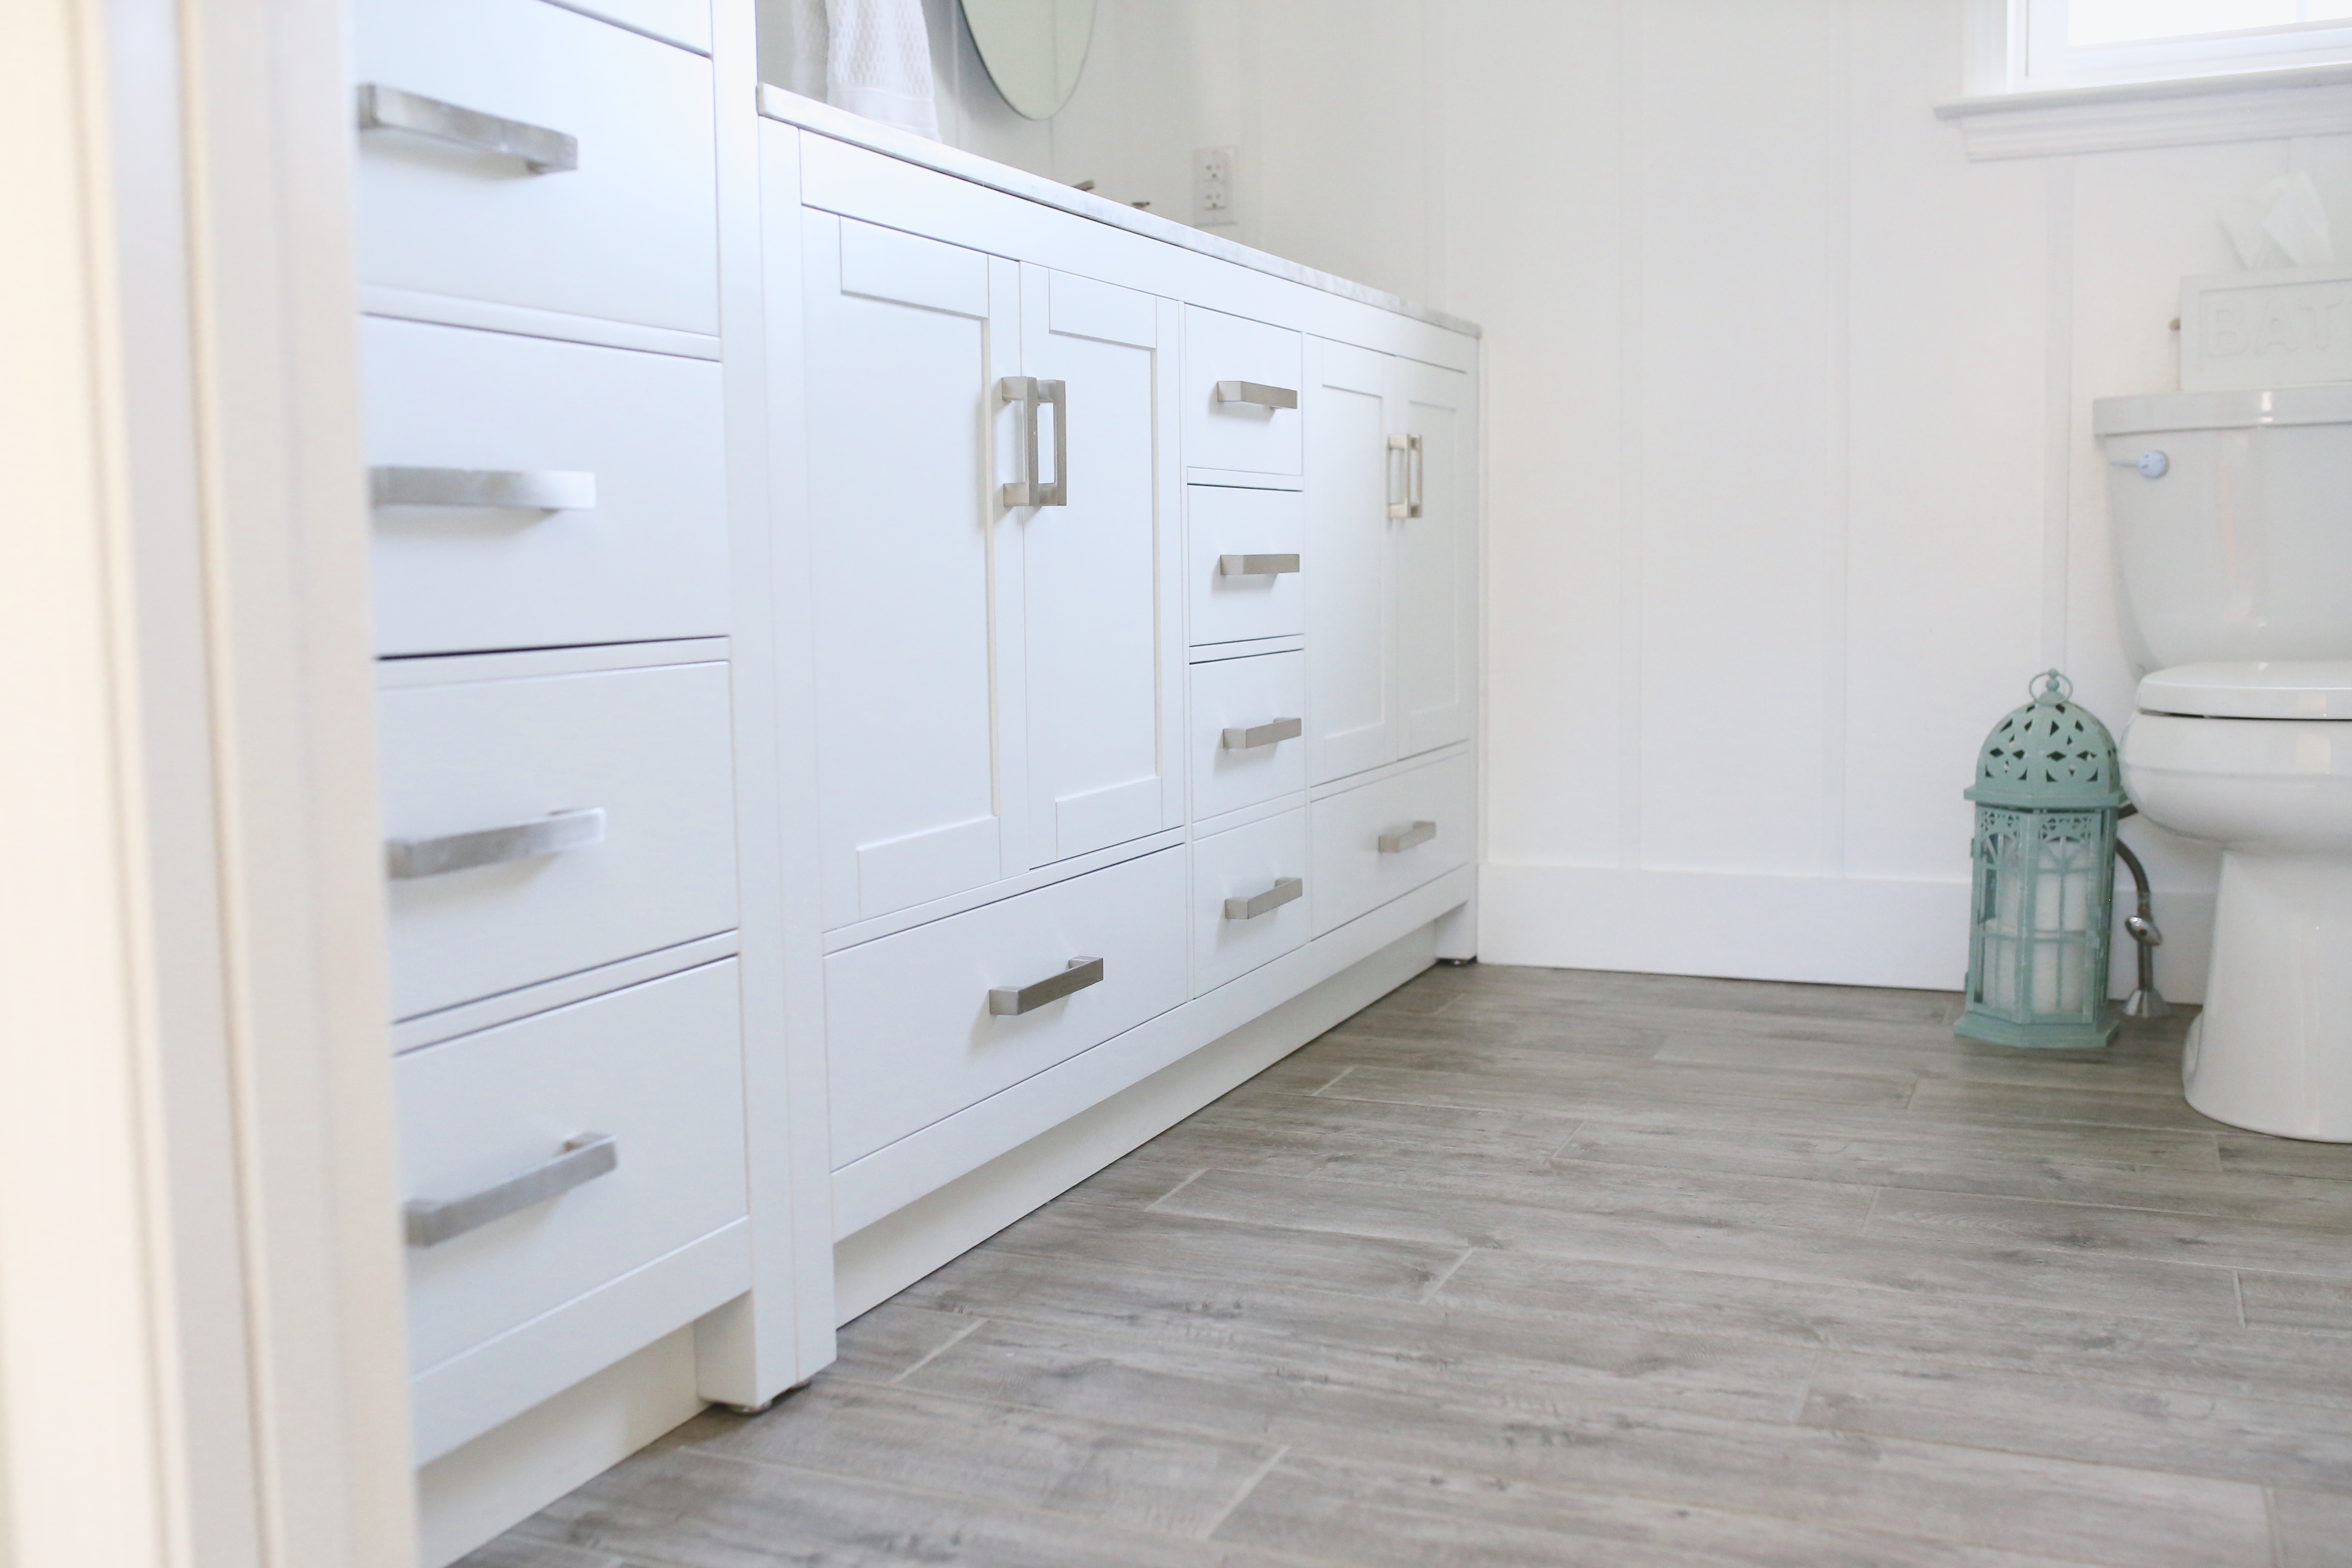
This beautiful new vanity was purchased at Home Depot (links directly to the vanity) and came with the carrera marble top. The amount of storage it has is perfect, especially because we got rid of that weird pantry space, and the price was really great. We had looked around at getting one custom made, but we just couldn’t afford it, but I am super happy with our choice. The wall color is a Sherwin Williams color called Sea Salt. It is super relaxing and goes well with the board and batten we hung. (That toilet paper holder isn’t really a toilet paper holder… I purchased it years ago at Home Goods. I believe it is a candle holder).
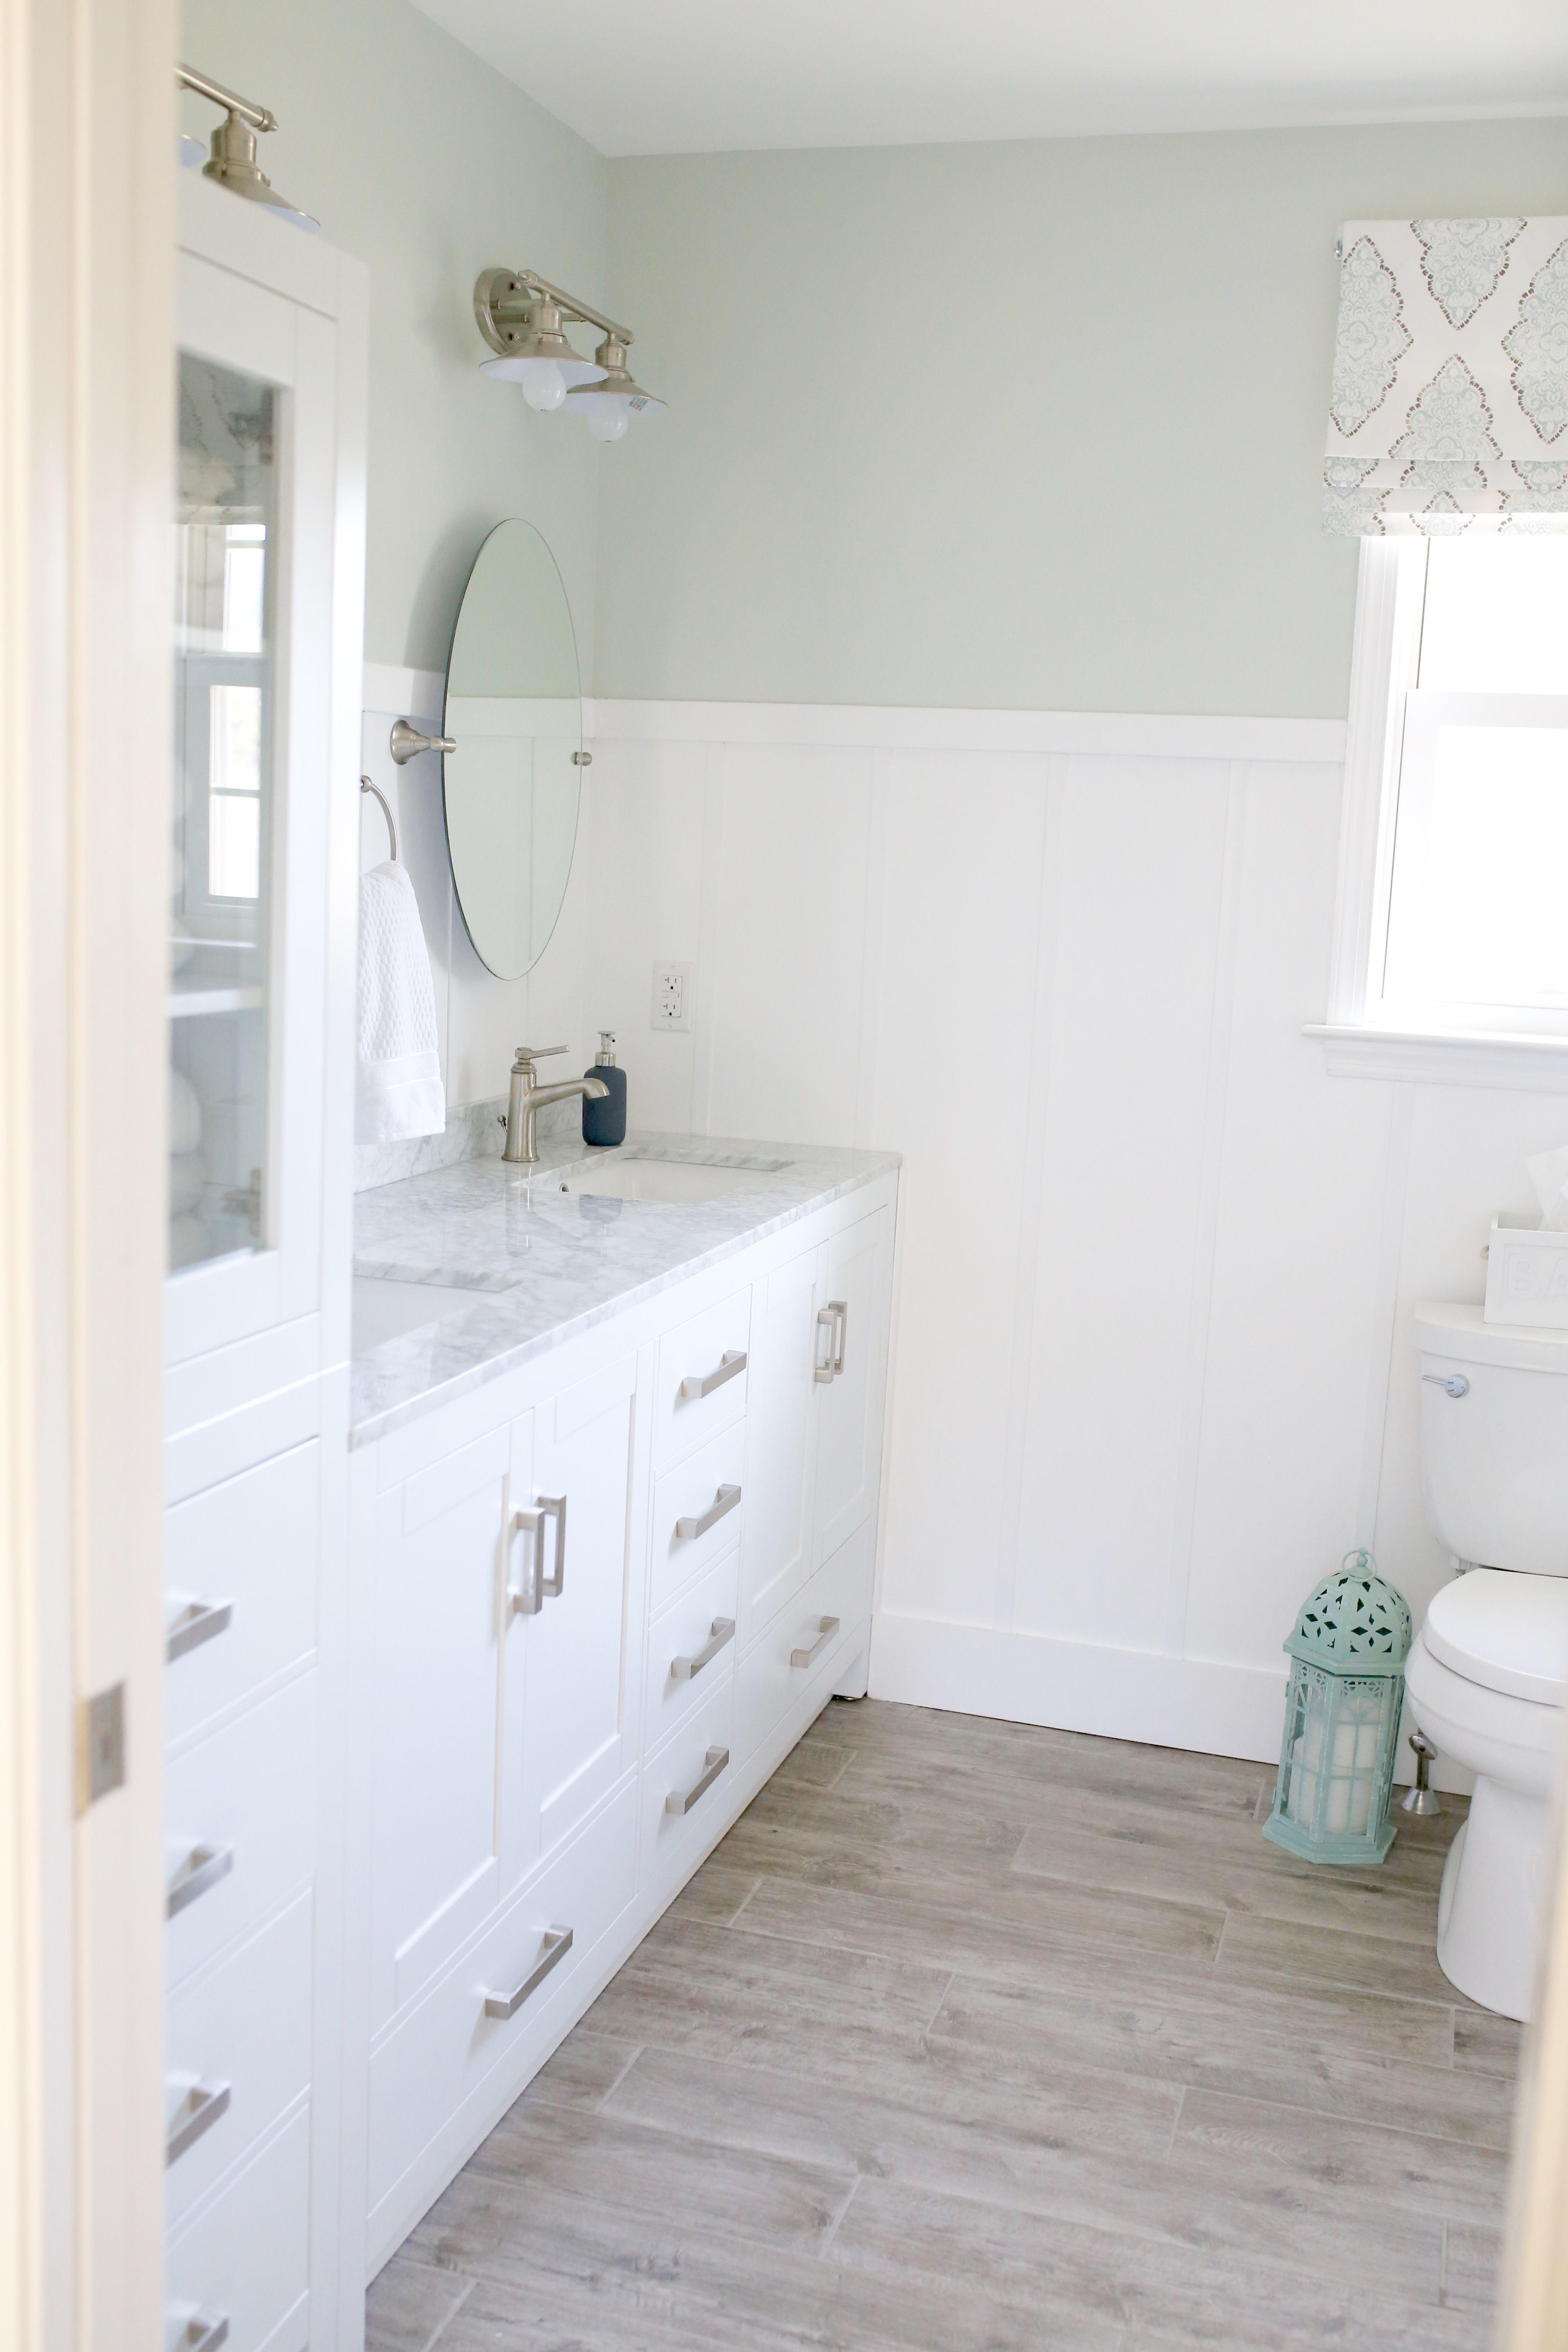
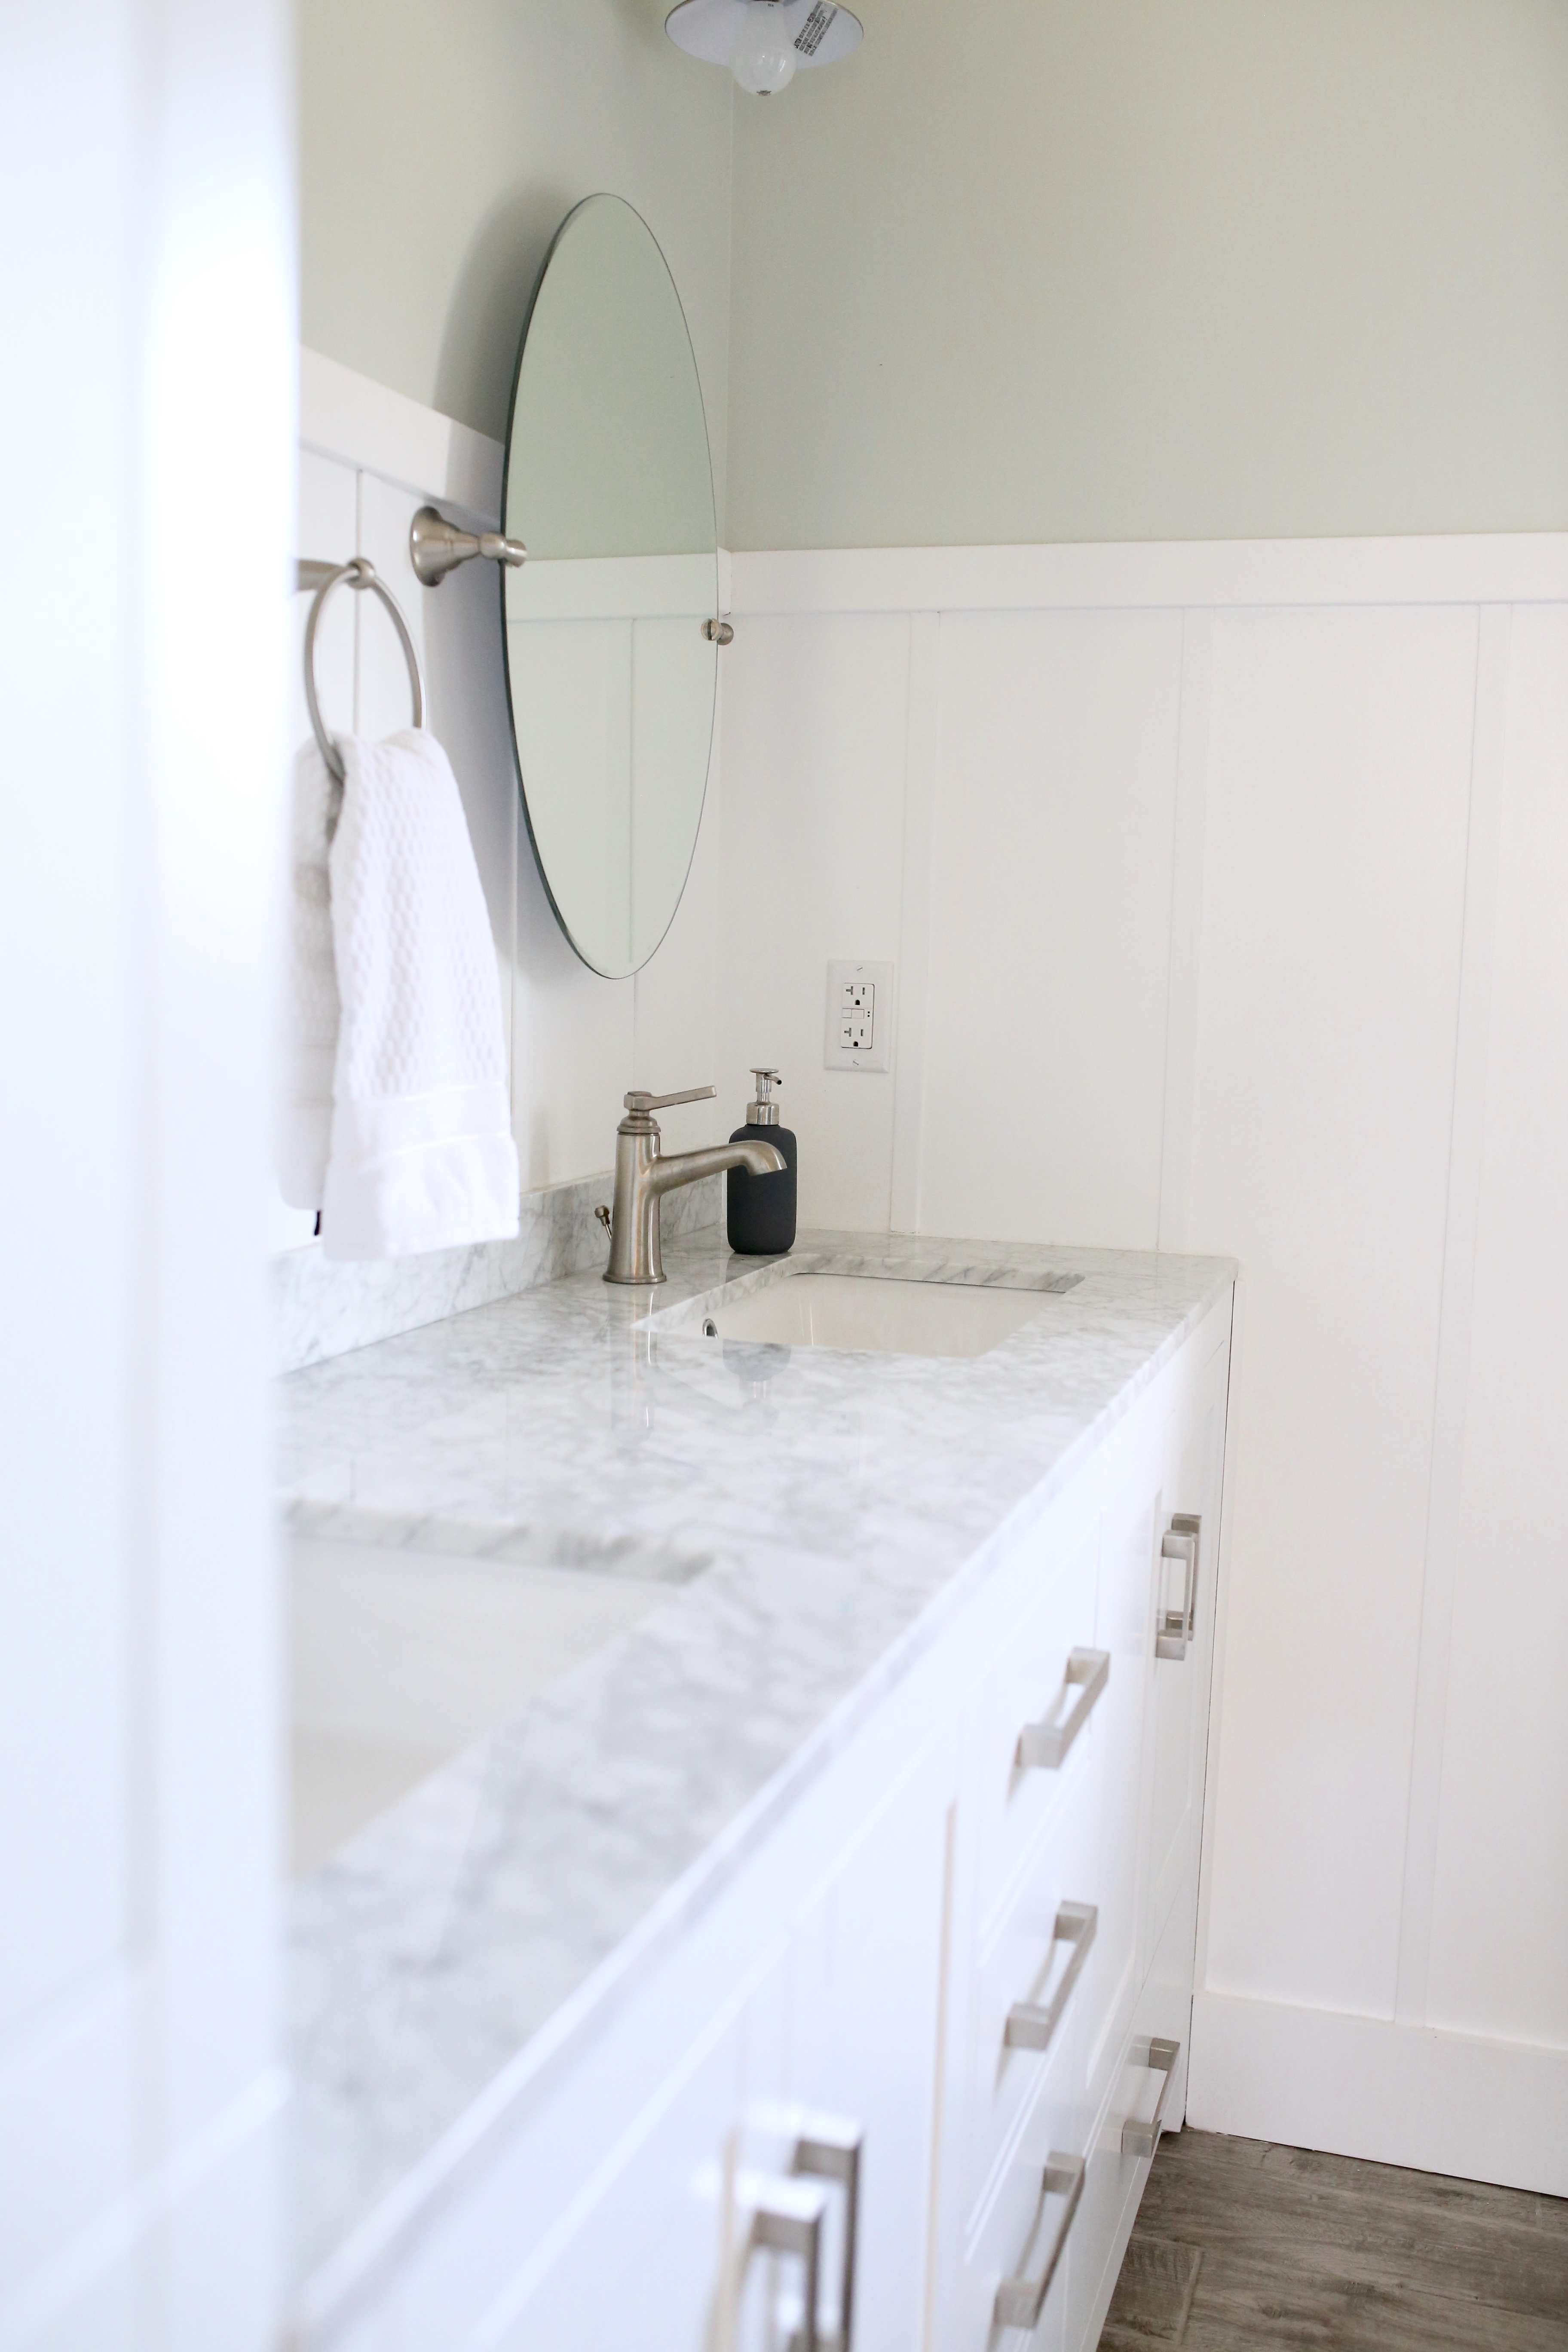
The oval mirrors are from Amazon. I love that they tilt and the brushed nickel fits right in with our other items like the towel holder and the faucets.
I chose simple and classic lighting for above each sink, also purchased at Home Depot. Sigh, isn’t the vanity just perfect?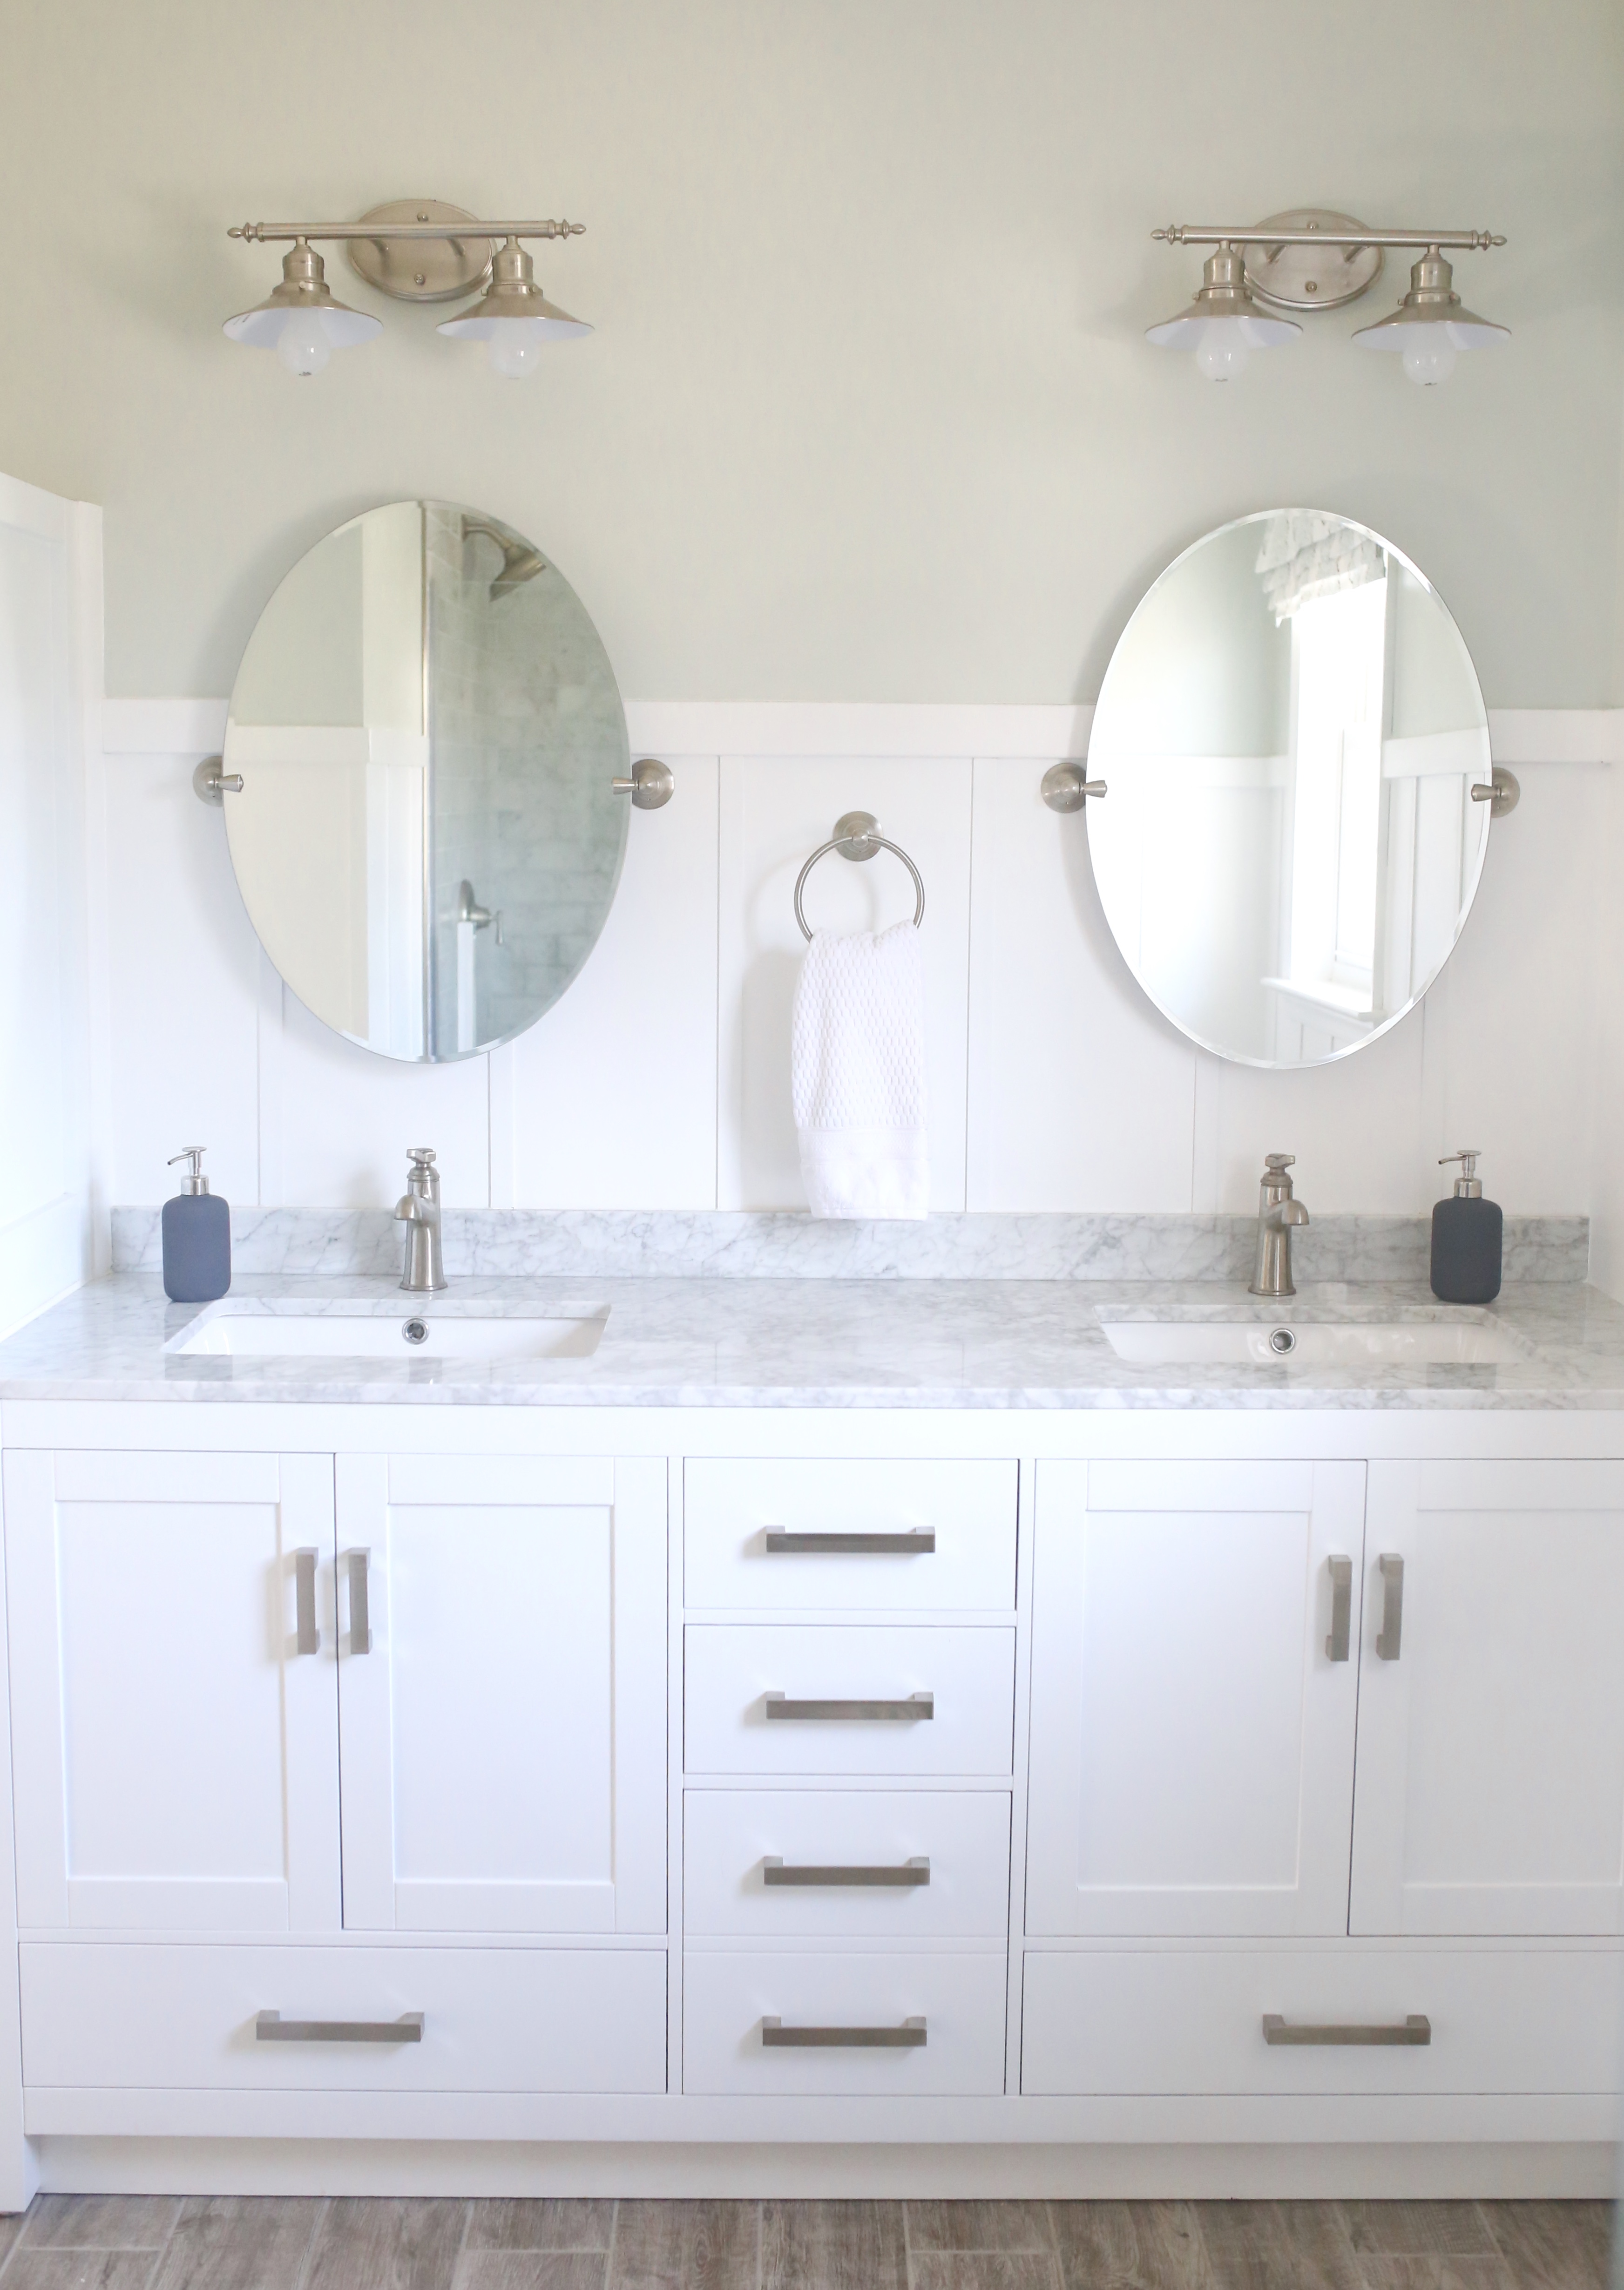
Next to the vanity, we were able to fit a gorgeous taller unit, perfect for towels and even more storage. I was worried you would be able to tell they weren’t built together, but I think they fit pretty seamlessly, once we put trim all around. The tall linen cabinet was also purchased at Home Depot.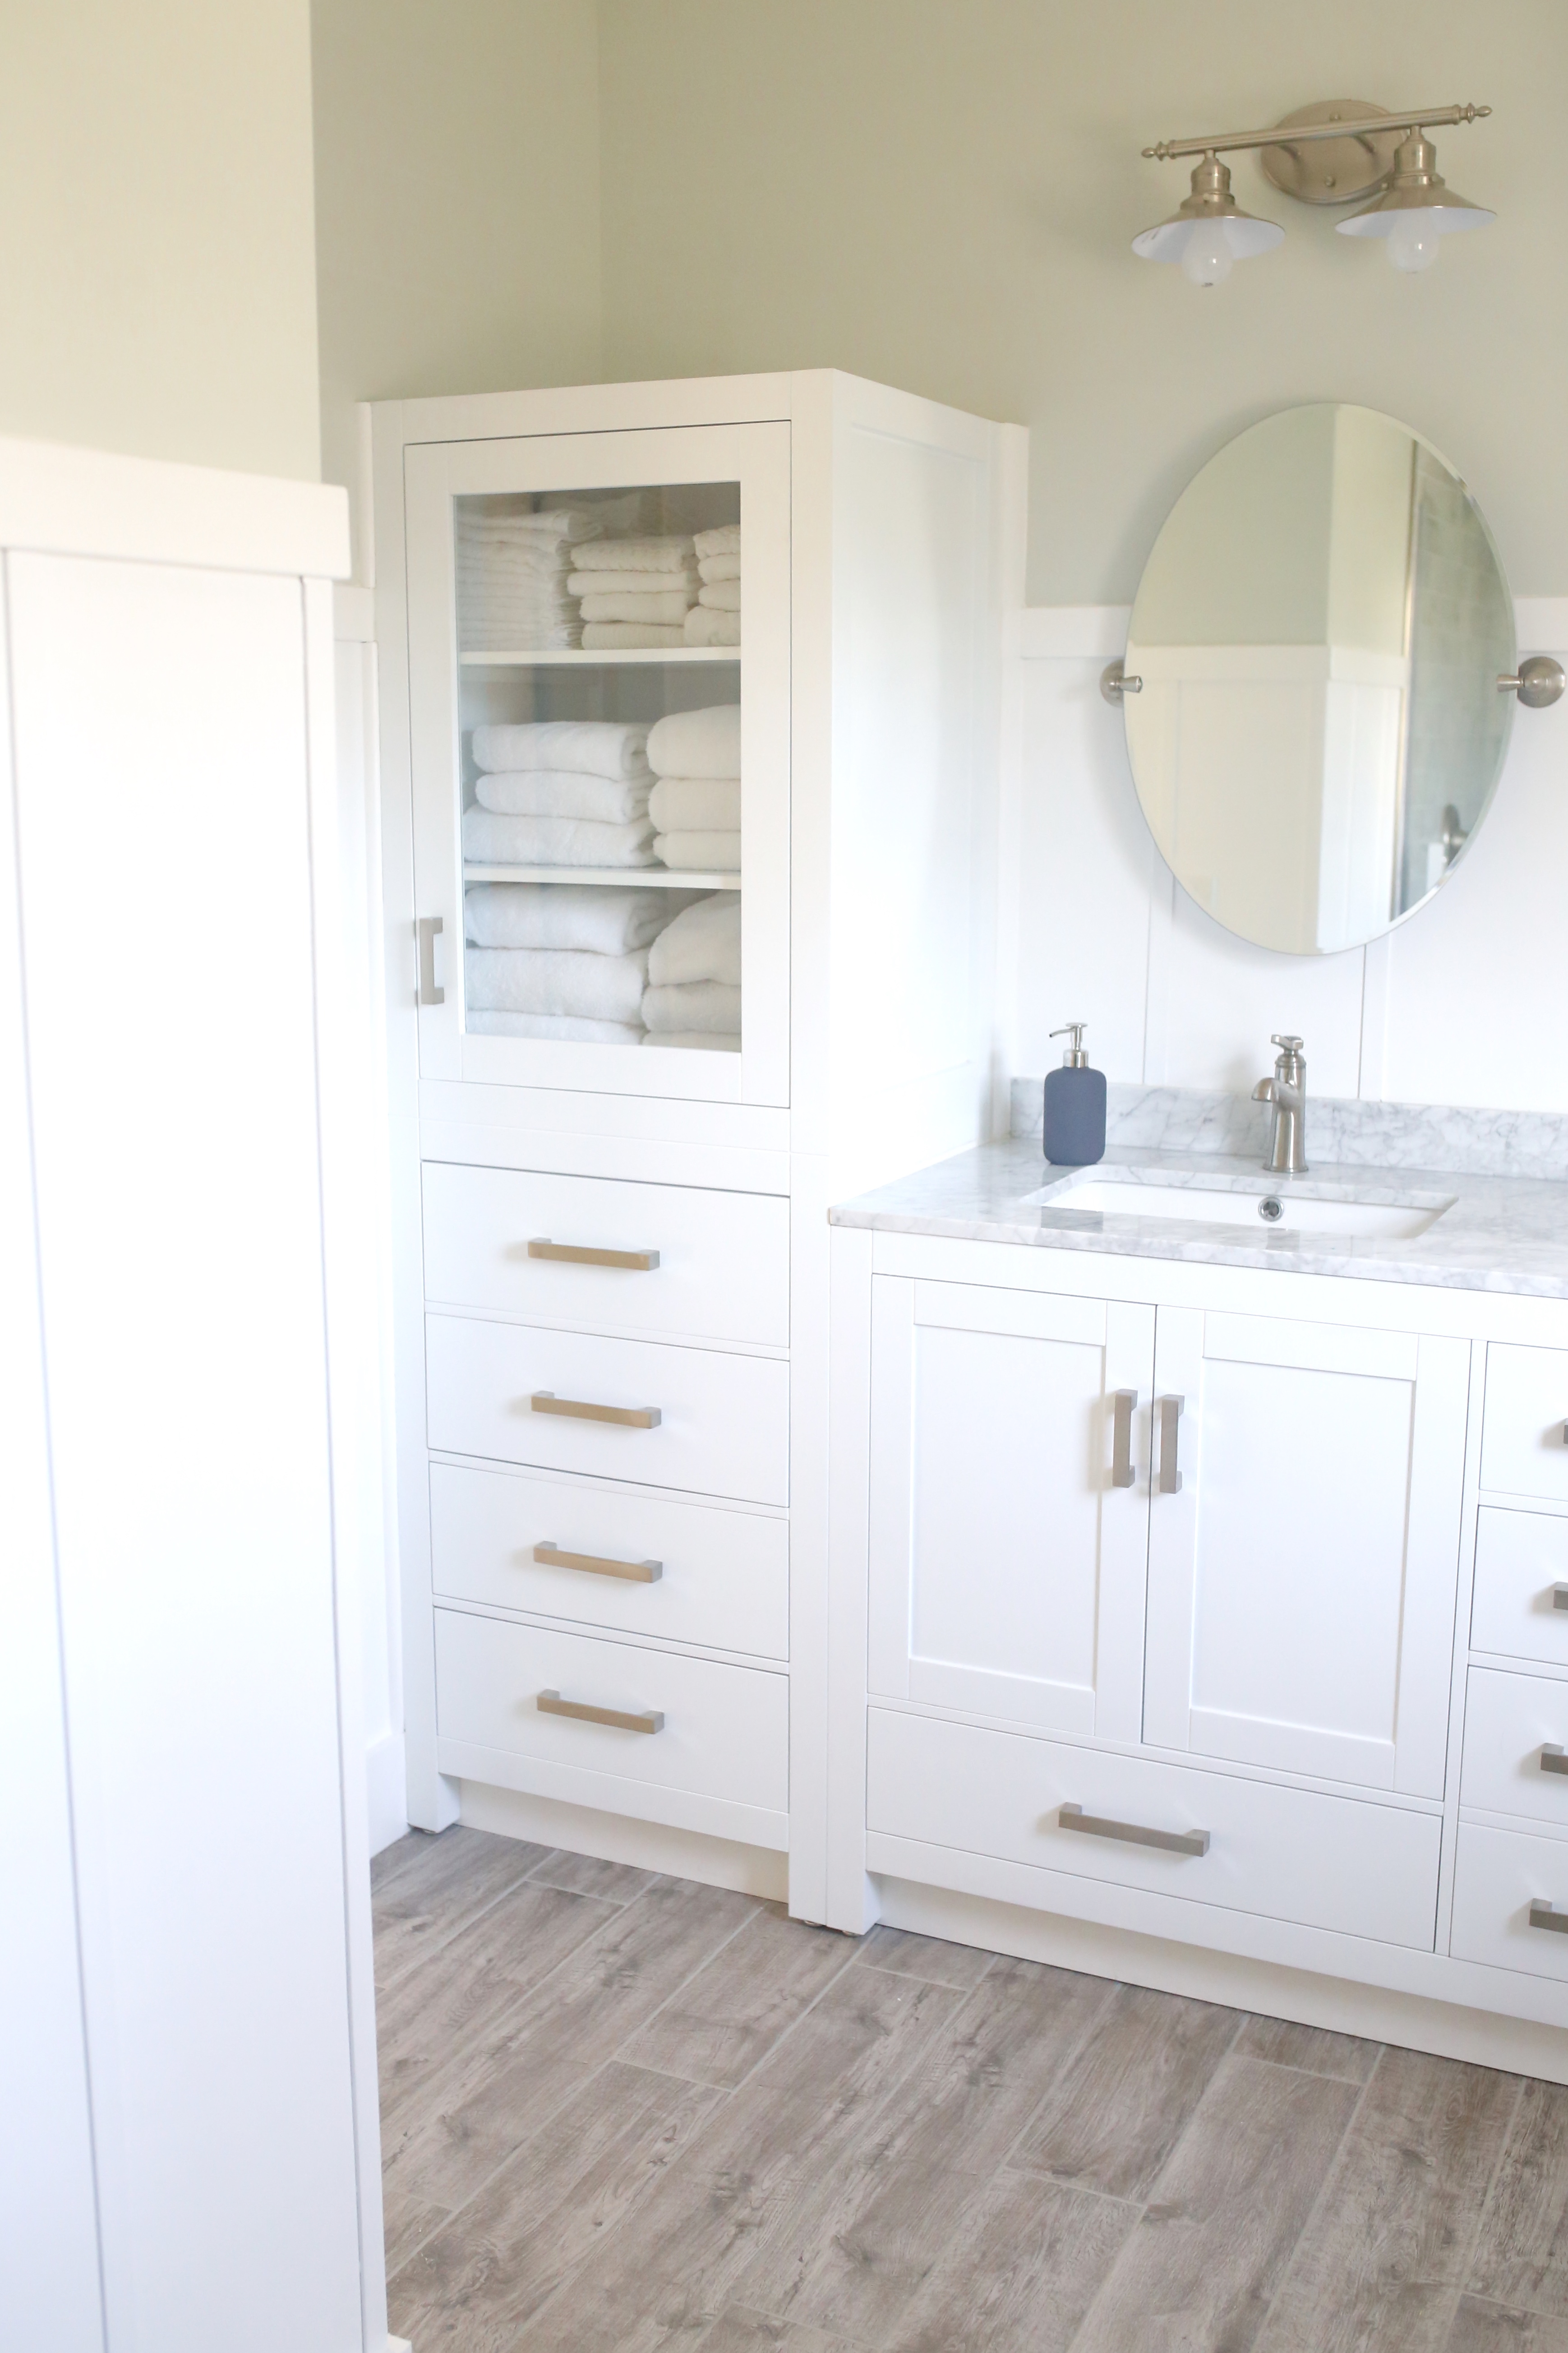
There is not much better than a stack of white towels. They are so easy to clean and go with any decor. I purchase them in bulk on Amazon.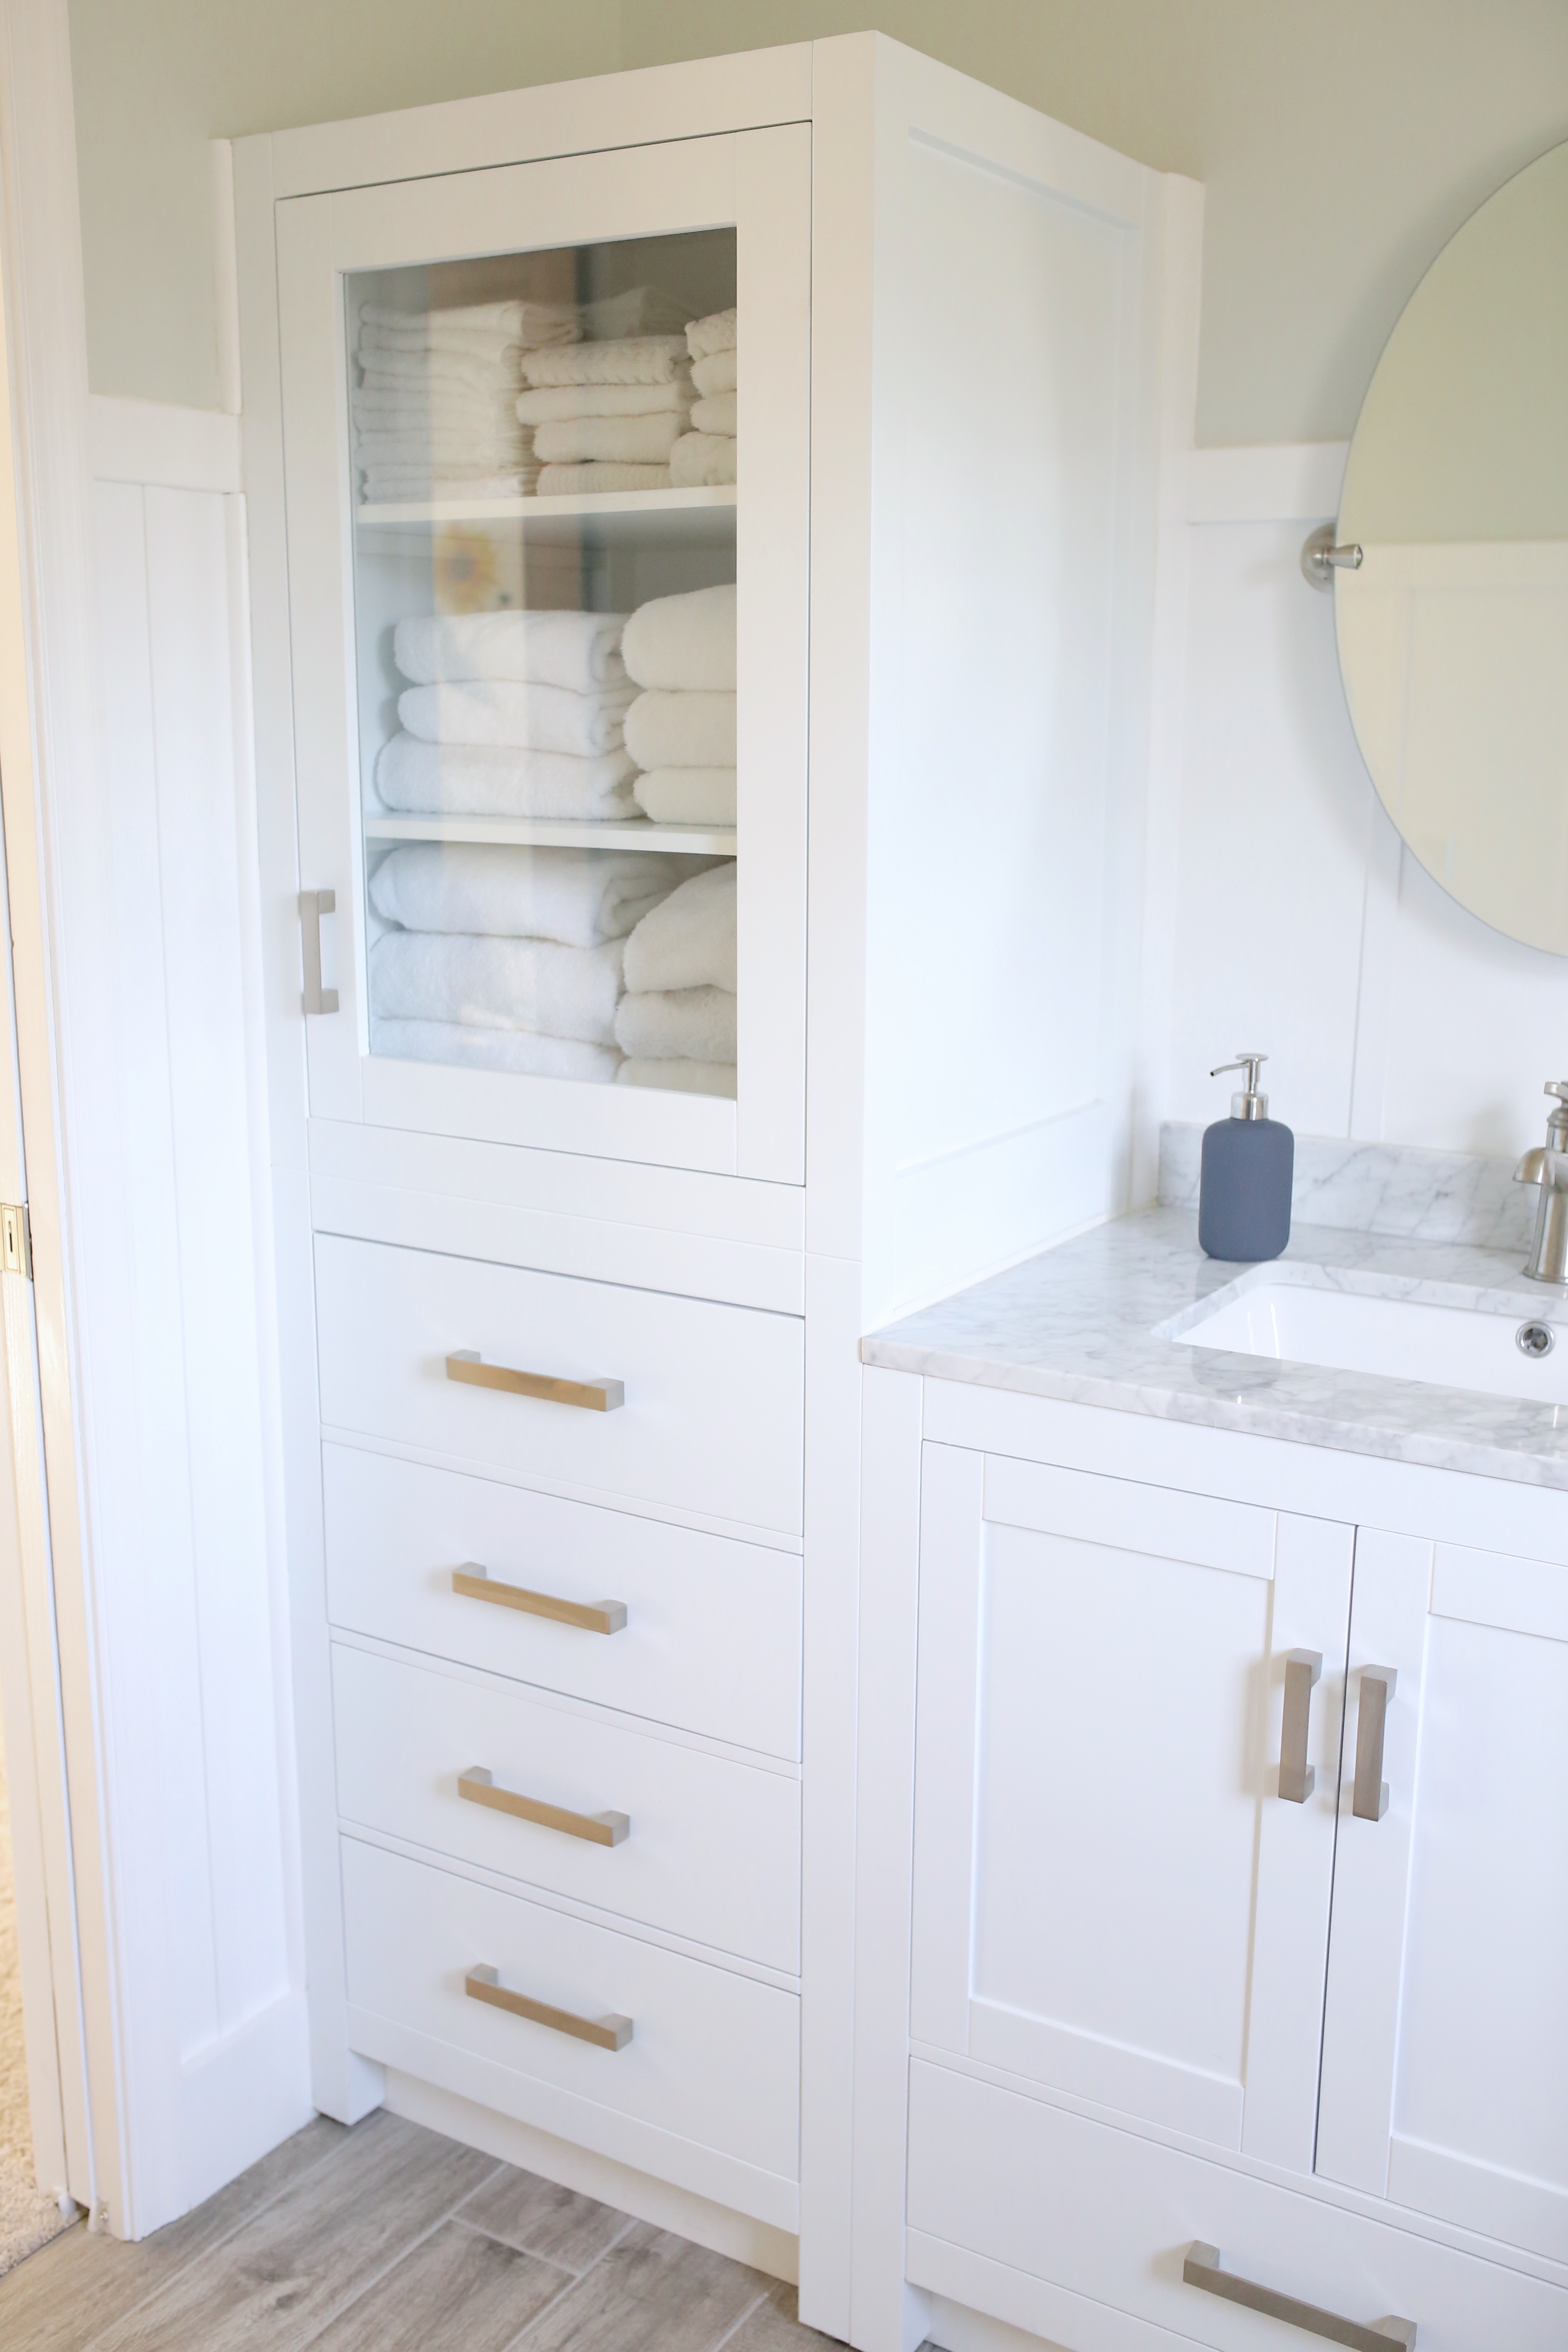
Now, obviously, sewing is what I do for a living (and designing the sewing patterns), but sometimes, it is worthwhile to pay someone else to sew for you. Originally, I had planned to sew my own faux roman shade. I have done it before in the kitchen and a few other rooms, so I had the experience, but time was so limited. I found the perfect shop on Etsy called J’aime Interiors. The quality is perfection and her turnaround time was great. I picked the fabric and style I wanted and had it delivered in a few weeks. I highly recommend! 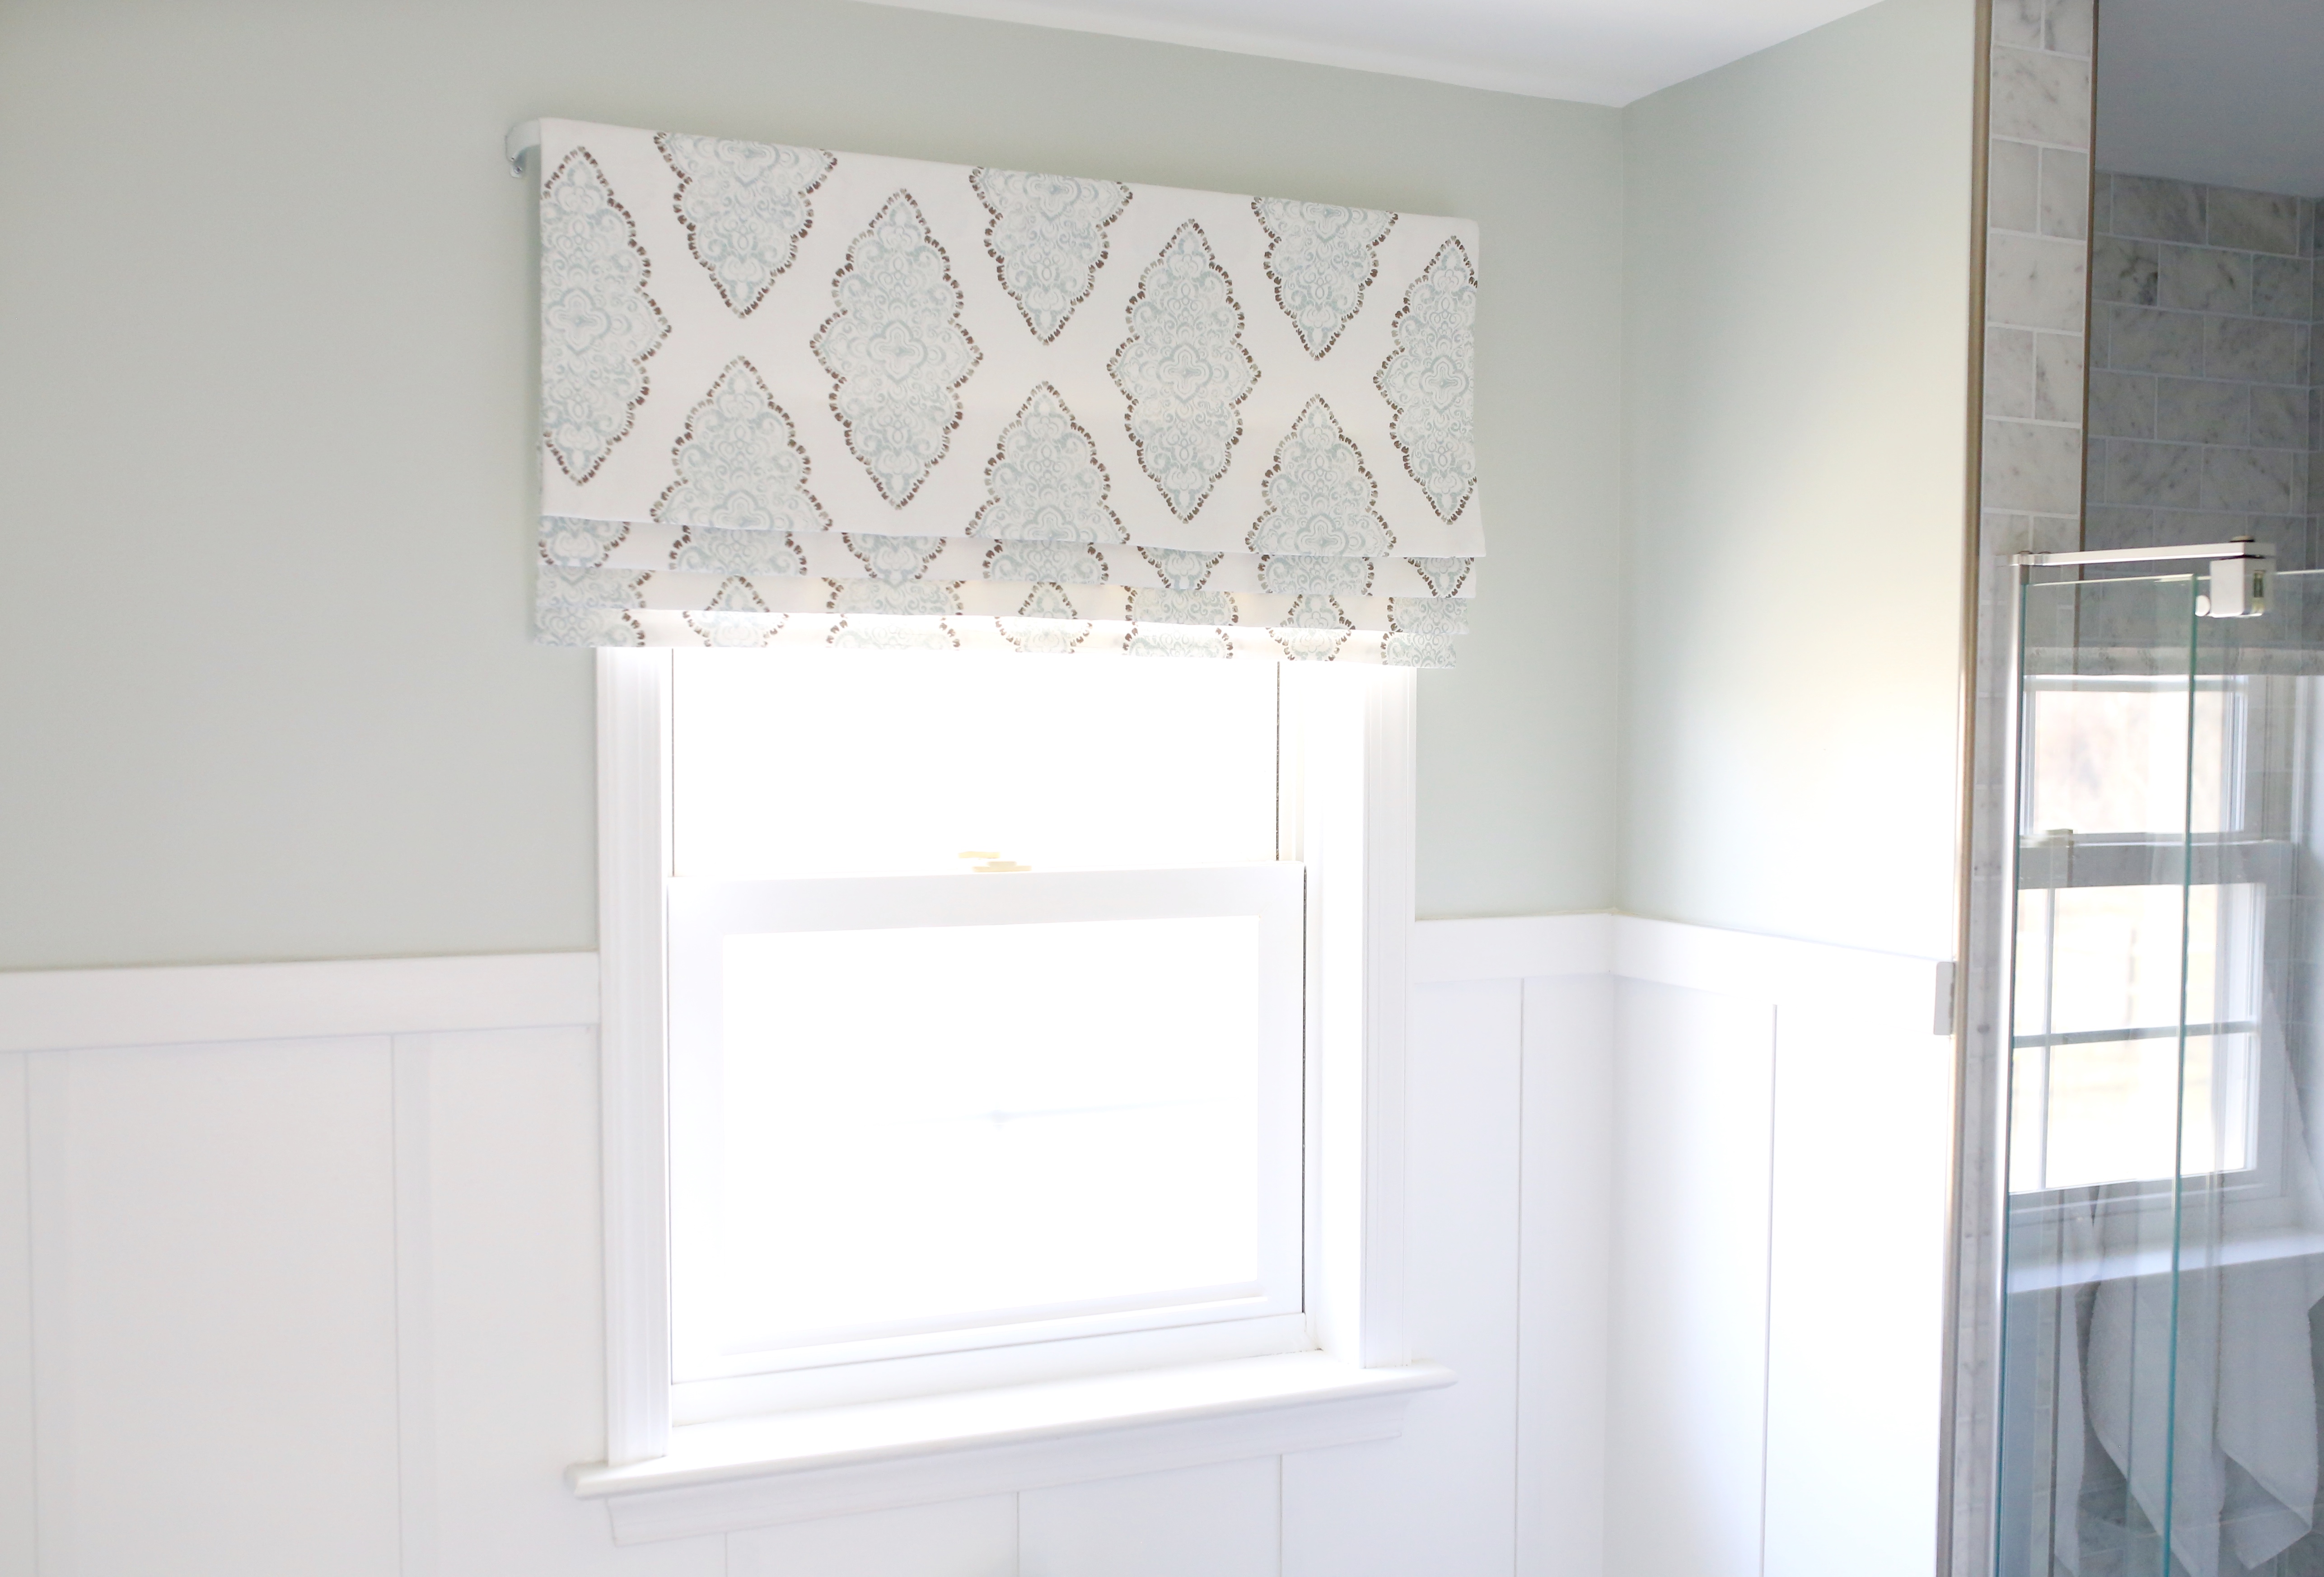
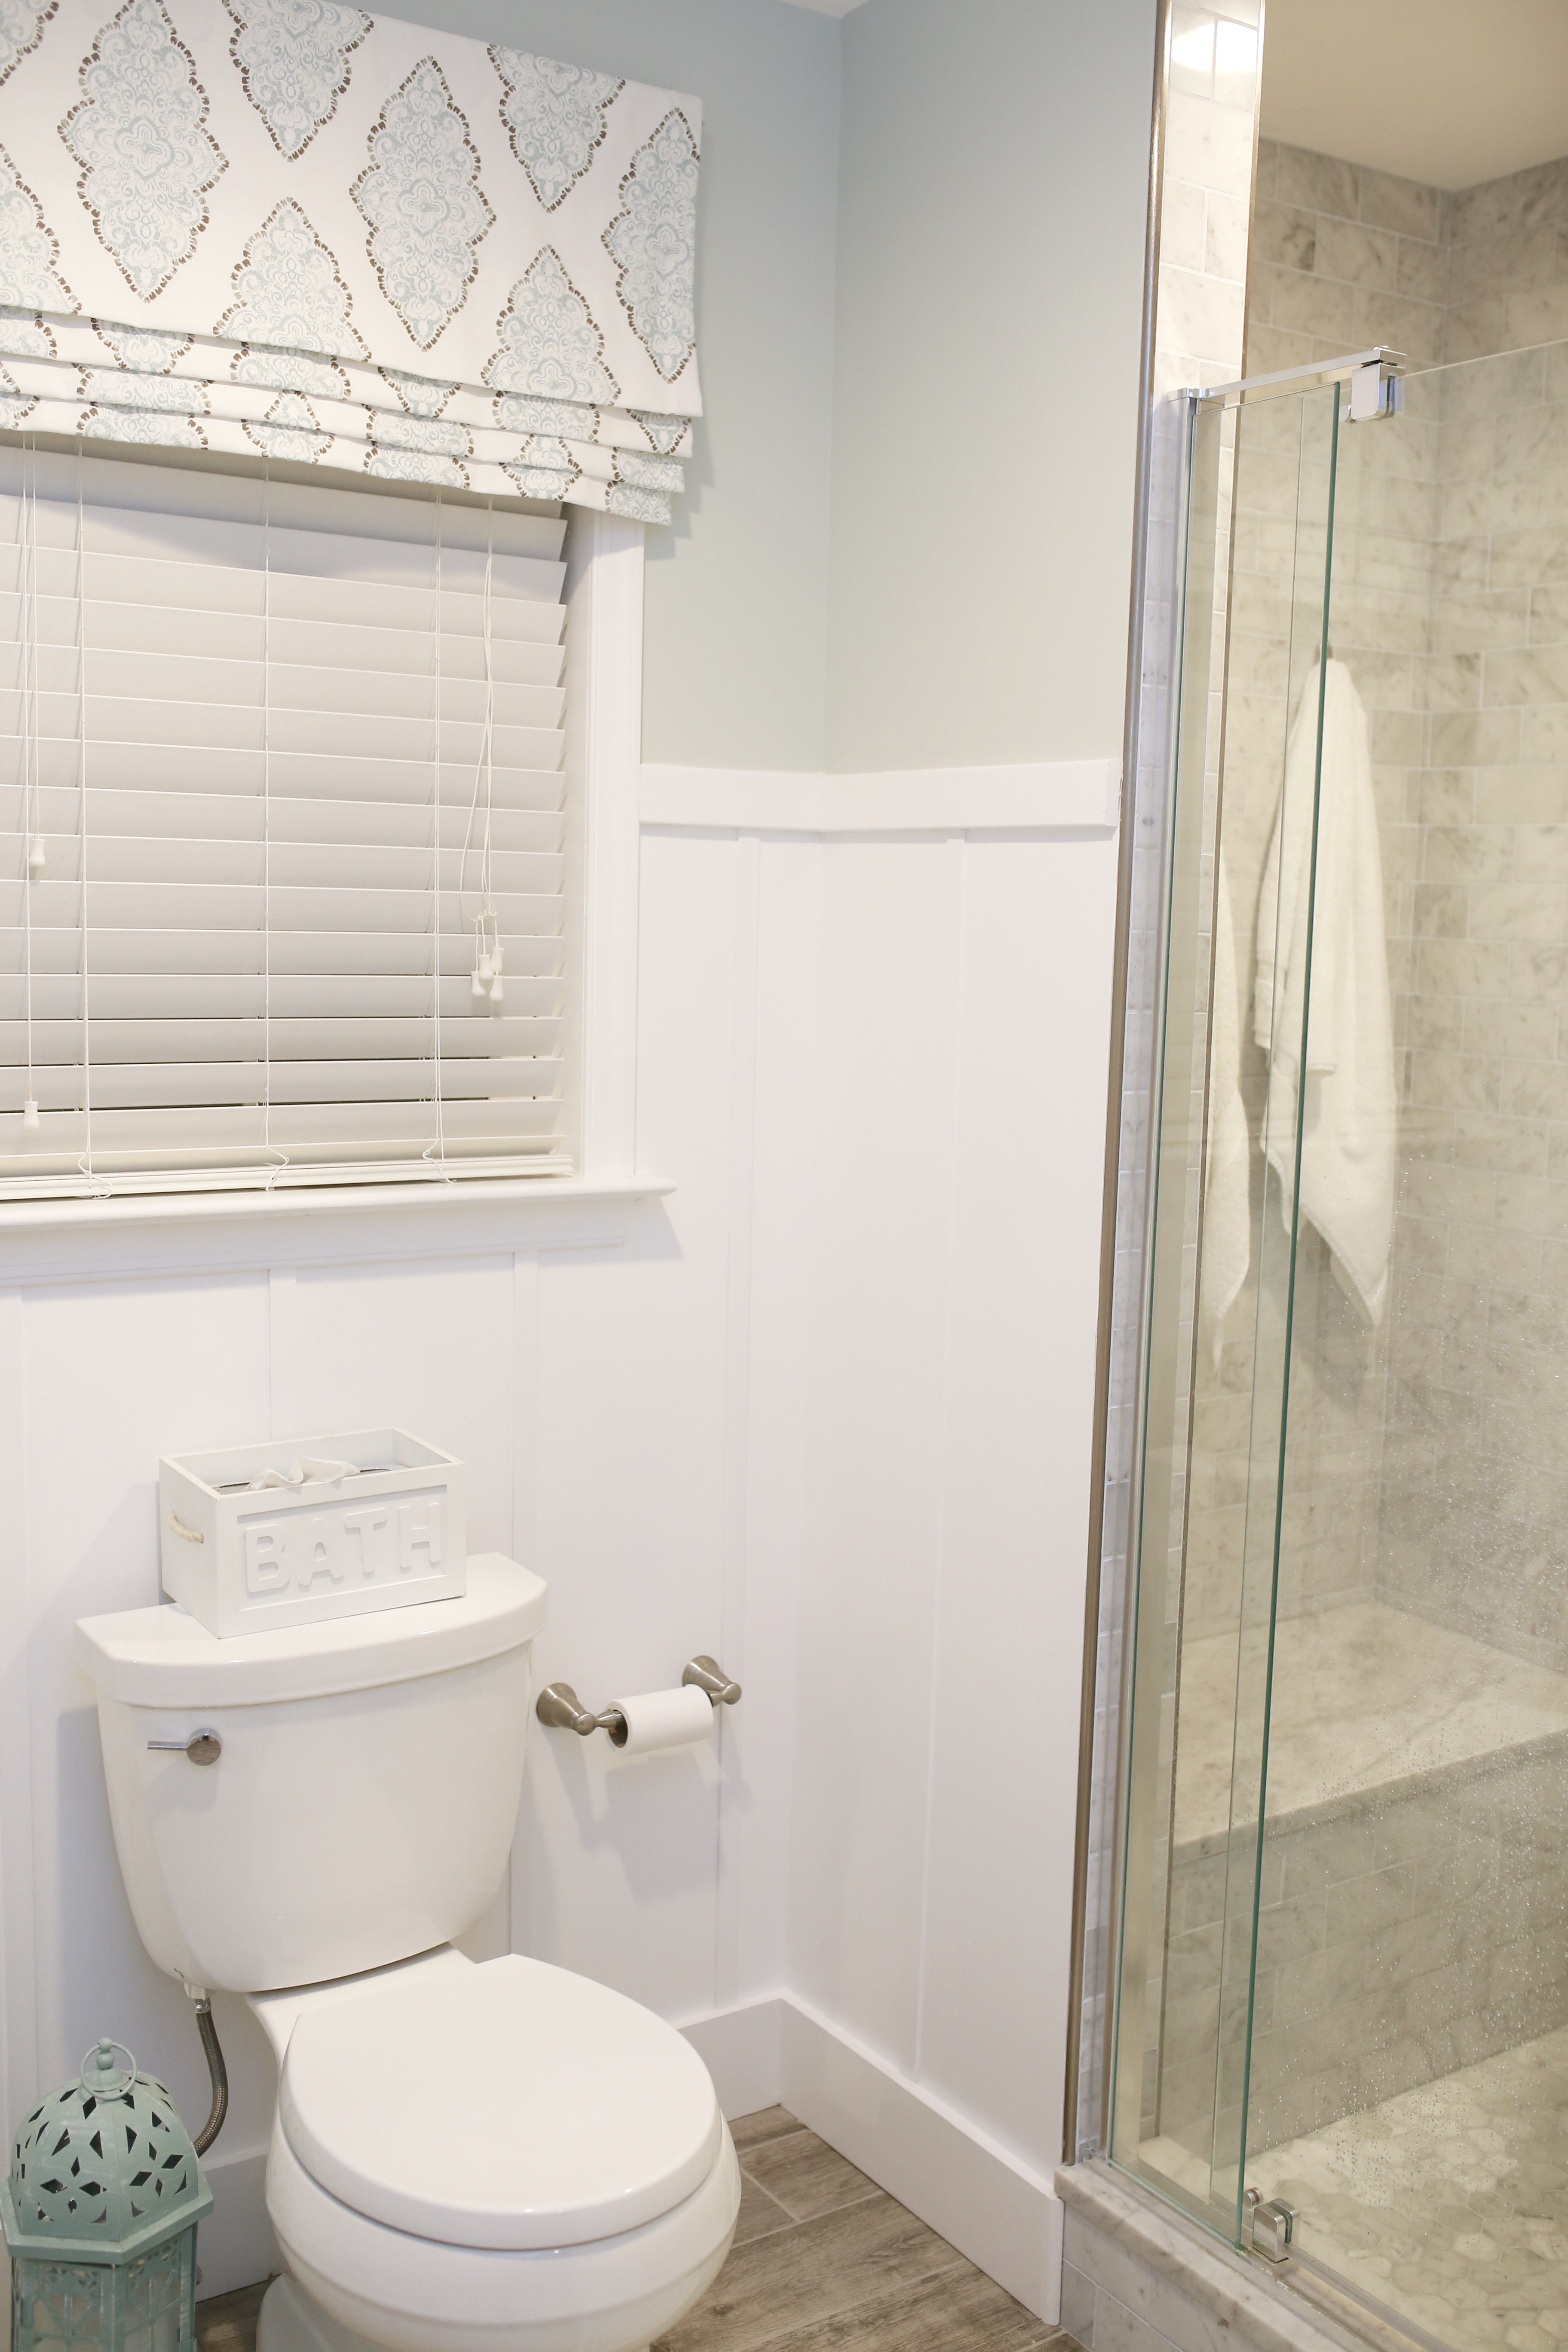
When we first moved into the house 7 years ago, I remember thinking how much I couldn’t stand the oversized soaking tub. It was so huge and such a water waster, we never once used it. Honestly, we used it to store laundry. I couldn’t wait to remove it and reveal all of that wasted square footage. What better than to turn that area into a beautiful shower, complete with a marble bench? In fact, removing it actually gave us more floor space!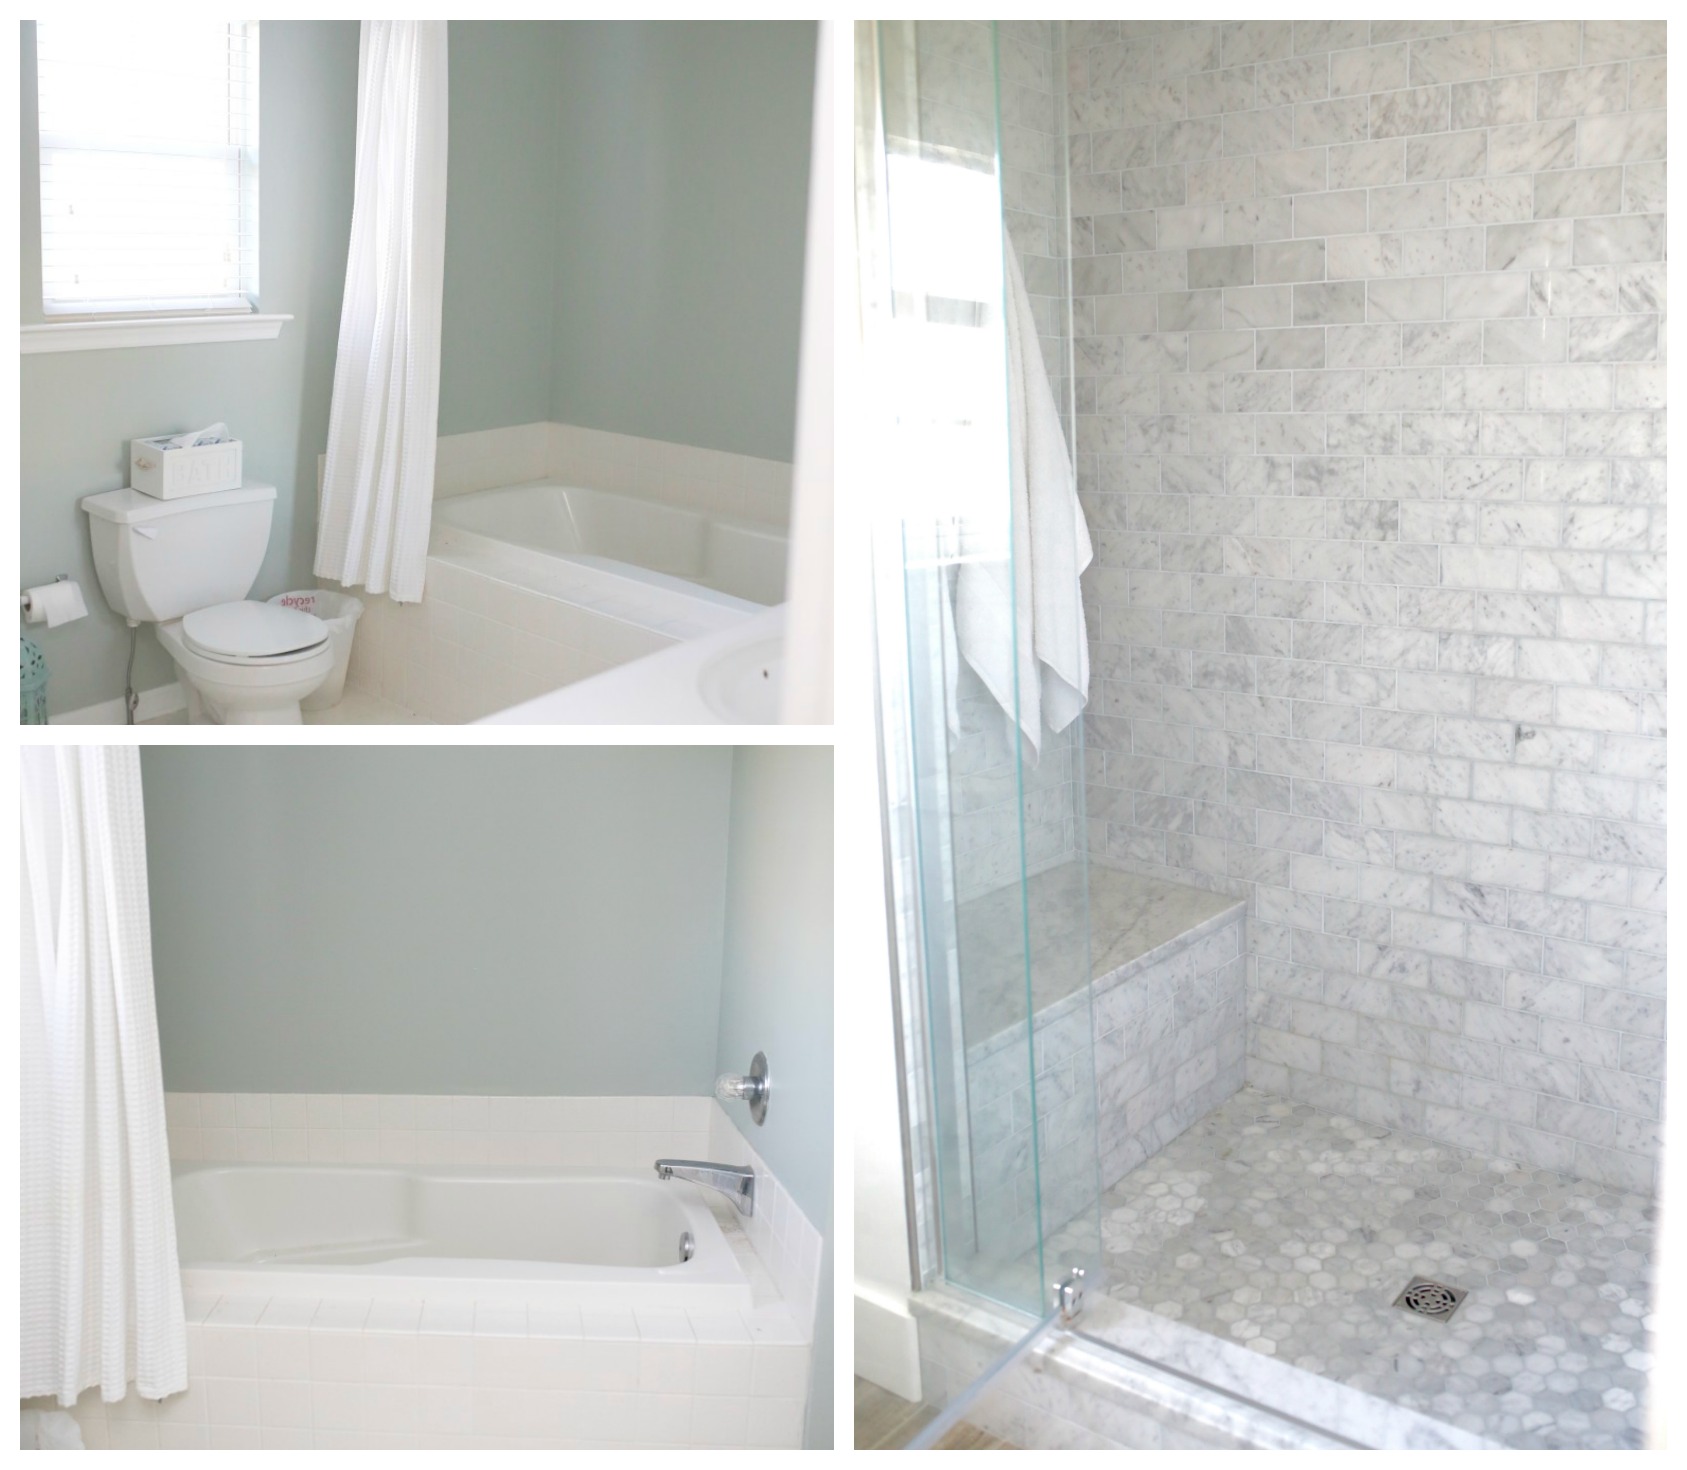
Even though it significantly cost more than some other choices, I knew I wanted a marble shower from floor to ceiling with a seamless shower door.
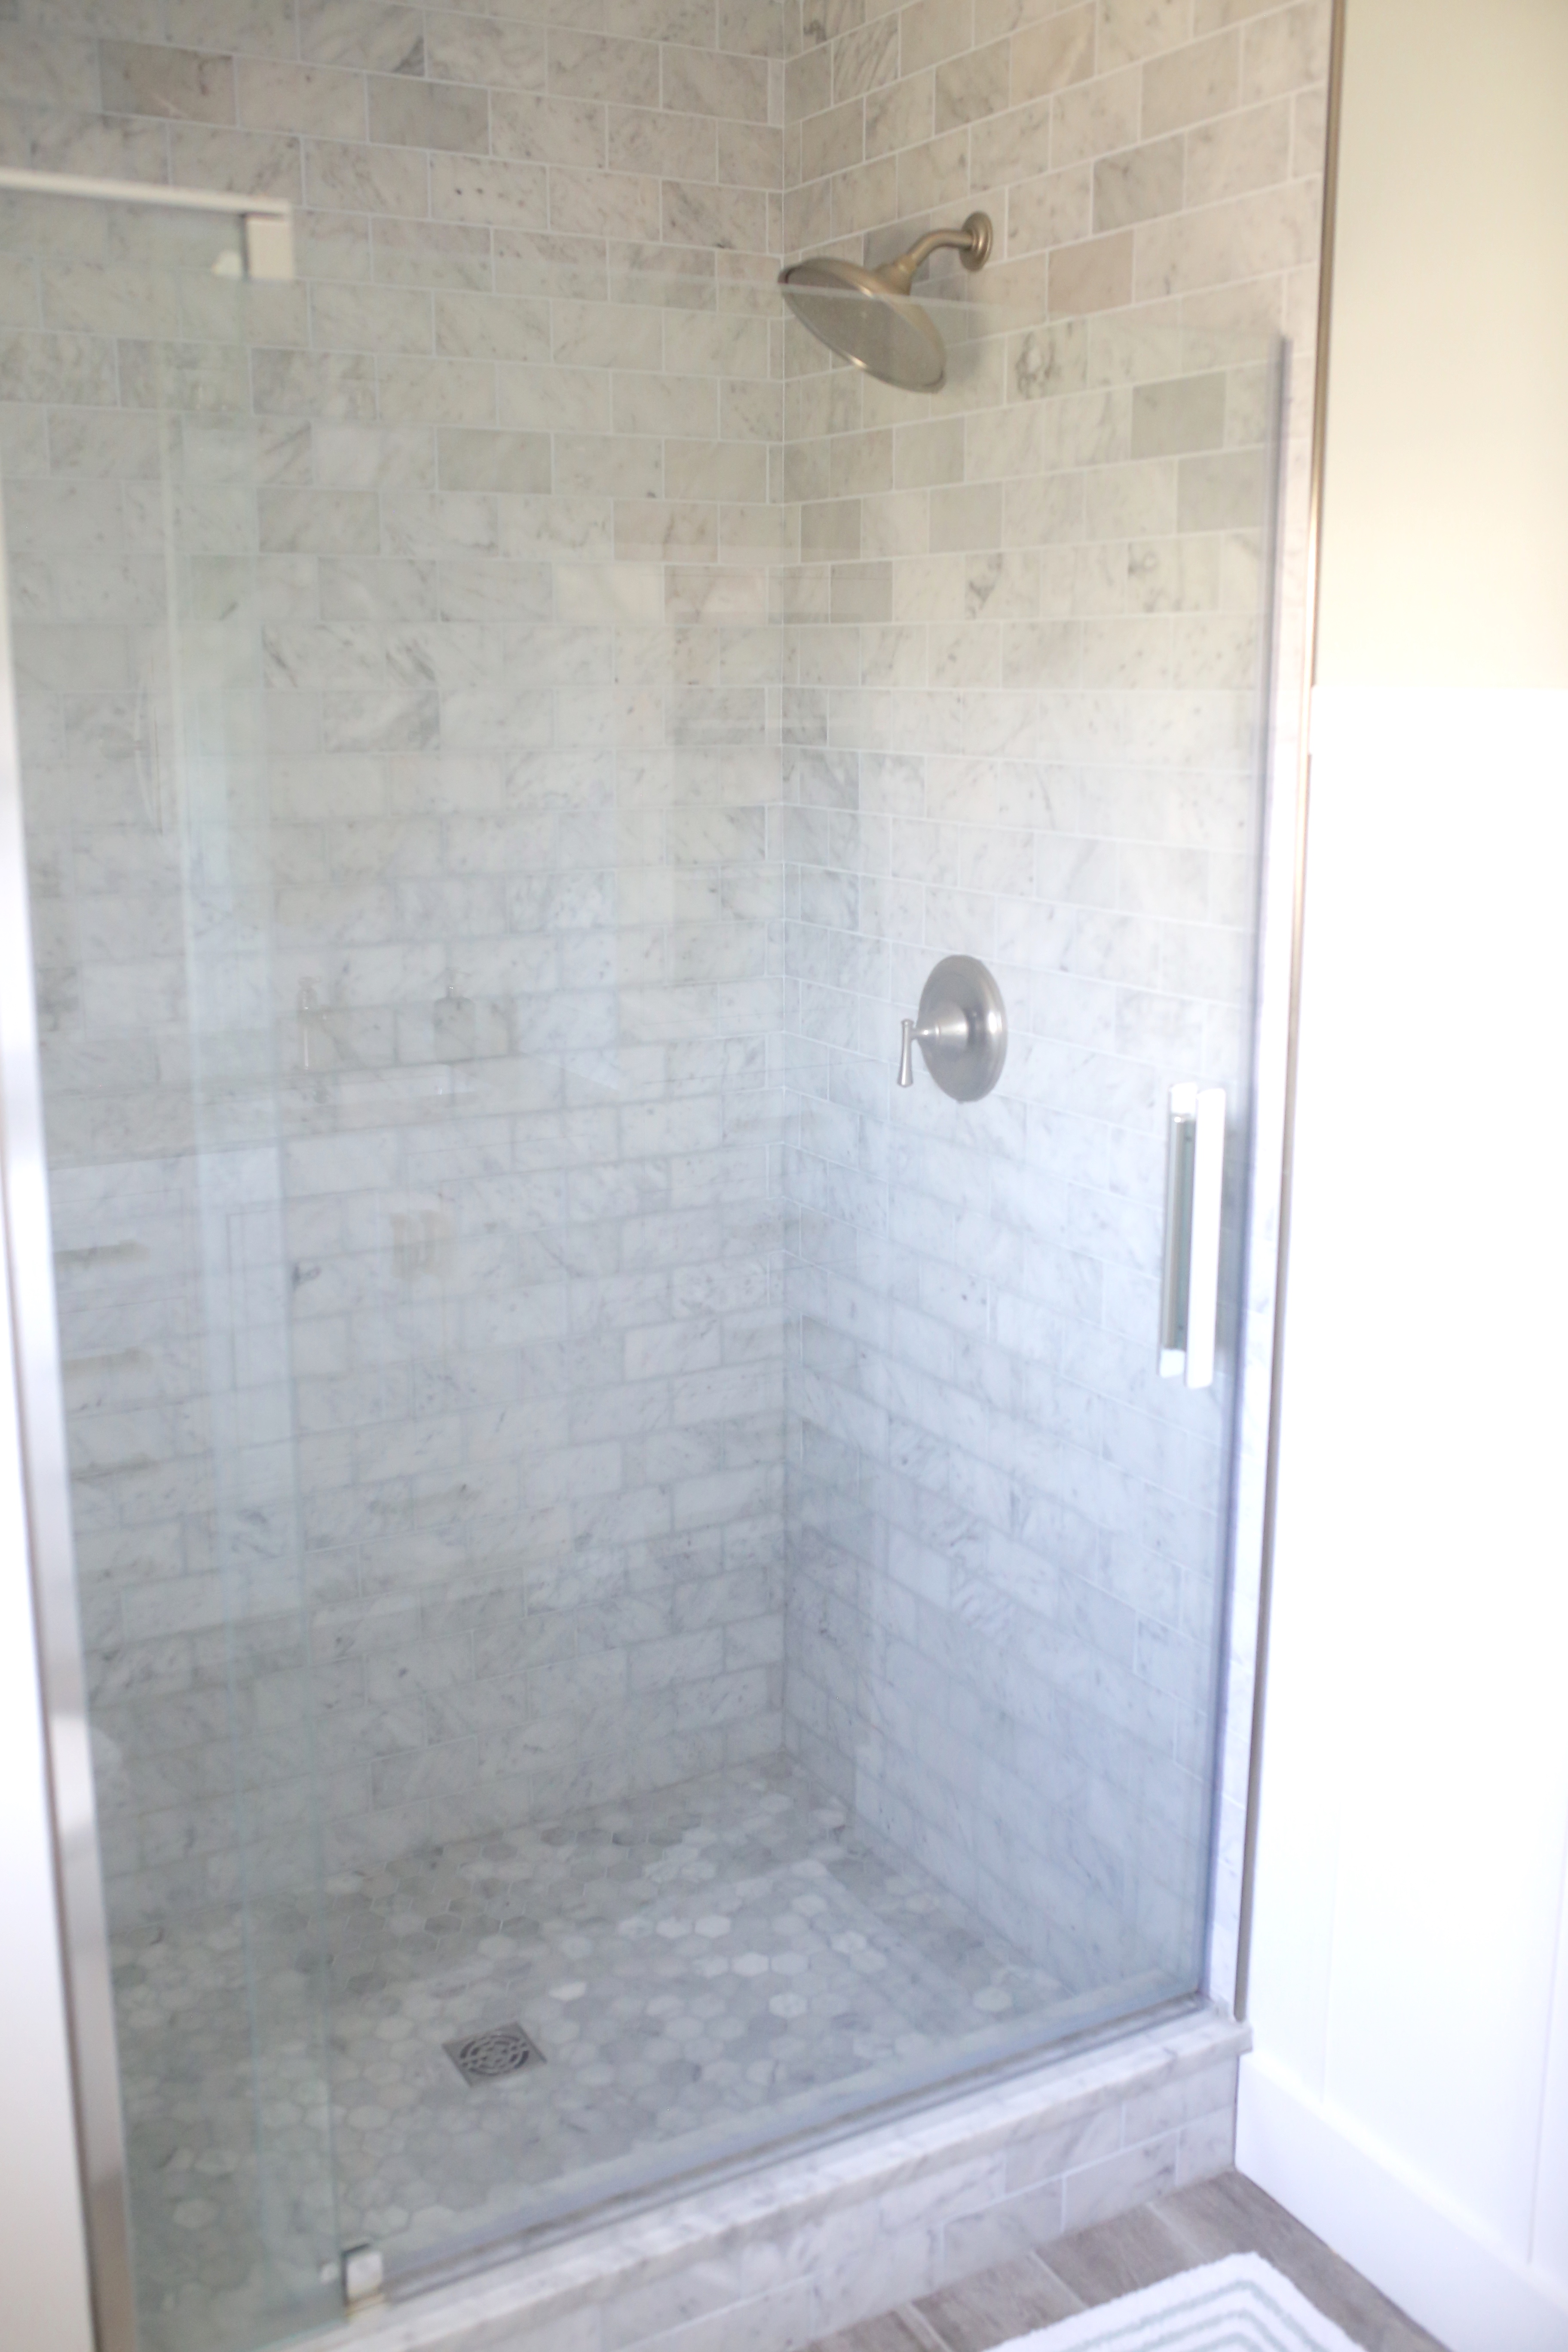
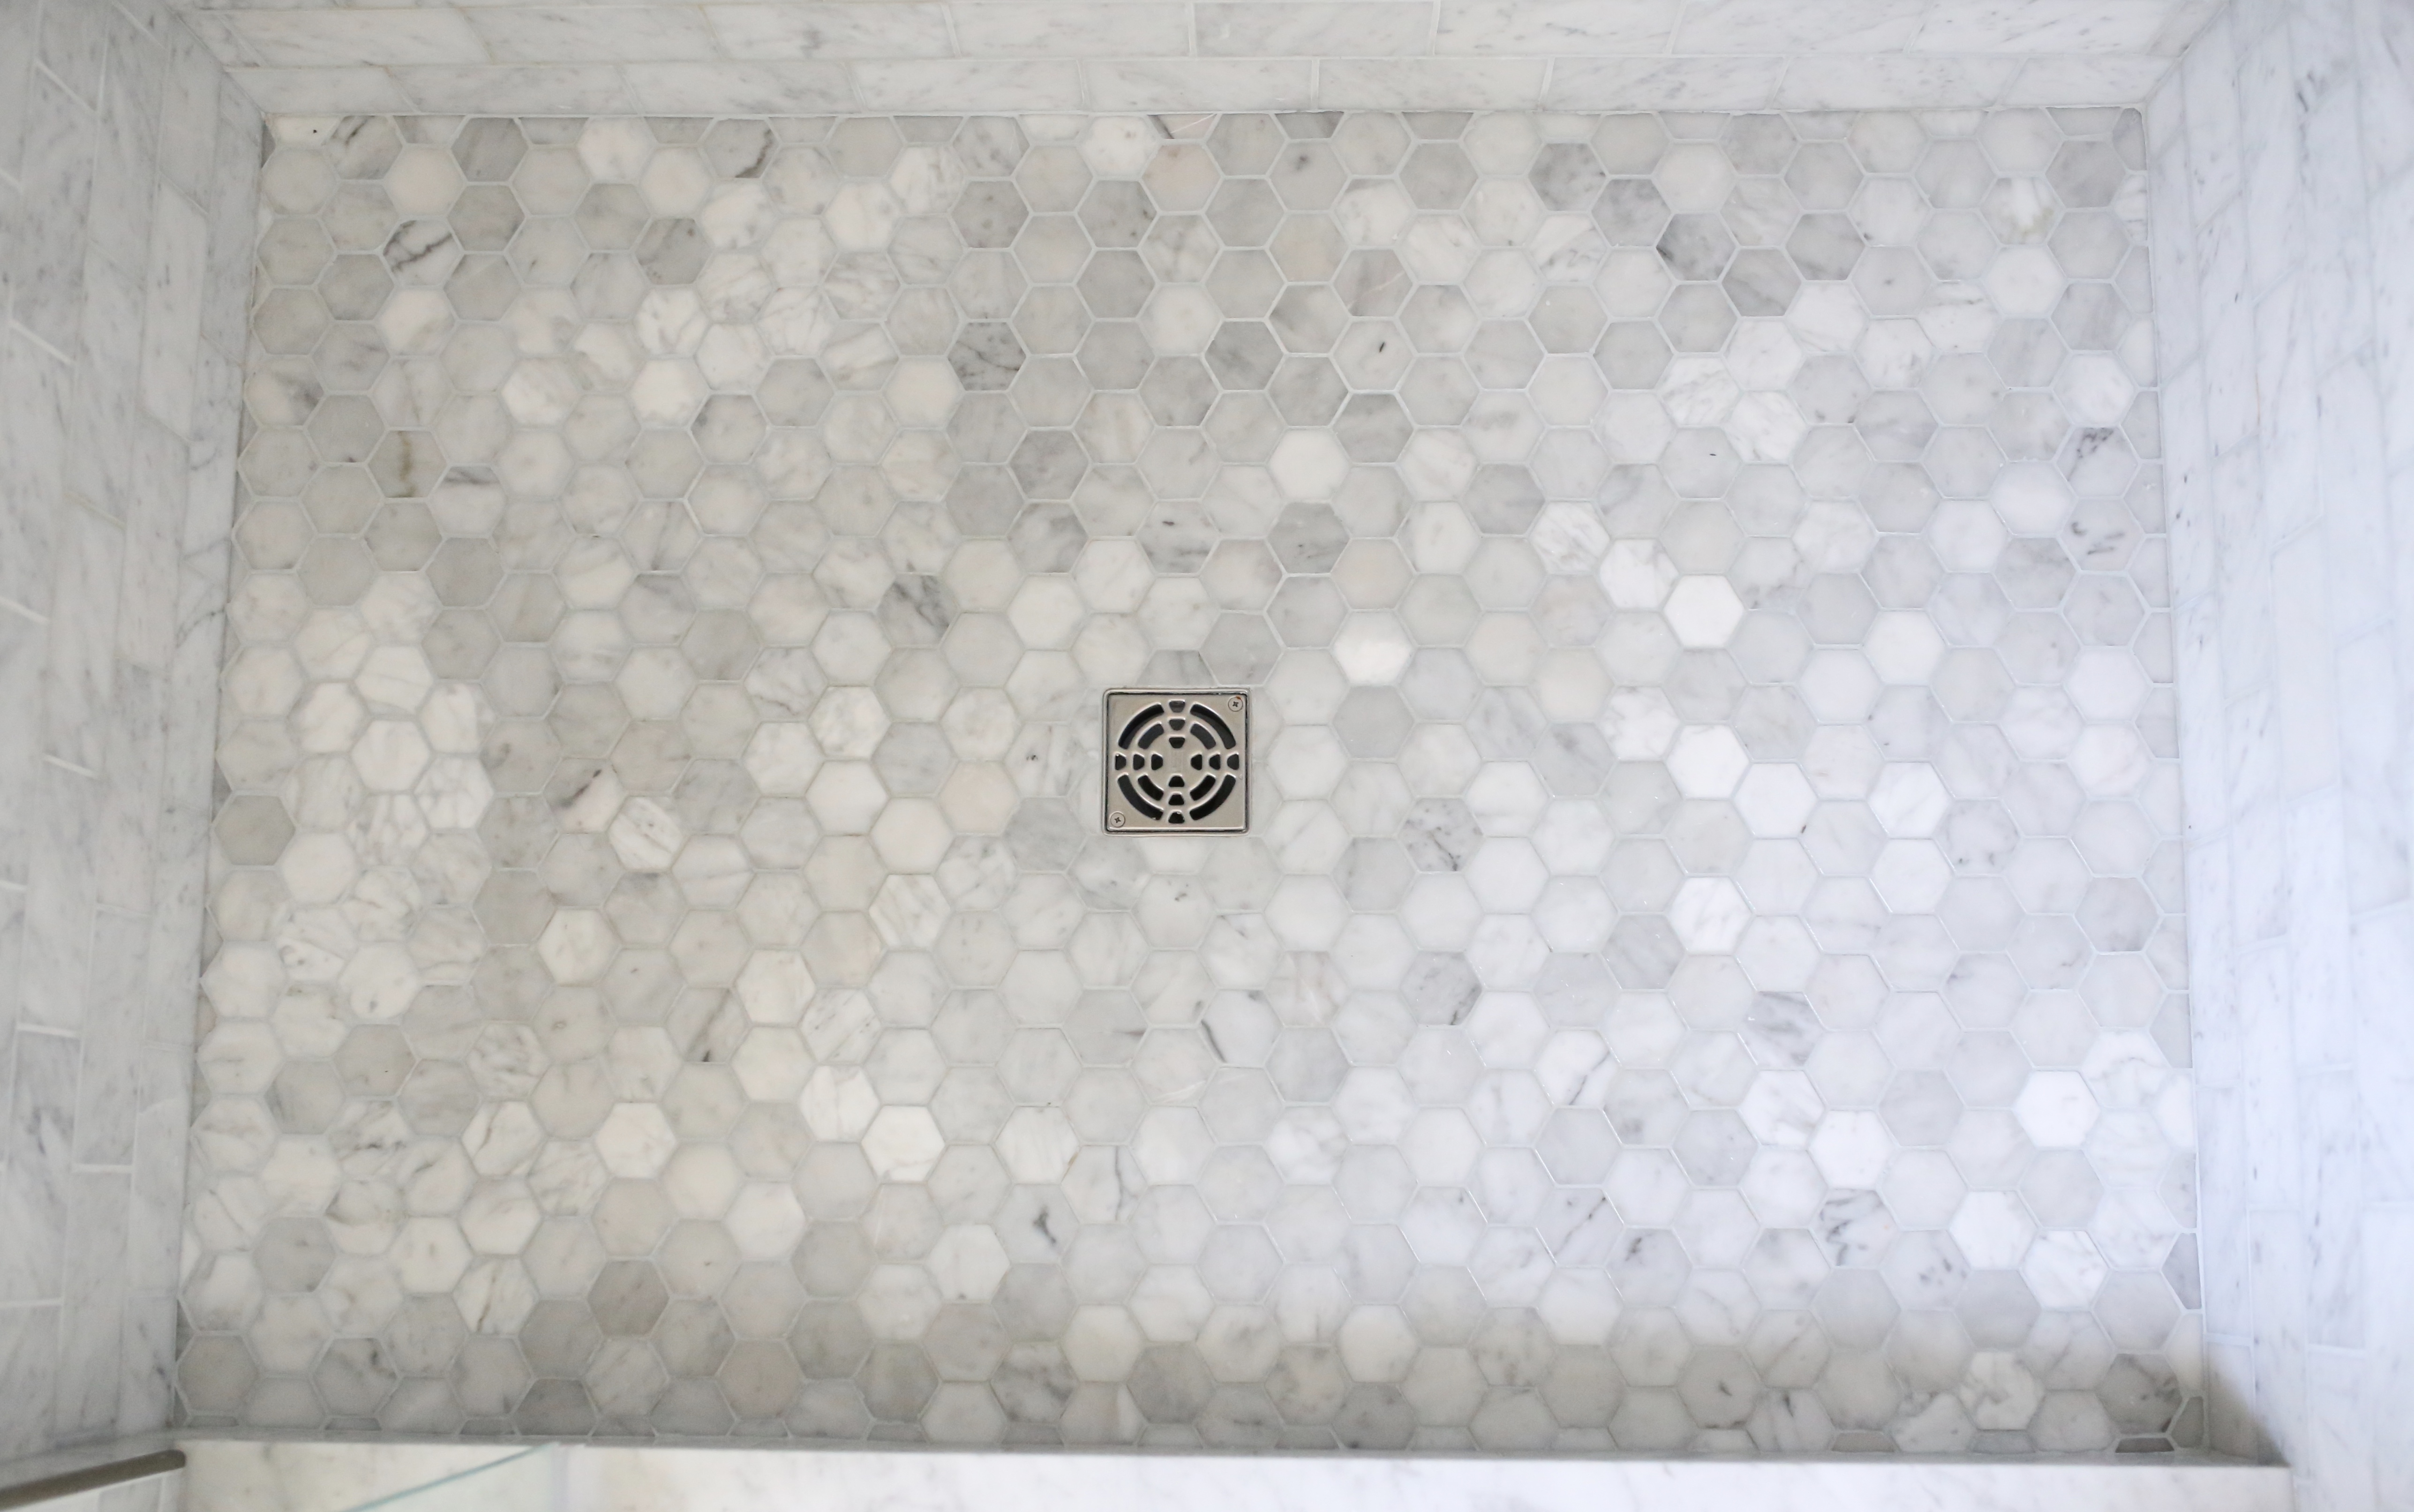
The tile is all imported and we purchased from a local tile store. We chose the carrara marble subway tile for the walls and the front of the bench and then hexagonal carrara for the floor. We had to purchase a custom sized marble slab for the bench,which ties it all together. It is so timeless.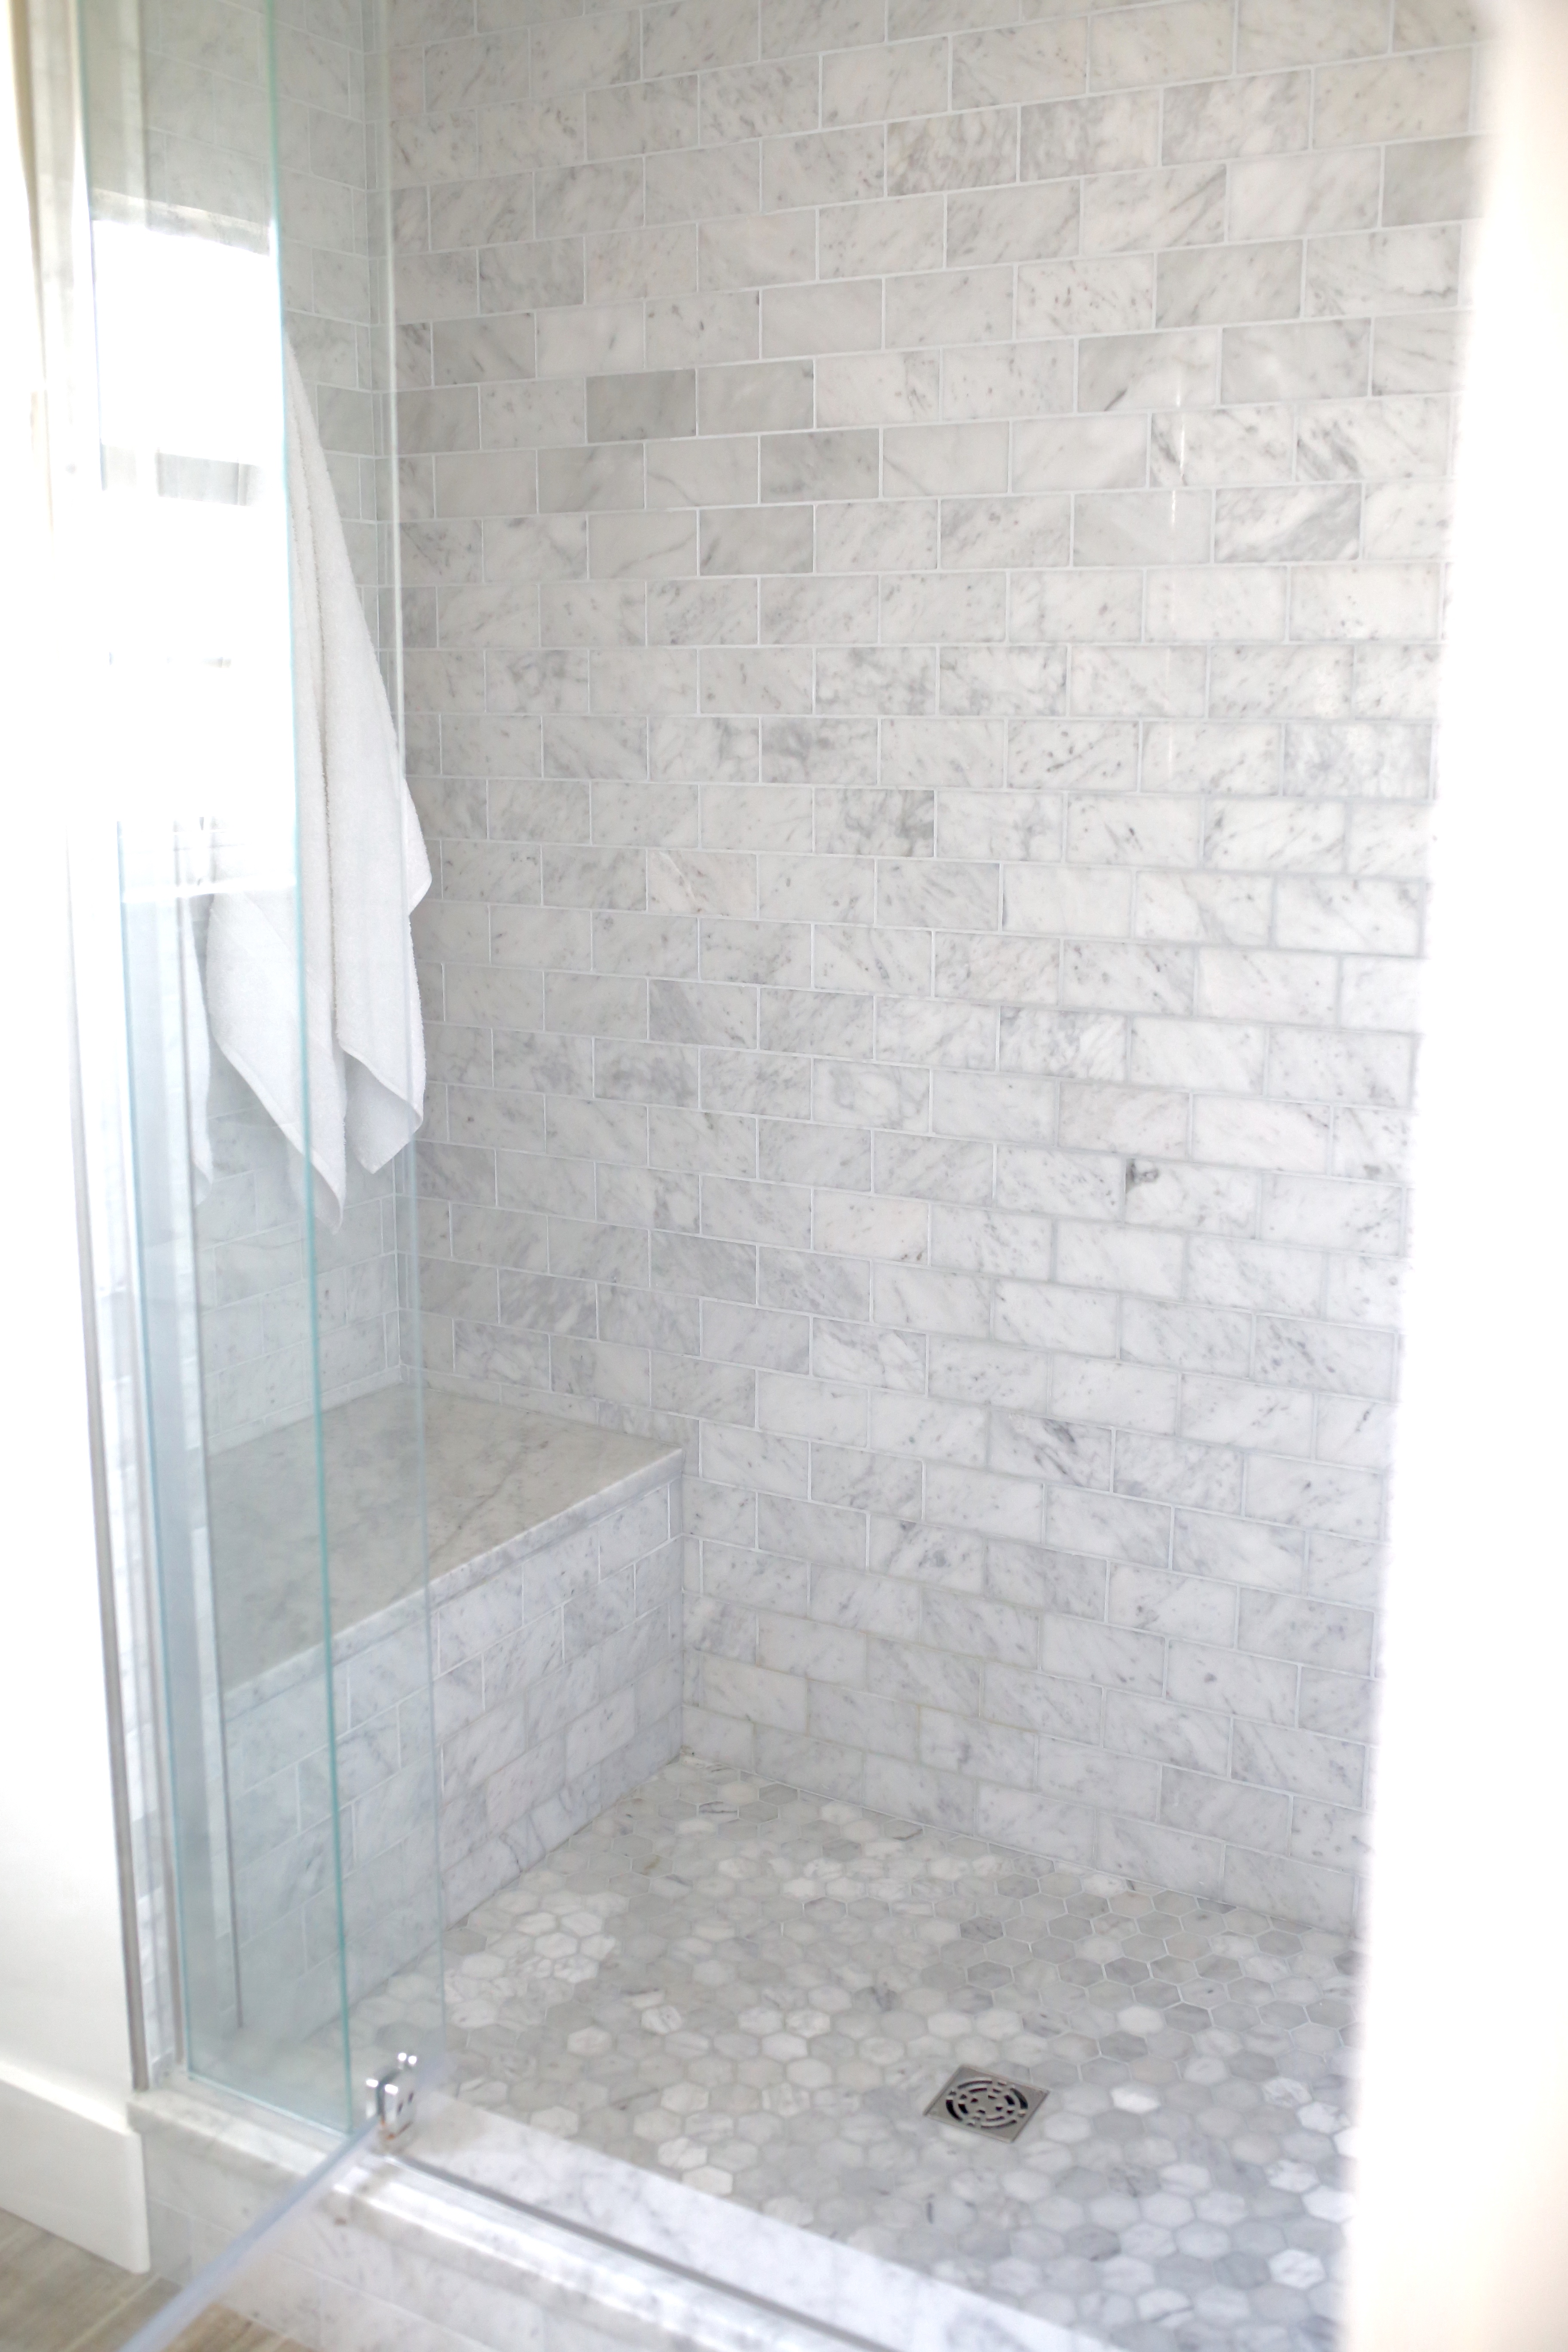
The floor of the shower is just amazing. I am SO glad I went with my vision.
Isn’t the bench just awesome?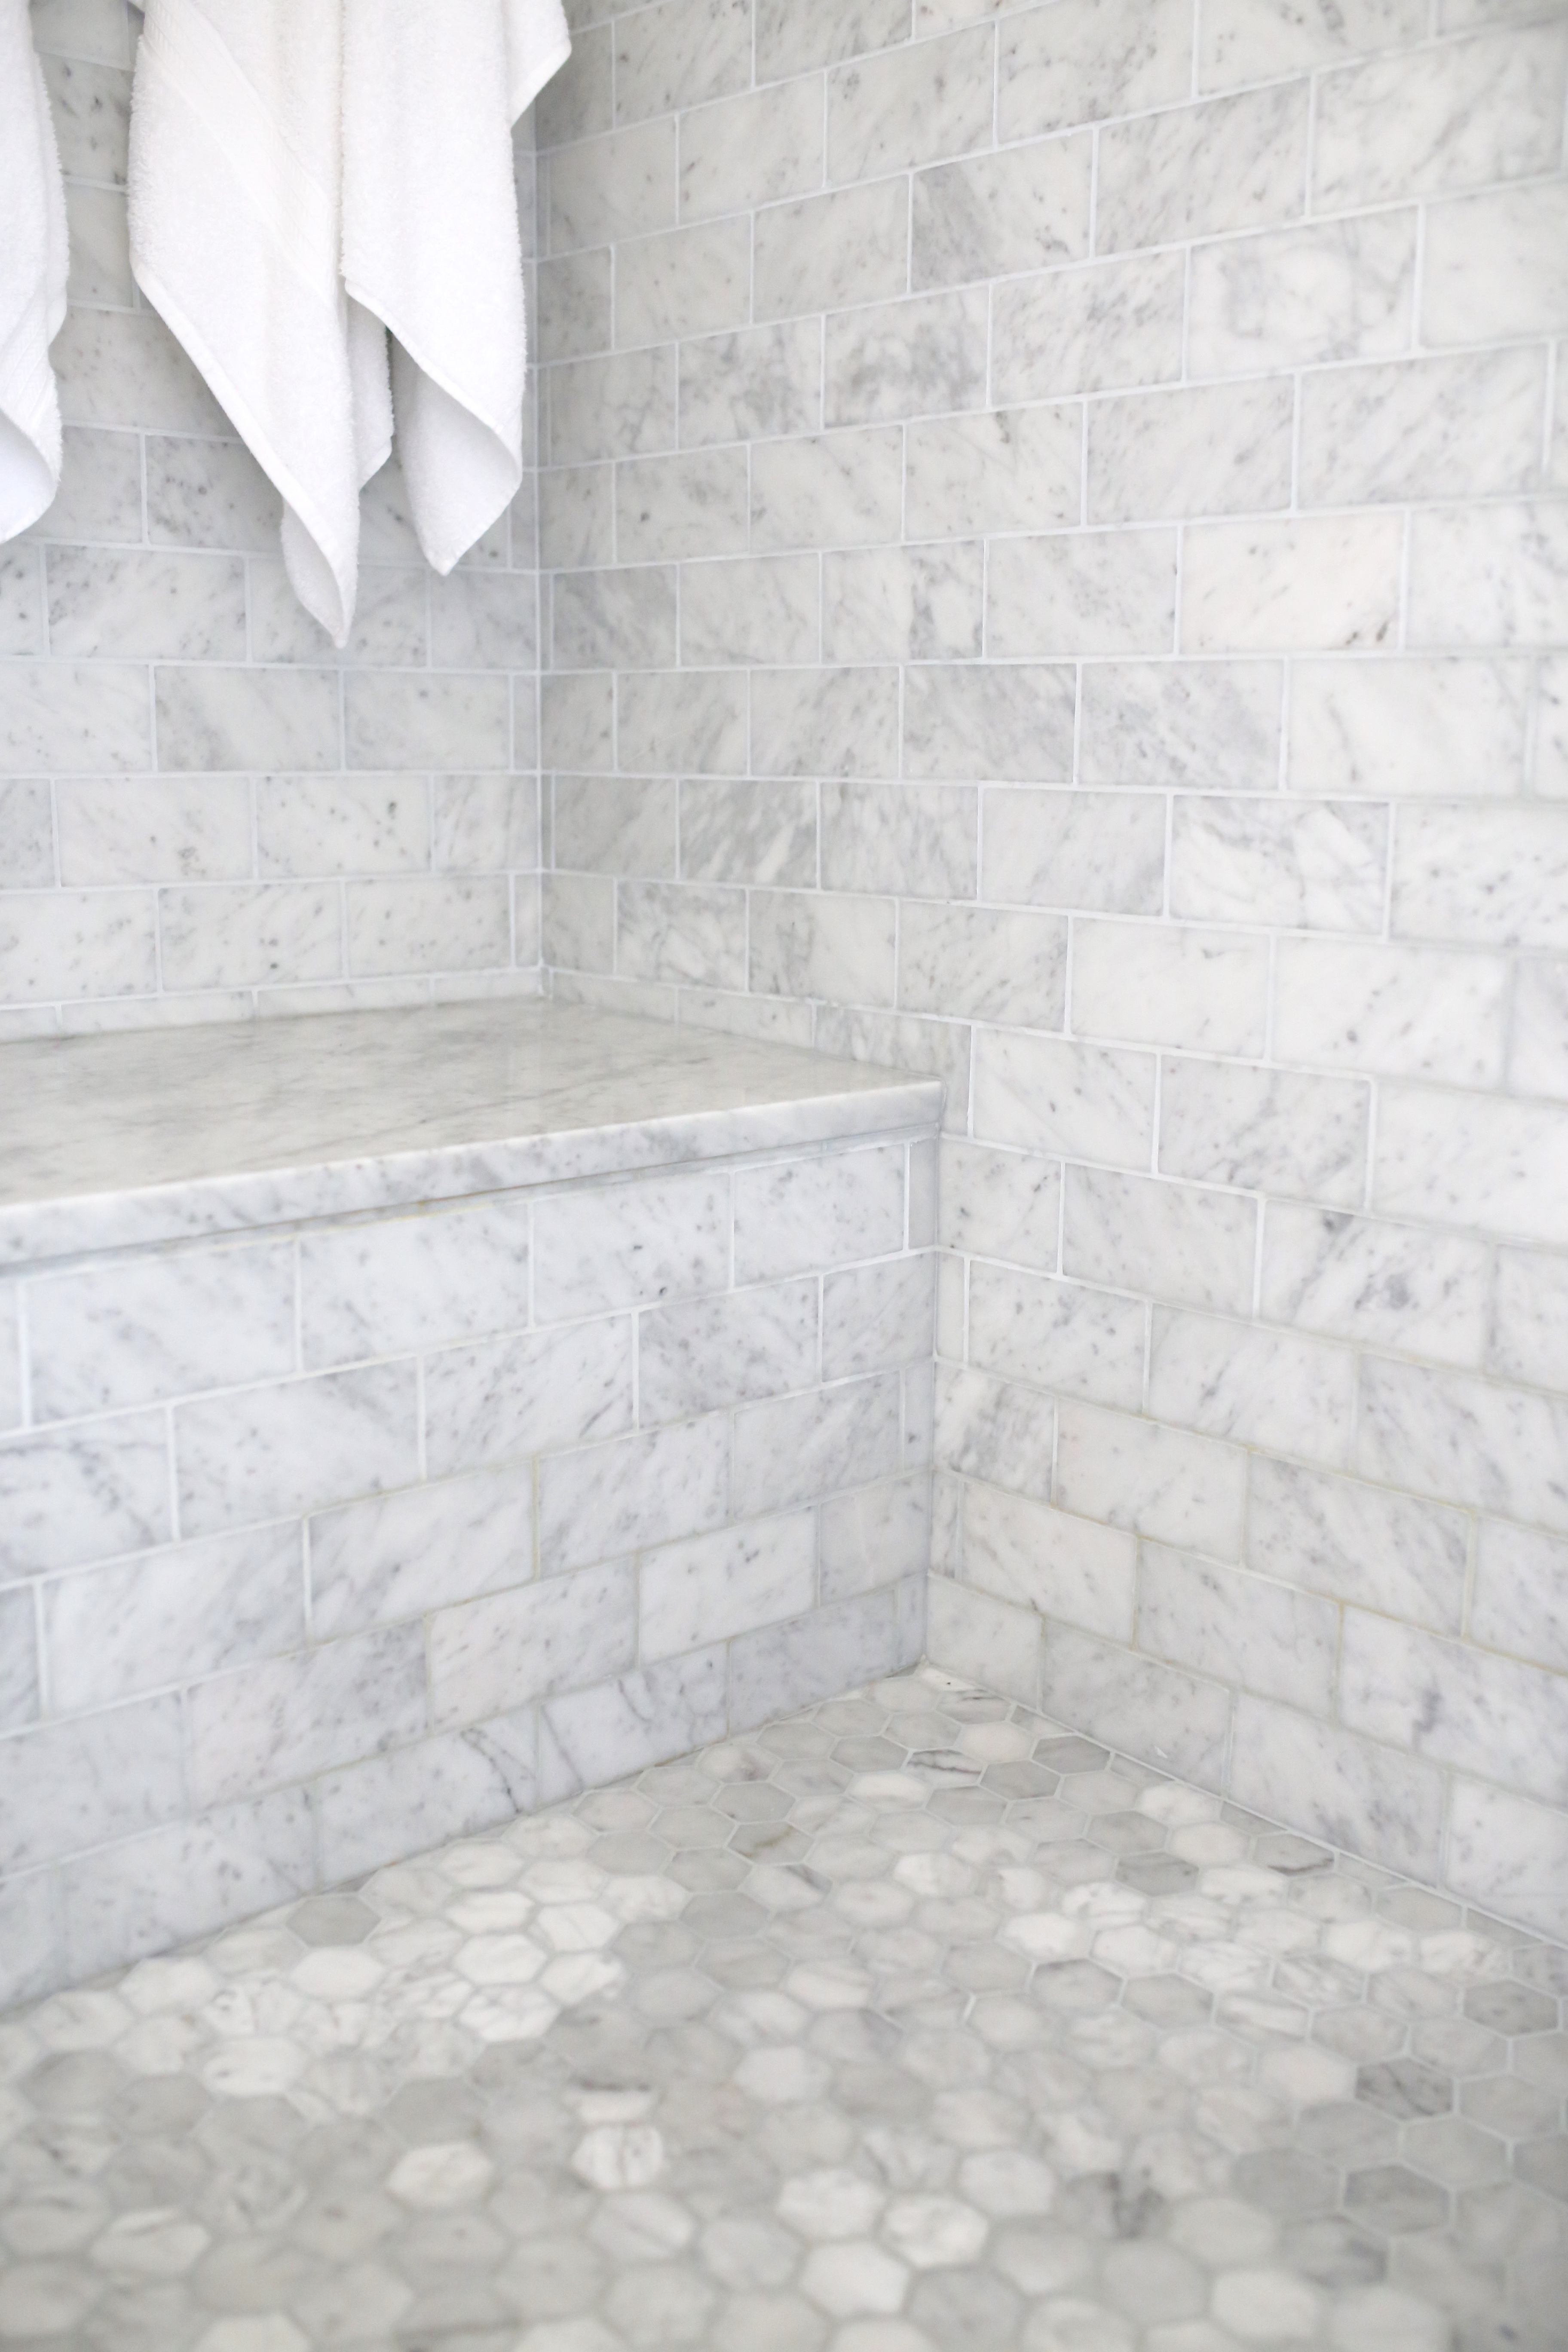
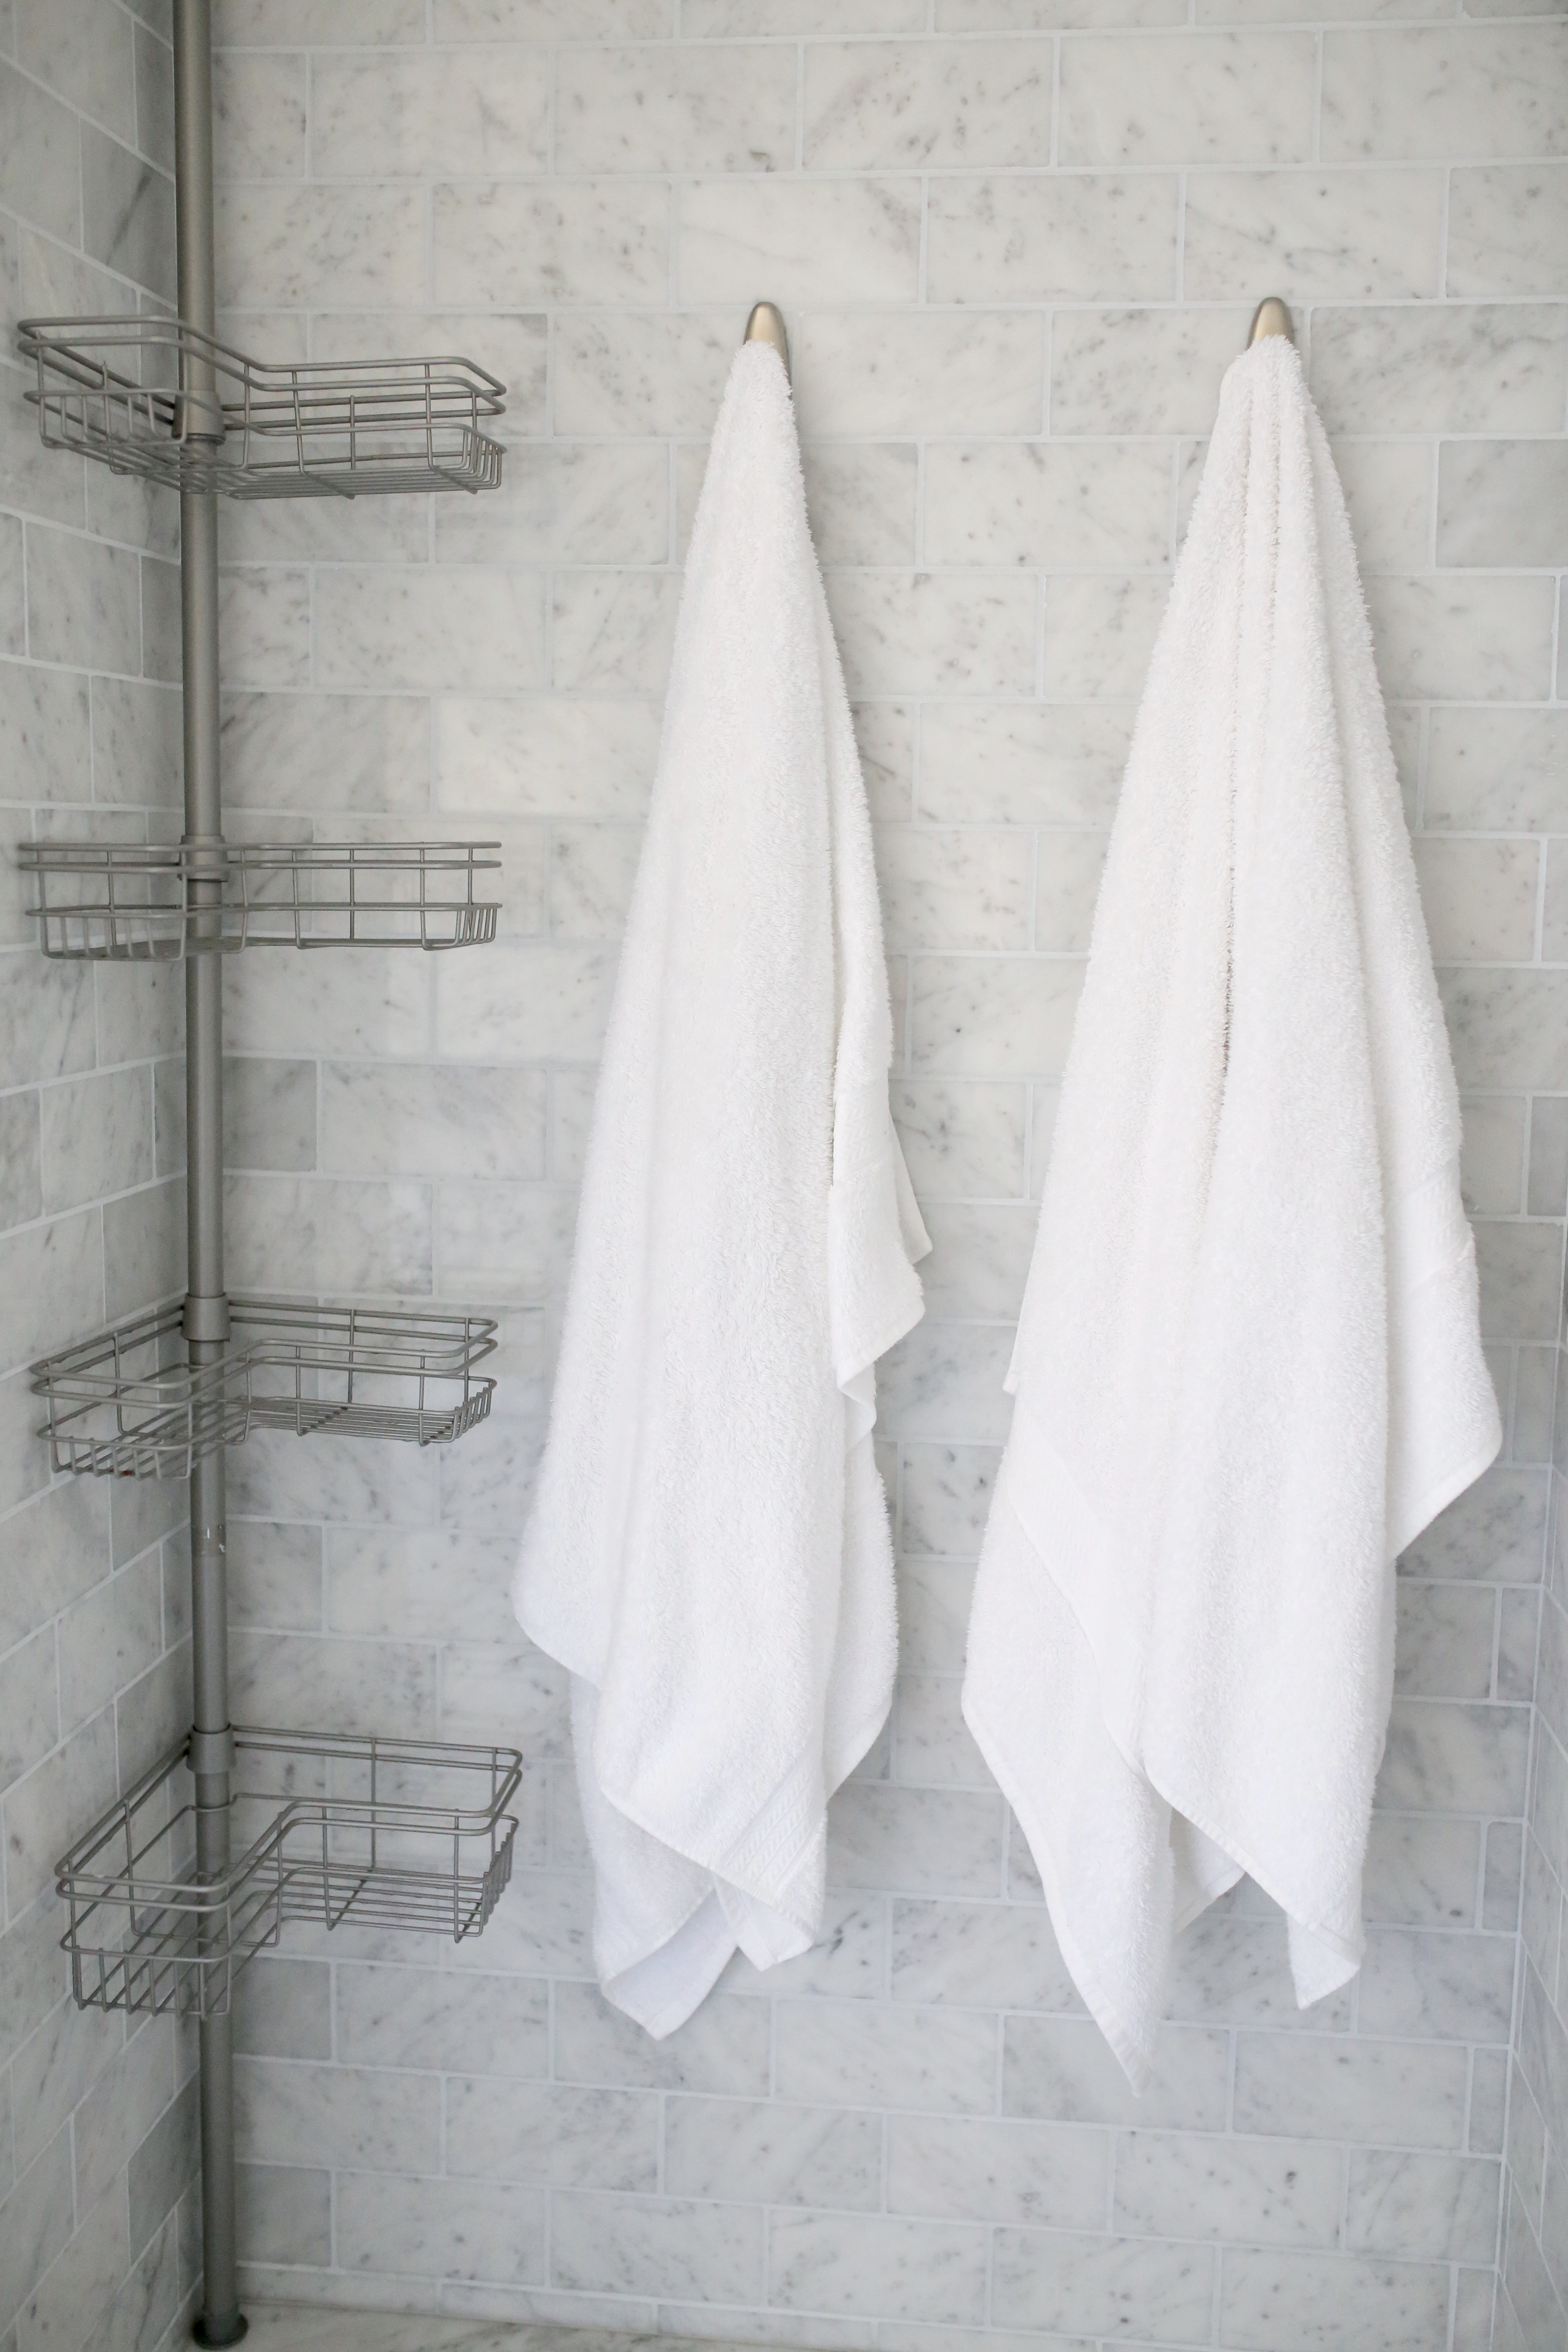
I didn’t want any type of permanent hooks or shelves, so we tried out the 3M brushed nickel hooks and I am shocked that they are still holding! I thought for sure they wouldn’t work in a shower, but 8 months later and our towels are still hanging up. We purchased the tension rod organizer HERE, which normally houses all our shower toiletries (removed for the purpose of a photo 😉 )
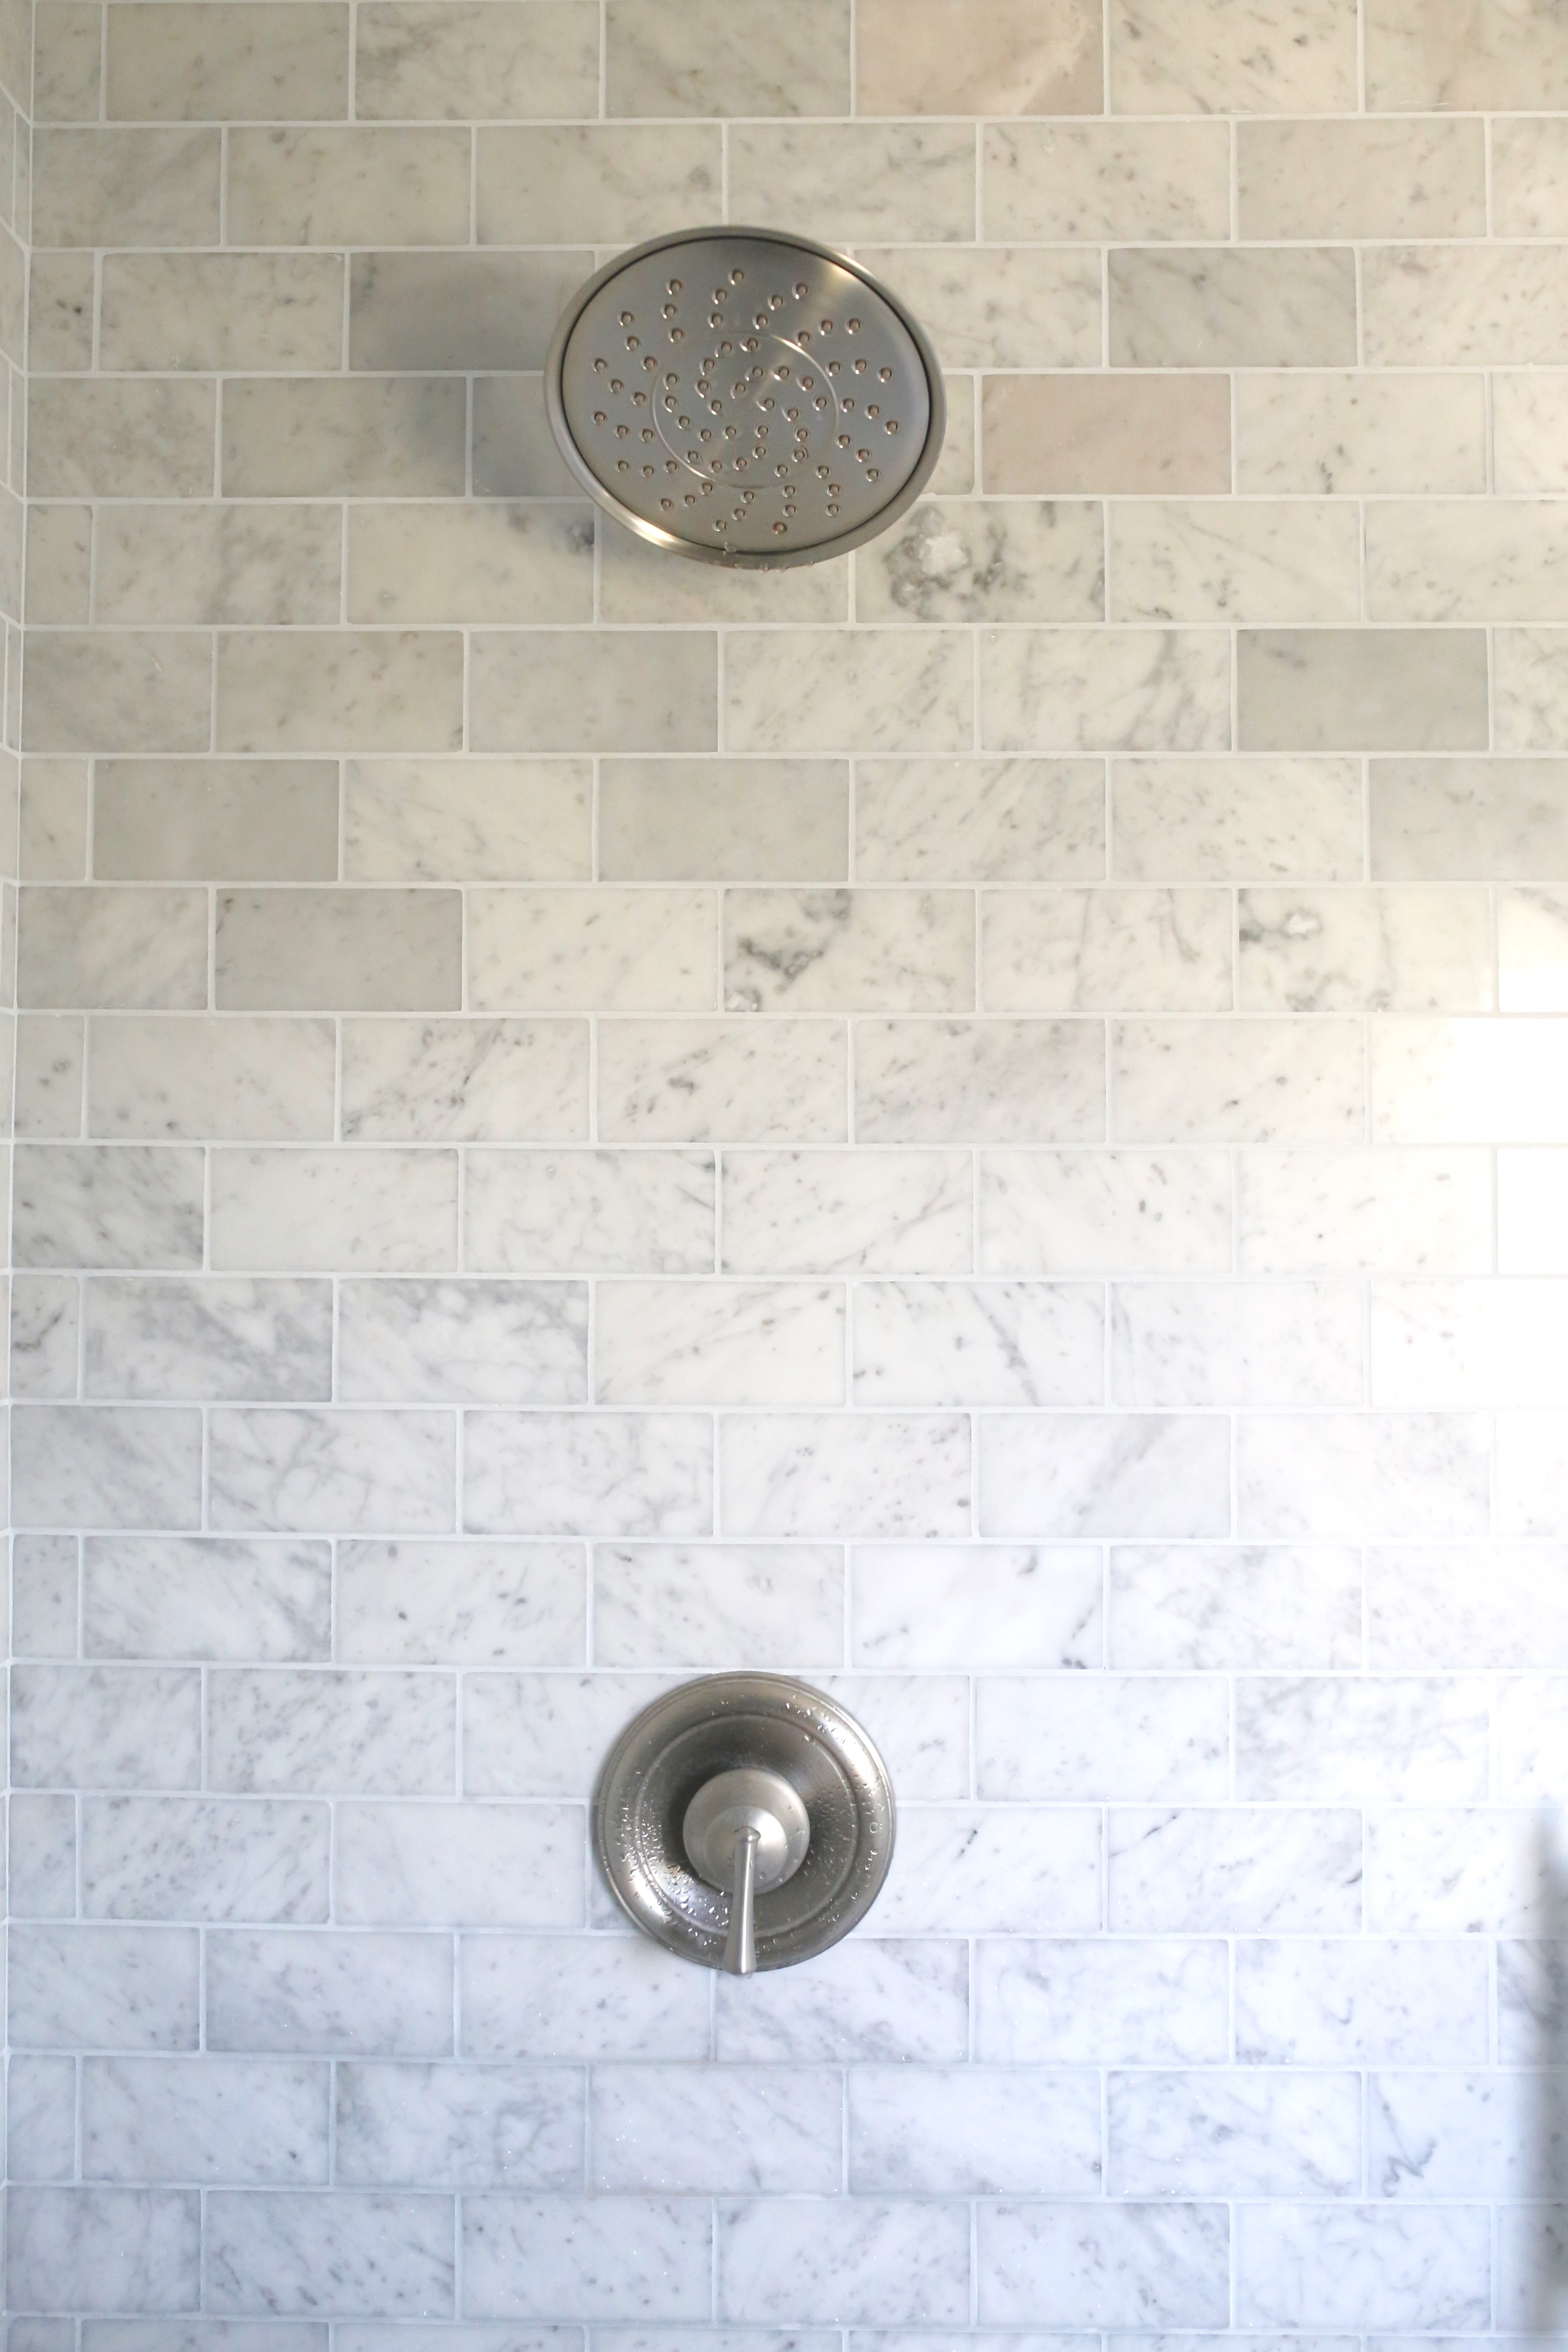
The rain showerhead was my first choice and is nice and simple.
Two things shown in this photo. First, the floor is a porcelain tile made to look like wood. Super durable and perfect for a bathroom. Unfortunately, I cannot seem to locate the name and brand of this particular one, but I suggest bringing home many samples to test in your own lighting conditions. I wanted one that had a gray undertone with warmth and once I brought them home, some of the colors were WAY off. This was the one we settled on and I am super happy with it. Secondly, if you notice, we boarded up the underneath of the vanity/linen cabinet. It isn’t noticeable until you sit on the floor, but it was super important because can you imagine how much cleaning you would miss under there? No thank you.
Here is the floor plan drawn up by the contractor. In a few days, I will share the master bedroom transformation. You won’t believe it!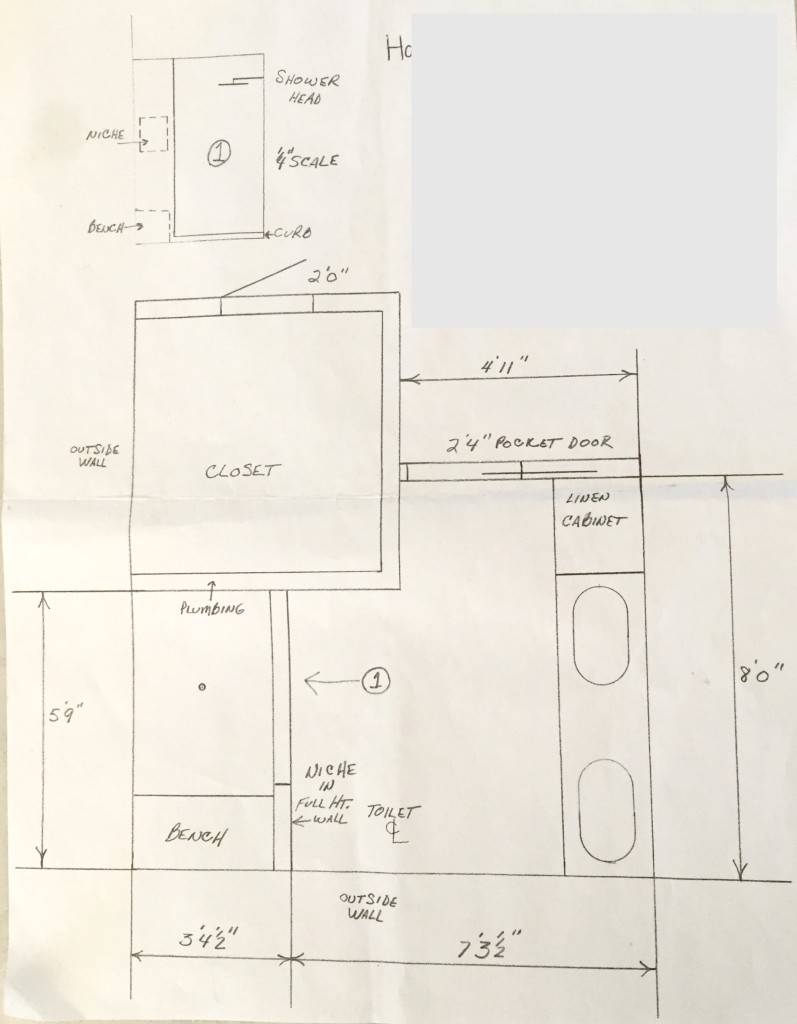

Hayley
Latest posts by Hayley (see all)
- Music Room: Home Tour - January 11, 2019
- The Ace Cardigan - July 30, 2018
- Susie Halter Top and Shorts: Project Run and Play - July 18, 2018
Absolutely gorgeous!
Such a beautiful new space!!!!!!! Congrats!!
You have done a super makeover in this space, looks great, what was that other door for? it definately looks better with the mirror. i love watching the make over shows my favorite being “love it or list it” based in canada, you work is just as good..
You really did a beautiful job! I love how bright & fresh everything looks. What an improvement.
Just stumble upon this post.Very clean looking bathroom and beautiful. great job. Congrats!!!!!!!
Huge difference! Very clean looking bathroom.