


Happy Friday, everyone! I have the lovely Veronica from sewVery, who is one of the sweetest ladies in all of blogland. She is sharing her super cute Fabric Christmas Tree decor, which would look so cute on my dining room table.
Thanks Veronica!
****************************************
Hi, ya’ll! Hayley has graciously invited me over today to share with you one of my holiday inspired projects. I hope it’s not too early to share this Christmas project with you, but I know you are going to want to make a few to decorate your table or mantle for the quickly approaching, gift giving season!
Christmas in my family has always included making homemade ornaments, decorations, gifts, and treats that we share with friends and family. When I was little, my mother and I would scour the pages of magazines to find inspiration for our latest projects. One of my favorite DIY ideas that my mom and I crafted together is this Christmas Tree Tabletop Decoration.

For this project, you will need the following:
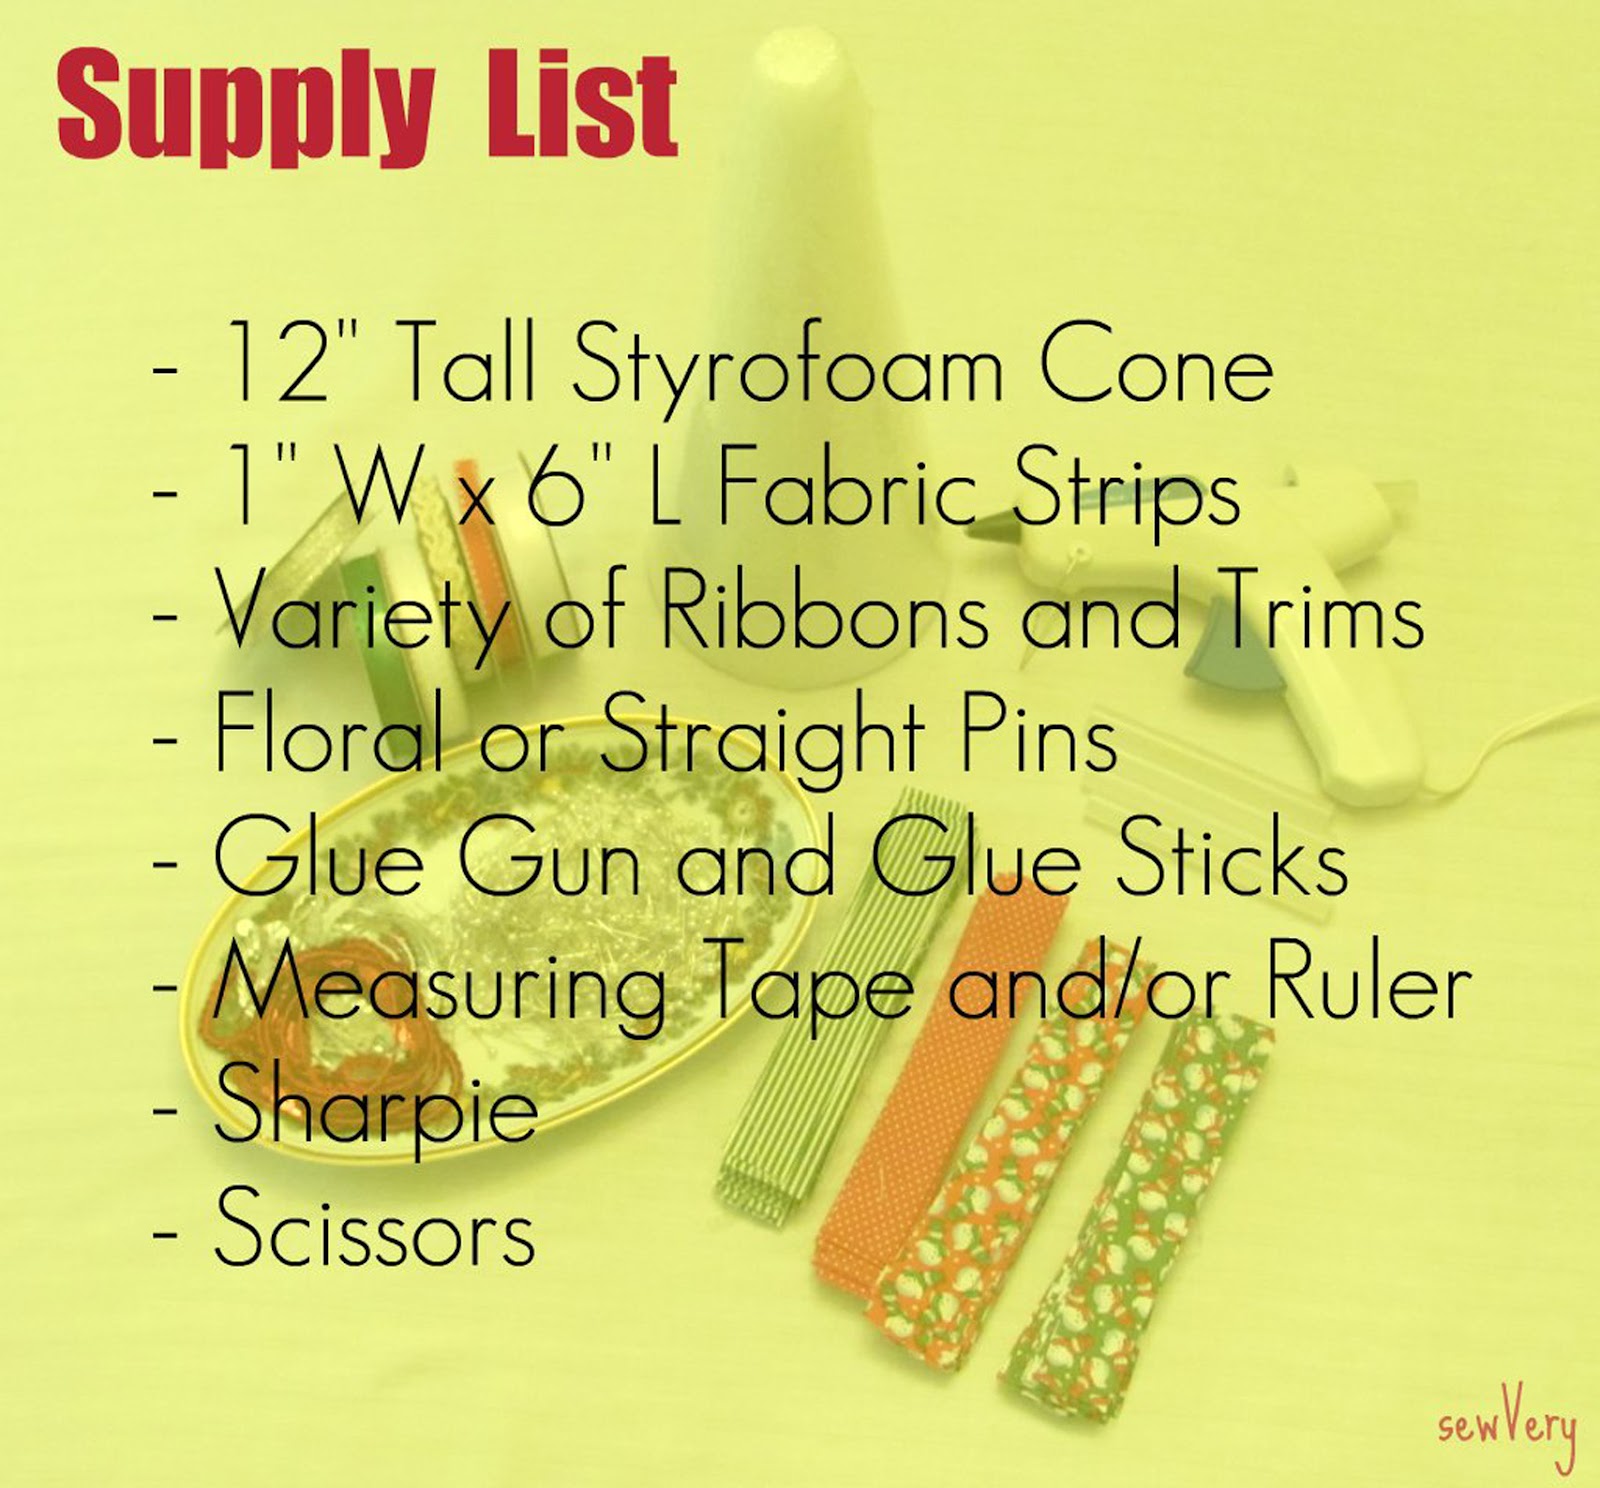
First, begin by cutting out approximately 100 – 1” wide by 6” long strips of fabric (for my example I had 25 each of 4 coordinating fabrics). Next, pick out 4 ribbons or trims (you’ll need a spool of each) that are ¼” – 3/8” wide that coordinate with the fabrics, and cut 50 pieces that are 5” long and another 50 pieces that are 4” long.
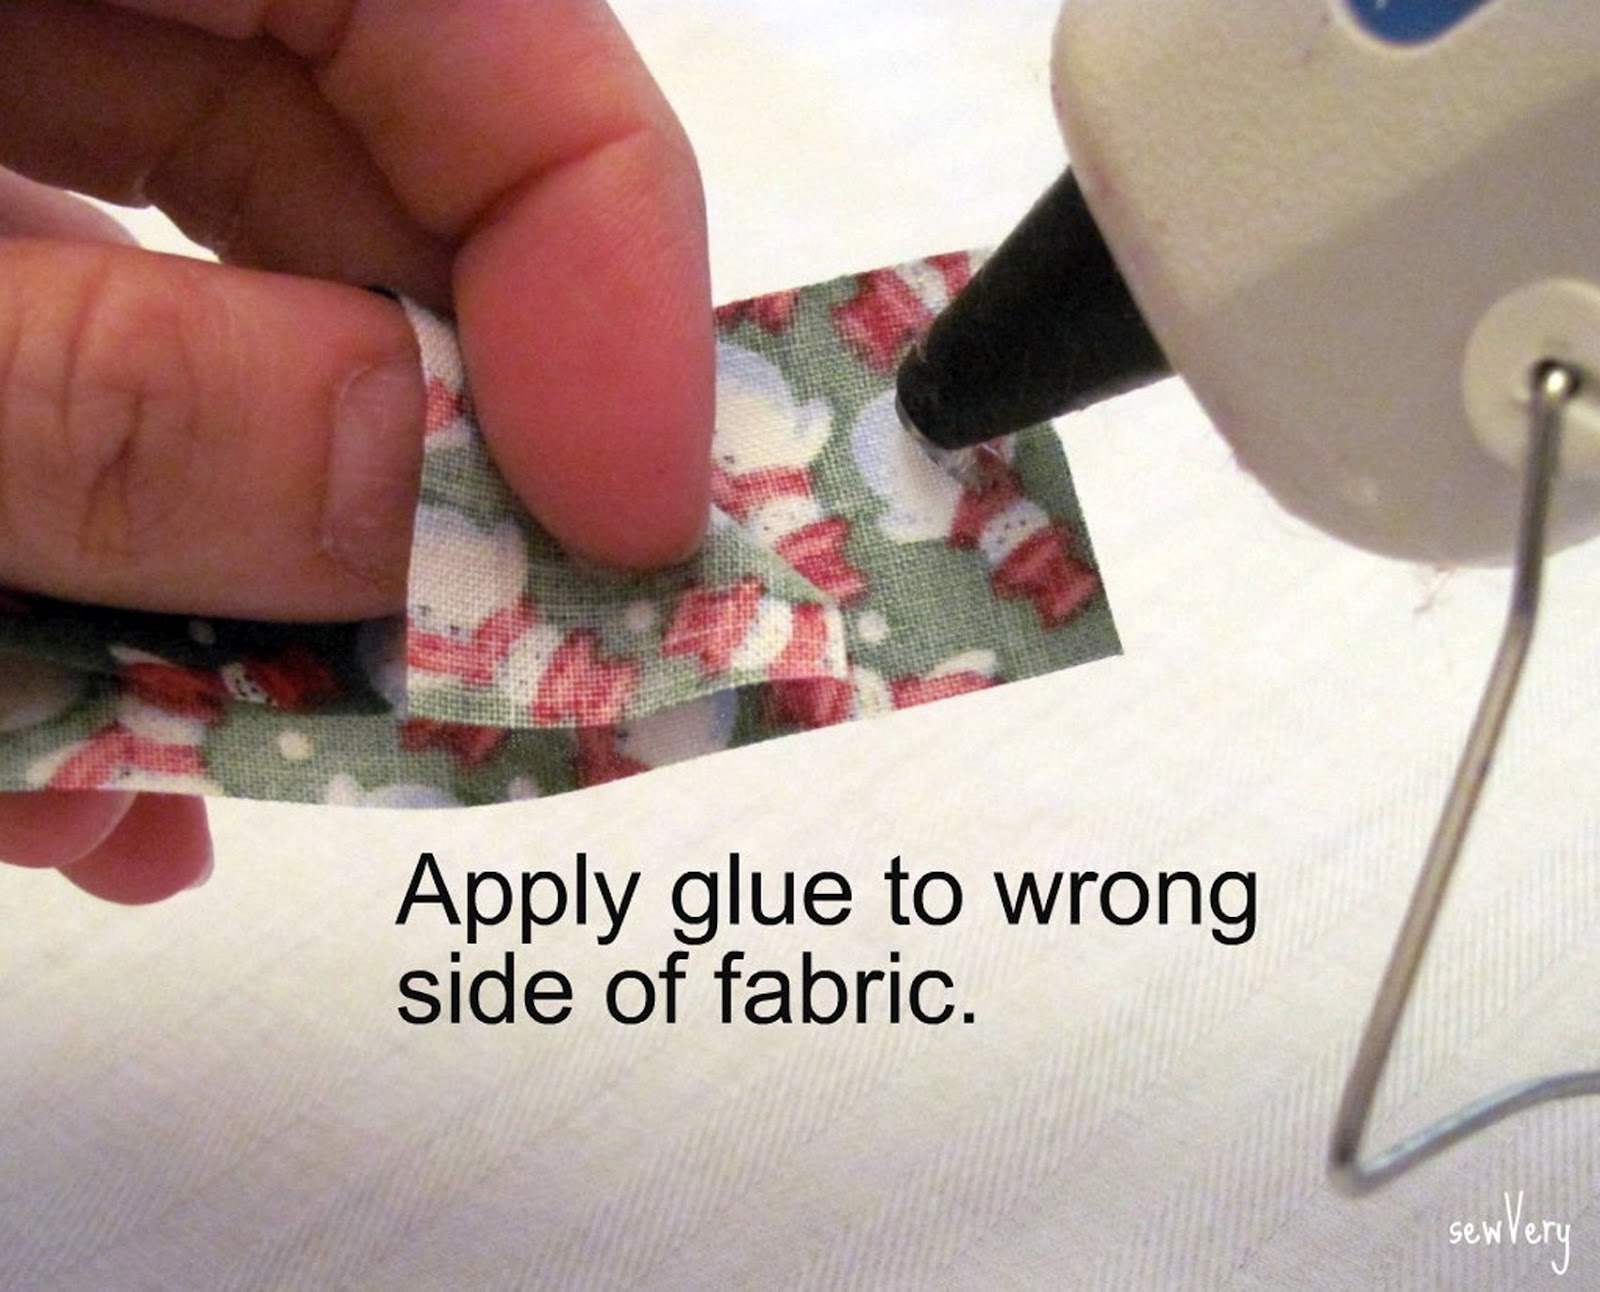
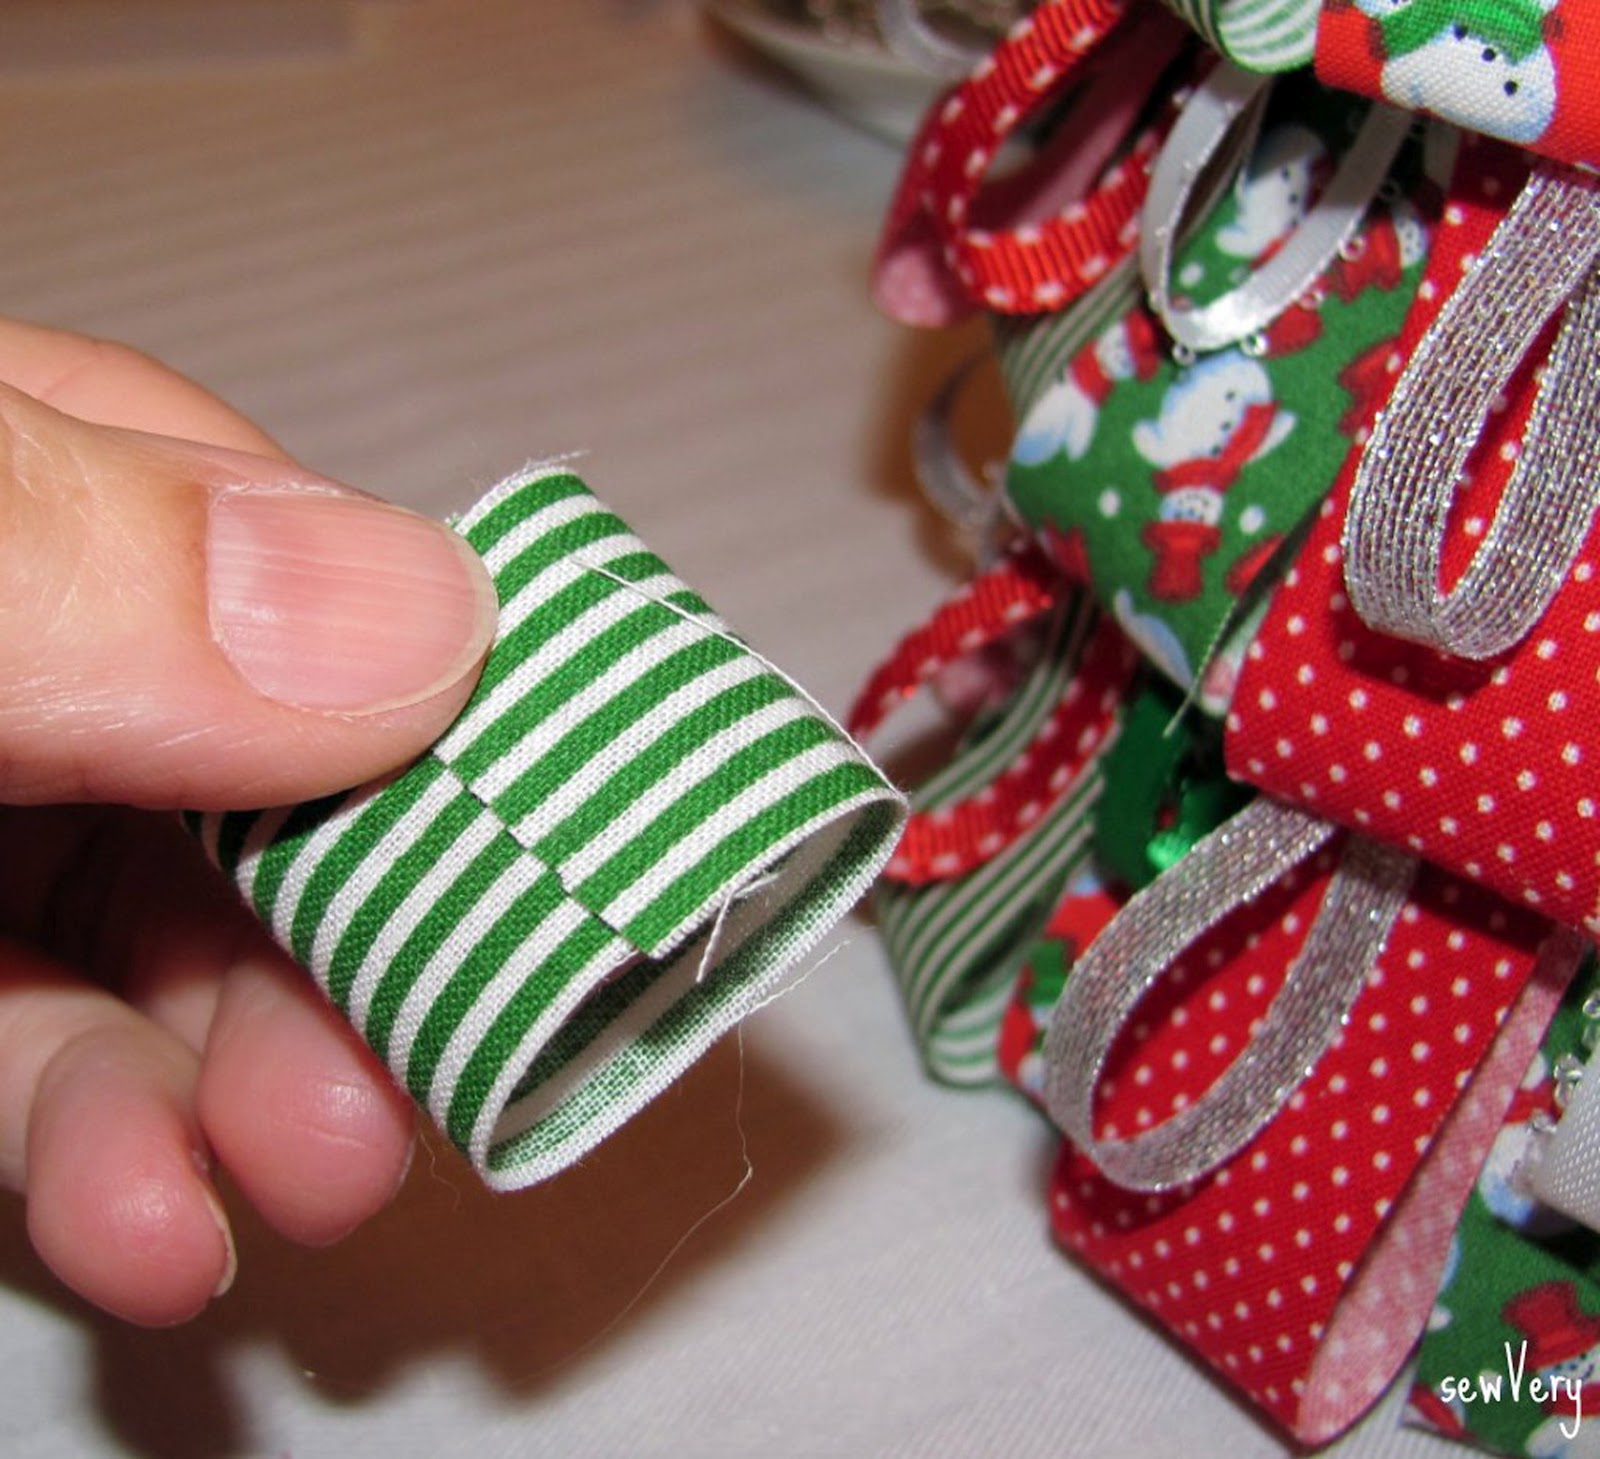
Using the hot glue gun, carefully apply a small dab of glue to the end of one of the fabric strips. Press the ends together forming a loop. Do this for all the fabric and ribbon strips.
Using a measuring tape or ruler, measure 3” up from the bottom of the Styrofoam cone and make a small mark using a Sharpie. Continue marking 1” – 2” increments up the cone. Repeat this all around the cone so that you now have a grid for guidance in evenly placing the fabric/ribbon rows.


Now cut 6 pieces of ½” wide white grosgrain ribbon to the following lengths:
12 ¾”, 11 ½”, 10 ¼”, 9”, 7 ¾”, and 6 ½”. These ribbon strips will be the foundation for each row of the Christmas tree.
Starting with the longest piece of grosgrain ribbon, lay out the fabric loops in the desired pattern adjusting the space between the strips as needed. Glue each fabric loop to the white grosgrain ribbon then glue the ribbon loops on top of each fabric loop. Complete each ribbon strip the same way.


Now you are ready to assemble the Christmas tree. Starting with the bottom row and using the markings on the cone as a guide, begin securing the ribbon strip onto the cone with floral pins or straight pins.
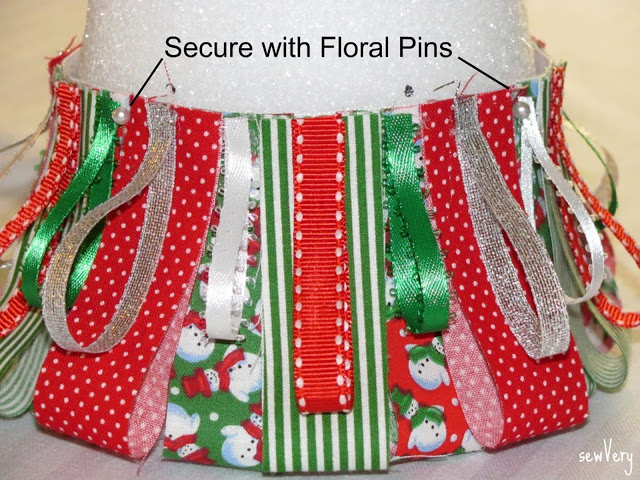
Continue pinning the ribbon strips to the cone so that the bottom edge of the new layer overlaps the top edge of the previous layer. My layers are spaced roughly 1 ½” to 2” apart vertically.

The final row should be even with the top of the cone. Now take 7 strips of fabric and cut them in half so that they are 3” long. Fold each strip in half and glue together.
Pin each small loop around the top edge of the tree.
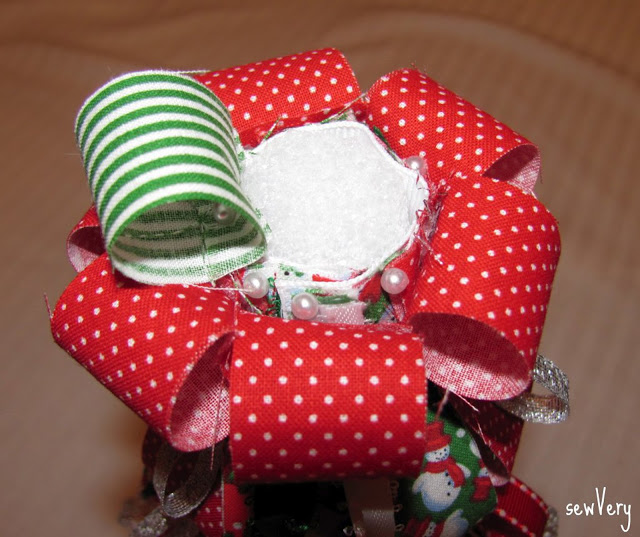
Using the remaining uncut ribbon, make a bow and secure it to the top of the tree using pins. Add one more small loop to cover the center of the bow if desired. Now you are done!

Use a candle holder or plate to set your Christmas Tree Tabletop Decoration on as a base. Make two or three Christmas Tree Tabletop Decorations with different sized cones for a larger tabletop or mantle holiday decoration.


I hope you enjoyed this tutorial and will come visit me for more sewVery simple tutorials and pattern reviews. Merry Christmas! Santa will be here before you know it!

Hayley
Hayley Crouse is a wife, mother and multifaceted designer. Her love of sewing, crafting, cooking and interior design infuses her daily life and naturally spills over into her online presence. She pushes the envelope of her creativity and hopes that others will be inspired to do the same. She currently authors the Welcome to the Mouse House Blog, is the pattern designer behind Mouse House Creations and is a collaborative designer with Willow & Co. Patterns.
Latest posts by Hayley (see all)
- Music Room: Home Tour - January 11, 2019
- The Ace Cardigan - July 30, 2018
- Susie Halter Top and Shorts: Project Run and Play - July 18, 2018
I am working on one this week, thanks so much Veronica!
Can’t wait to see your version, Hayley!