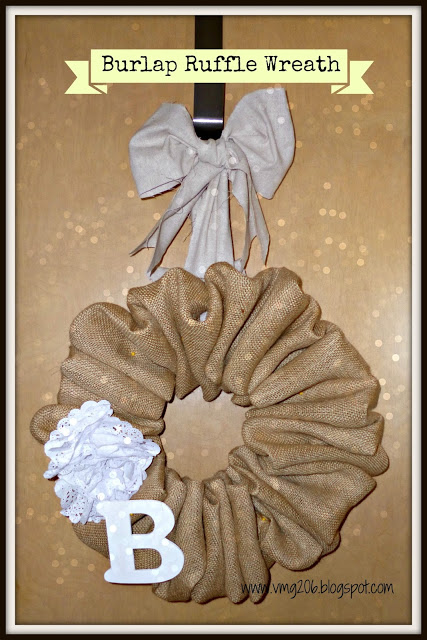
Burlap is so much fun ~ but so messy, stinky, too. Lately, I have been up to my eyelashes in burlap! My last burlap project, the Spring Burlap Pennant, got the ball rolling. And I have been finding things to do with burlap ever since.I had a really fun time making this beautiful Burlap Ruffle Wreath. Aren’t those ruffles just divine?! This was a super quick project – believe it or not.
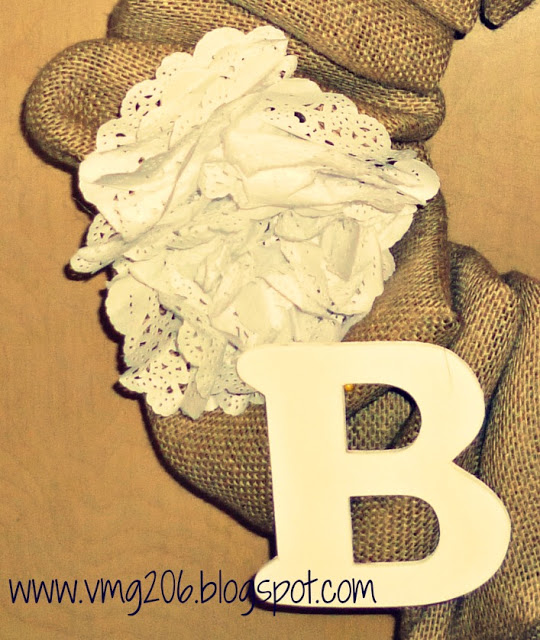
Swoon! It’s so pretty I had to get out the Disco Ball!Once I got going with all the burlap, I just had to add some lace! Burlap and lace is just a match made in heaven. I think it’s the contrast of the rough burlap and the delicate lace = true love 4 ever! So, I added a big, white lacey flower. And a monogram ~ of course!
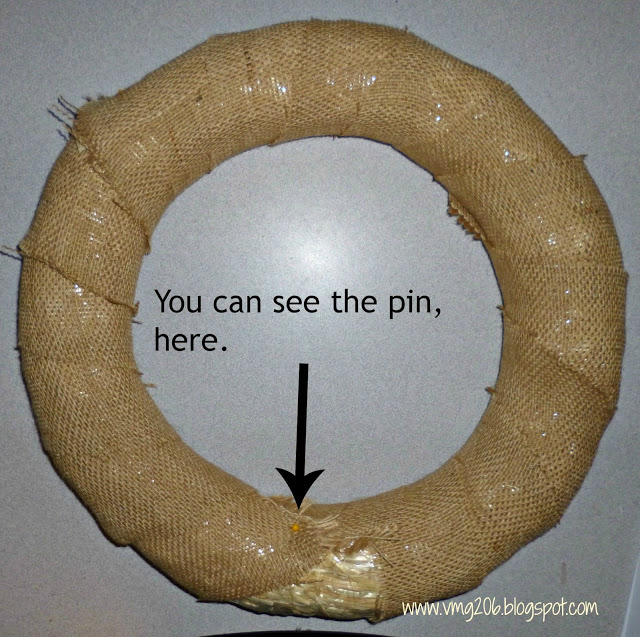
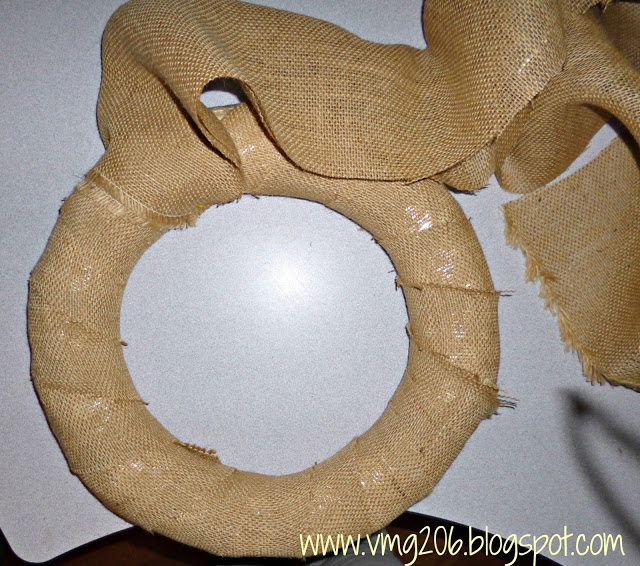
Here is a tutorial so you can make your own Burlap Ruffle Wreath.You will need:* Wreath* Sewing Pins* Burlap (about 1-1/2″ yards”* Lace Doilies (from the baking section)* Piece of cardboard or cardstock (for the flower)* Small Wood Letter – and paint* Fabric for Hanger and Bow (Muslin)* Glue GunI started with a simple straw wreath from the local craft store. I got it on sale for about $3.00. I liked this for the base because it was the right size and it’s fairly light. And the price was right!I thin cut a 3″ strip of fabric, the length of the piece (42″?). I then started wrapping it around the wreath to cover the straw (I did not remove the plastic the wreath came in). I needed two strips. I used a pin to anchor it at the start, another in the middle where the two pieces met, and one at the end. The pins are nice and long and go right into the straw.
I then cut my burlap for the ruffles into strips about 12″ wide, and the length of the fabric. I needed 3 strips.
I folded the strip lengthwise (to 6″) and started pinning it to the wreath. I kept the two rough edges down towards the wreath and tucked them under. I started making big S’s, pinning as I went.
This made sure that you didn’t see the frayed edges but just the pretty ruffles. There really is no pattern to follow with the ruffles, just do what you think looks good. I did start and then take a few of the S’s out to redo. I wanted my S’s closer so the ruffles were fuller. Be sure to hide your pins.I also used three separate pieces to make these ruffles – I wanted it full.
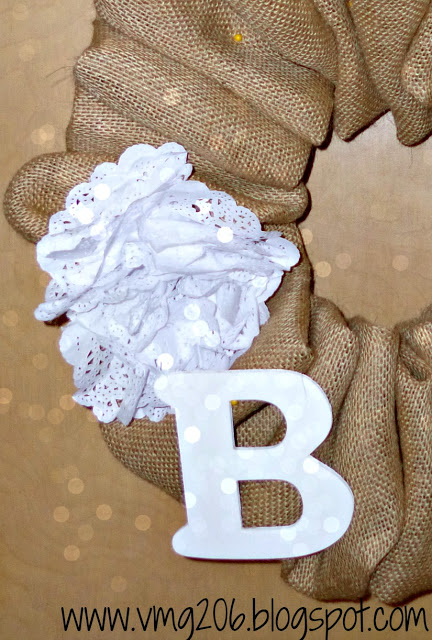
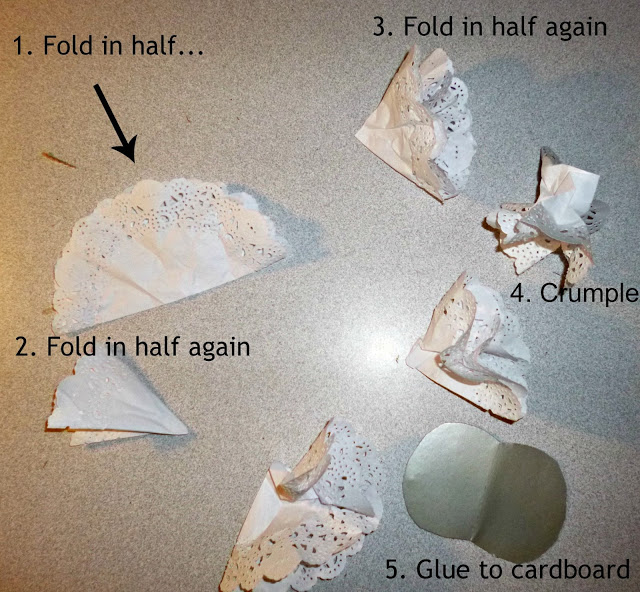
Then I made a big flower out of white lace doilies. I started by folding them in half, then in half again, then in half again. Then I sort of bunched them up in my hand to ruffle them. Once I had 5-6, I used my hot glue gun to glue them to a piece of cardboard I’d cut into a blob circle. I glued them to the cardboard somewhat close together. I “fluffed” up the edges to create a look of one flower. Then I pinned this onto the wreath. (I figured since it’s all just pinned on there – it’s all easy to remove and change up later.)
Here’s a close up of the details ~
Since I love Monograms (!!), I have many letters on hand. I grabbed one of my B’s and painted it white. I attached it with a pin ~ but it could also be glued on.To finish it off, I used a strip of muslin (about 3″ wide) and tied it to the base of the wreath. I should have done this first – but I easily removed a few pins, tied it on and repined the wreath.I used a second strip to tie a bow onto the fabric hanger I just created. I think it really completed the look.
This was a really quick and easy (and inexpensive ~ under $10.00) project and I think it came out really pretty! I think this Burlap Ruffle Wreath would make a great gift. X0X0X0 
Hayley
Latest posts by Hayley (see all)
- Music Room: Home Tour - January 11, 2019
- The Ace Cardigan - July 30, 2018
- Susie Halter Top and Shorts: Project Run and Play - July 18, 2018







Hayley
Thank you so much for having me today!
~ Megin of VMG206
Thank YOU so much for your awesome post!!!