


Hi, I’m Annette from Designs By A Rose. Hayley was so kind to allow me to show you my Infinity scarf, made from an old maternity shirt. I’m excited to be here!
Today we’re going to take an old shirt and transform it into something new. I just had my third baby and no longer need my maternity shirts, so I wanted to find something to do with that super soft material.This is just one of my many creations. You can always find maternity shirts at Goodwill or you can just use a regular shirt you already have. The bigger the better in this case.
For the easiest scarf, find a shirt that has a print on both sides or has 2 “right” sides. If your shirt doesn’t have a print on the inside, or you don’t like the “wrong” side of the fabric, I will show you a trick to make it work anyway.
To get started, you will need the shirt you want to transform, scissors, a sewing machine or hand sewing needle and matching thread. This is super easy, so even a beginner can do it!

Get your shirt out and decide where you want to make your cuts. In my case I just wanted to use the bottom section of the shirt. This section is approximately 15″ tall (from the top dotted line to the bottom dotted line) and the width of the shirt. Make sure to cut across the shirt and leave the side seams in tact.
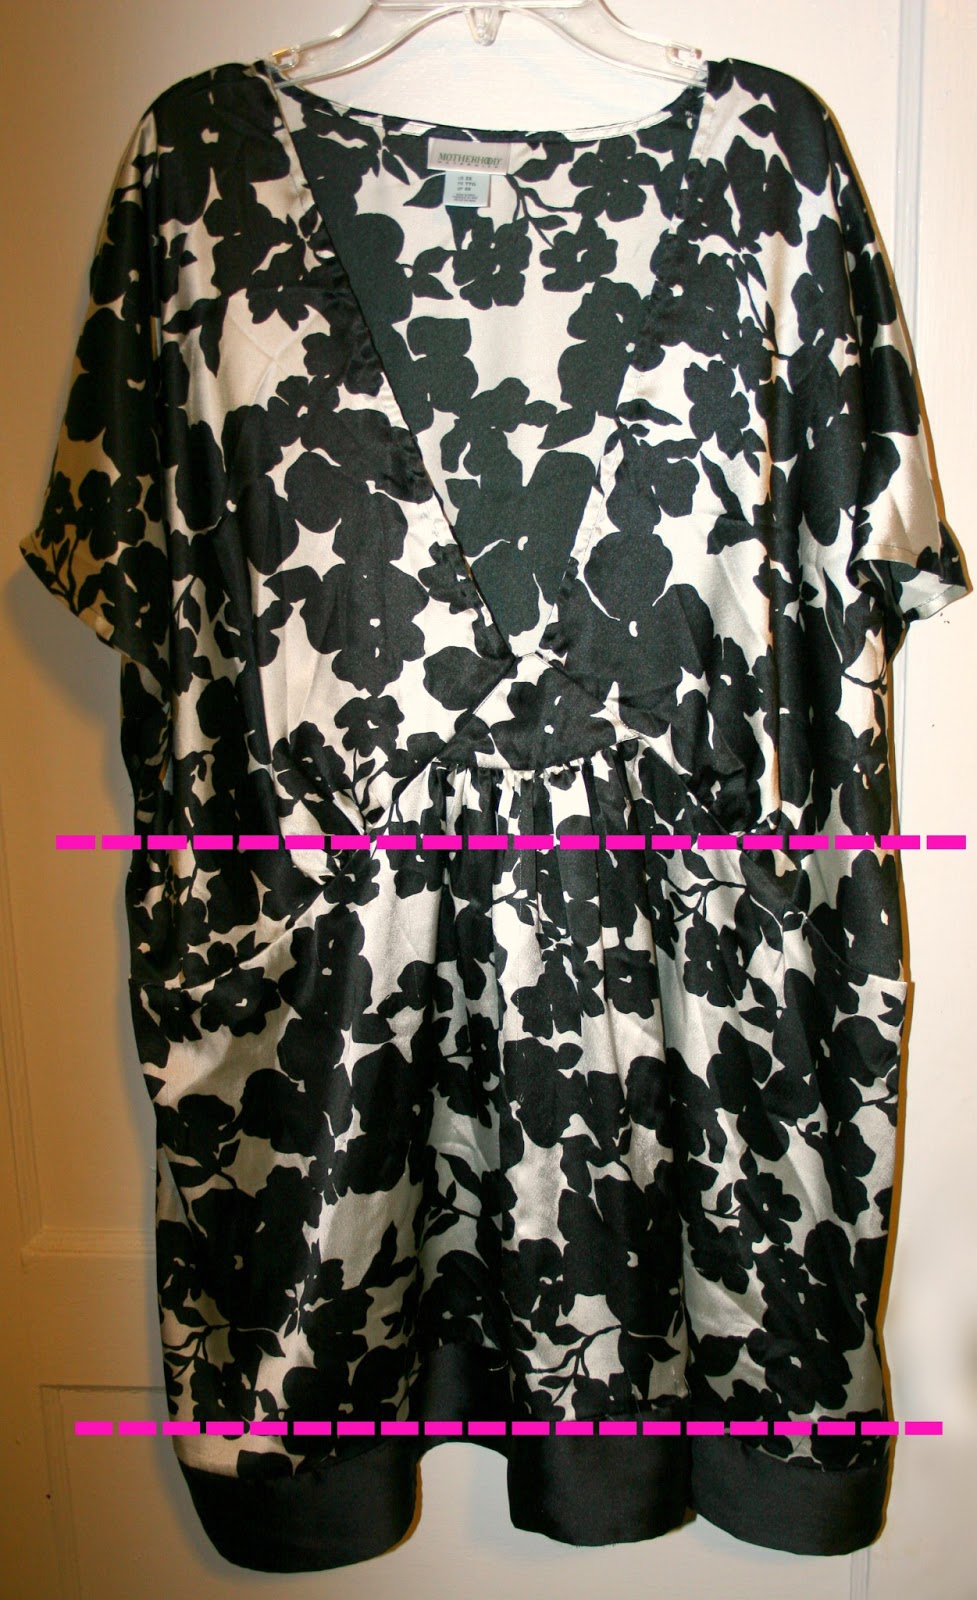
First I removed the black trim from the bottom to use for another project. If your shirt has a normal bottom hem, you may want to keep it, or you can leave it and only have one side to hem. Your choice.

After you have cut your shirt. Line up the sides to make they match. In my case, I cut around the embellishments on the front and there was elastic to cut out of the back, so the sides didn’t match.

Trim to make the sides even.

Depending on the type of material you have, you could leave it at this point. Knits and jersey materials (think t-shirt material) won’t fray so you don’t necessarily have to hem the edges. In my case…that wouldn’t work.

Fold over the edge 1/8″ inch and then another 1/8″ inch and stitch. This will keep all your raw edges out of sight. I used a long basting stitch, but you could use a decorative stitch.

And…you’re done! How easy is that?

If your shirt has a “wrong” side, there’s just one more step. Pin the seams you just created together and stitch all the way around.

Once you finish your scarf. You can wear it in many ways. Here are a couple of my favorites:


I would love to see your creations! Come visit my blog to see what I did with the rest of the shirt. Here’s a sneak peek:

Thanks for having me Hayley!
Annette
Annette is the mother of 2 girls (13 and 16 months) and a new baby boy (2 months). She blogs about crafting and sewing, while running her handmade business: Designs By A Rose.

Hayley
Hayley Crouse is a wife, mother and multifaceted designer. Her love of sewing, crafting, cooking and interior design infuses her daily life and naturally spills over into her online presence. She pushes the envelope of her creativity and hopes that others will be inspired to do the same. She currently authors the Welcome to the Mouse House Blog, is the pattern designer behind Mouse House Creations and is a collaborative designer with Willow & Co. Patterns.
Latest posts by Hayley (see all)
- Music Room: Home Tour - January 11, 2019
- The Ace Cardigan - July 30, 2018
- Susie Halter Top and Shorts: Project Run and Play - July 18, 2018
Thanks so much for posting Annette! What a great idea for a refashion!